Baking the Perfect Nutty Baklava with Honey Syrup: A Simple Guide
Baklava is one of those desserts that’s not only a treat to eat but also to make. Originating from the Middle East, this sweet pastry has made its way into the hearts of people all around the world. Made with layers of flaky pastry, filled with a mixture of nuts, and soaked in a lovely honey syrup, baklava is the perfect mix of crunchy, nutty, and sweet. Here’s how you can create this delightful dessert in your own kitchen, without needing the skills of a professional pastry chef.
Ingredients You’ll Need:
- Filo (phyllo) pastry sheets (about 16-20, depending on the size of your pan)
- 2 cups of mixed nuts (pistachios, walnuts, and almonds are a great choice)
- 1 teaspoon of ground cinnamon
- 1 cup of melted unsalted butter
- 1 cup of water
- 1 cup of sugar
- 1/2 cup of honey
- 2 teaspoons of vanilla extract
- 1 lemon
Preparing the Nutty Filling:
-
Chop the Nuts: Start by finely chopping your mix of nuts. You can do this by hand for a more rustic texture or use a food processor if you prefer a finer consistency. Be cautious not to over-process; you’re aiming for small pieces, not nut butter.
-
Mix with Cinnamon: Once your nuts are chopped, mix them with a teaspoon of ground cinnamon. This will give your baklava that classic warmth in flavor.
Assembling the Baklava:
-
Prepare the Pan: Lightly brush the bottom and sides of a baking pan with some of the melted butter. A rectangular or square metal pan works best.
-
Layering the Filo: Take one sheet of filo pastry and place it in the pan. Brush it gently with melted butter. Don’t worry about the sheets fitting perfectly; you can tear pieces to fill in any gaps. Repeat this until you have layered about 8-10 sheets.
-
Add the Nut Mixture: Sprinkle about half of your nut mixture evenly over the filo layers. Then, add another 2-3 buttered filo sheets on top. Spread the remaining nuts and cover again with 6-8 more buttered filo sheets, ensuring the top layer is nicely buttered too. Use a sharp knife to gently score the top layers into pieces – diamonds or squares, according to your preference.
Baking Your Baklava:
-
Preheat and Bake: Preheat your oven to 350°F (around 175°C). Bake your baklava for about 50 minutes or until the top is golden and crispy.
-
Cooling: Once baked, remove the baklava from the oven and let it cool slightly.
Creating the Honey Syrup:
-
Combine Ingredients: While your baklava is baking, it’s the perfect time to make your honey syrup. In a saucepan over medium heat, mix the water, sugar, honey, and the juice of one lemon. Let the mixture come to a boil, then lower the heat and let it simmer for about 10 minutes. Add the vanilla extract and then remove the pan from the heat.
-
Pour Over Baklava: Once your baklava has cooled for about 15 minutes, pour the warm honey syrup over it. It will seem like a lot, but don’t worry, the layers will soak it all up.
-
Let It Sit: This is perhaps the hardest part – waiting. Your baklava needs to sit for a few hours, preferably overnight, to fully absorb the syrup and for the flavors to meld together beautifully.
Serving Your Delicious Creation:
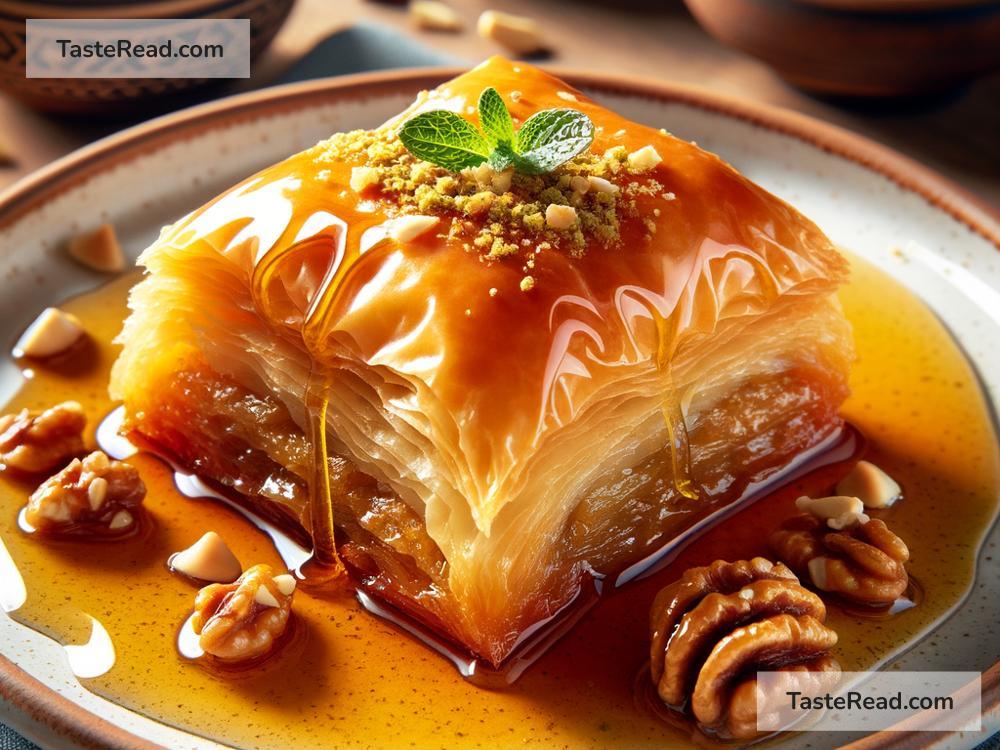
When it’s time to serve, cut through the previously scored lines. Serve the pieces on a platter or individual plates. Baklava is best enjoyed at room temperature or even slightly warmed.
Final Tips:
- Choose Quality Ingredients: The better the quality of your nuts and honey, the tastier your baklava will be.
- Be Patient: Rushing the process, especially the cooling and syrup-soaking time, won’t do your baklava any favors. Give it time to develop its best flavor.
And there you have it, a simple guide to creating a nut-filled, sweet, and sticky baklava that’s guaranteed to impress. Whether for a special occasion or a sweet treat for the family, this baklava recipe is a great way to bring a piece of Middle Eastern delight into your home. Enjoy the process and, most importantly, the delicious result!