How to Create a Show-Stopping Red Velvet Cake: A Simple Guide
Red velvet cake is a true classic; with its vibrant color and exquisite texture, it’s a favorite for many occasions. Whether you’re prepping for a birthday, an anniversary, or just craving a luscious treat, this cake never disappoints. The good news is, you don’t need to be a pro baker to whip up this delight! Here’s an easy guide to creating your very own show-stopping red velvet cake that will have everyone asking for more.
Ingredients You’ll Need:
- 2 1/2 cups of all-purpose flour
- 1 1/2 cups of sugar
- 1 teaspoon of baking soda
- 1 teaspoon of salt
- 1 teaspoon of cocoa powder
- 1 1/2 cups of vegetable oil
- 1 cup of buttermilk, at room temperature
- 2 large eggs, at room temperature
- 2 tablespoons of red food coloring
- 1 teaspoon of white distilled vinegar
- 1 teaspoon of vanilla extract
For the Cream Cheese Frosting:
- 1 pound (450g) of cream cheese, softened
- 2 sticks (1 cup) of butter, softened
- 1 teaspoon of vanilla extract
- 4 cups of sifted powdered sugar
Step by Step Creation:
-
Preheat and Prep
First things first, preheat your oven to 350°F (175°C). While waiting, grab two 9-inch round cake pans and gently butter and flour them. This prevents your cake from sticking. -
Mix Dry Ingredients
In a large bowl, whisk together your flour, sugar, baking soda, salt, and cocoa powder. Make sure there are no lumps and everything is well combined. -
Blend the Wet Ingredients
In another large bowl, mix the vegetable oil, buttermilk, eggs, food coloring, vinegar, and vanilla extract until they’re completely blended. -
Combine Wet and Dry
Slowly add your dry ingredients to the wet mixture, mixing on a low speed if you’re using a mixer, or gently folding by hand until just combined. Be careful not to overmix; this is the secret to a light and fluffy cake. -
Bake to Perfection
Divide the batter evenly between your prepared pans. Tap them lightly on your counter to release any air bubbles. Slide them into the oven and bake for 25-30 minutes, or until a toothpick inserted into the center comes out clean. Let the cakes cool in the pans for about 10 minutes, then turn them out onto a wire rack to cool completely. -
Frosting Time
While your cakes cool, let’s whip up that creamy frosting. Beat together the cream cheese and butter until smooth. Add the vanilla extract and gradually beat in the powdered sugar until you get a creamy, spreadable consistency. -
Assemble Your Masterpiece
Once your cakes are completely cool, place one layer on your cake stand or plate. Spread a generous layer of frosting over the top. Place the second cake layer on top and apply a thin crumb coat over the entire cake. This is your base layer of frosting; don’t worry if it’s not perfect. Chill the cake for about 30 minutes to set this layer. After chilling, apply the final coat of frosting, smoothing it over the top and sides.
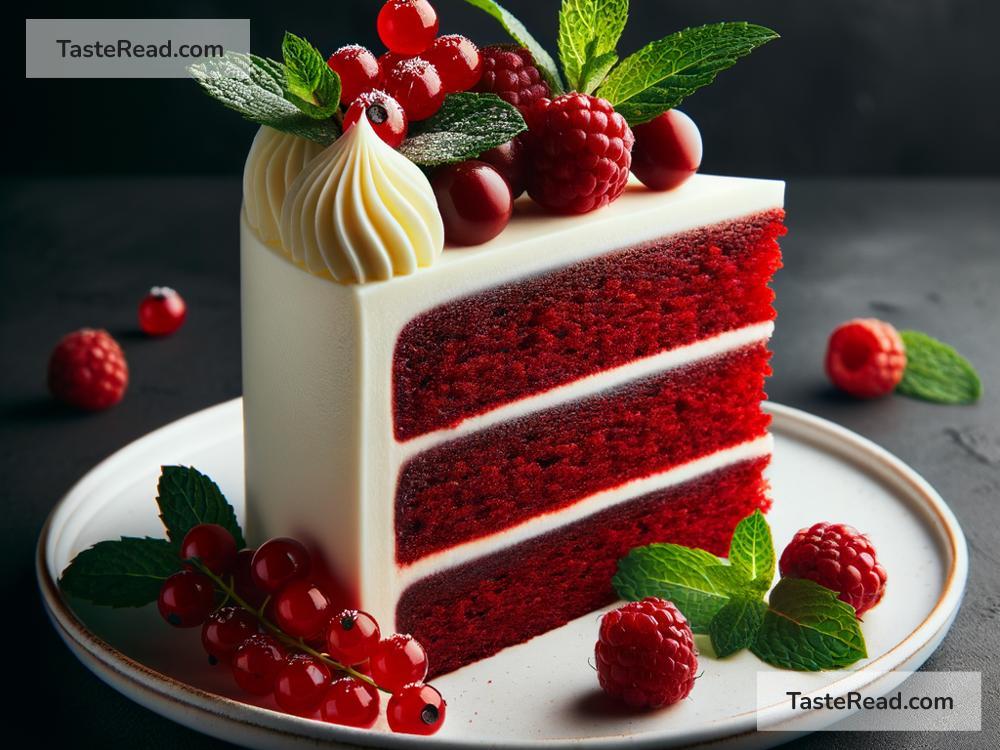
The Finishing Touches
For an extra touch of elegance, you can top your cake with fresh berries, red velvet crumbs, or even white chocolate shavings. And there you have it, a gorgeous red velvet cake that’s bound to impress!
Baking a red velvet cake from scratch might seem daunting at first, but with these simple steps, you’ll find it’s quite doable and incredibly rewarding. The key is to go step by step and not rush the process. Remember, baking is as much about enjoying the creation process as it is about indulging in your delicious masterpiece.
Whether it’s for a special occasion or a treat for yourself, this red velvet cake will make any moment memorable. So, don your apron, and let’s get baking! After all, there’s no better way to show off your baking skills than with a show-stopping red velvet cake that looks as good as it tastes.

