Sweet Chocolate Peanut Butter Granola Bars: A Simple and Delicious Snack!
Looking for a tasty and quick snack that satisfies your sweet tooth without the guilt? Well, your search ends here with these delightful Sweet Chocolate Peanut Butter Granola Bars. Not only are they incredibly delicious, but they’re also easy to make and perfect for on-the-go munching. So, let’s dive in and learn how to whip up these yummy treats in simple English, ensuring everyone can enjoy making them.
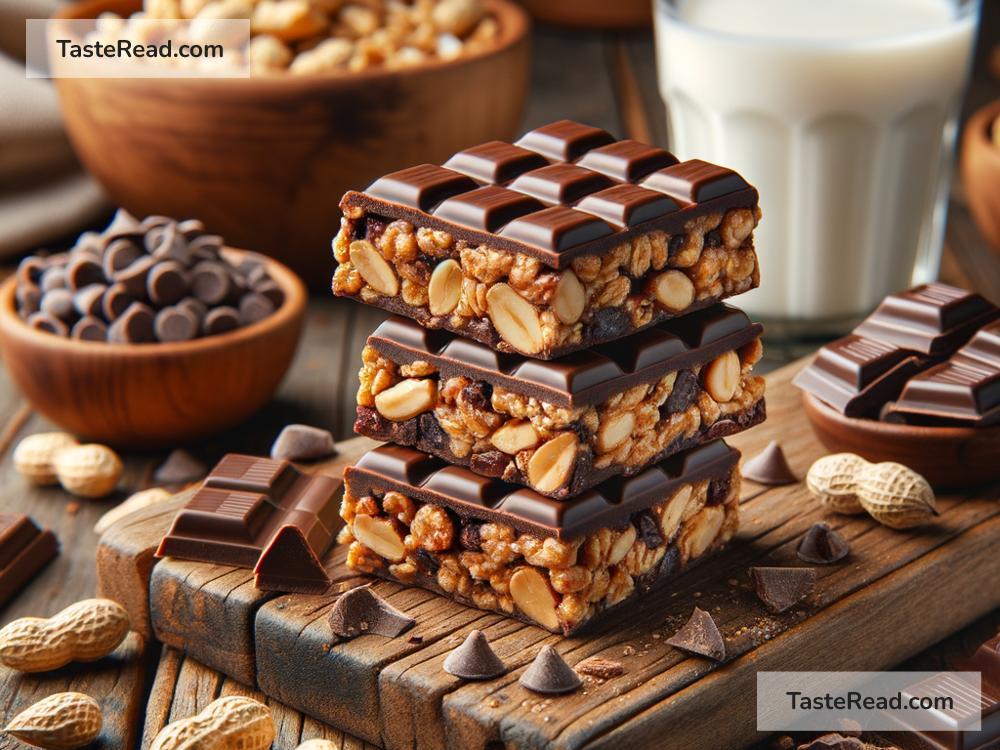
Ingredients:
To start, let’s gather what we need. Don’t worry; the list is quite straightforward, and you might already have most of these items in your kitchen:
- 2 cups rolled oats — these are your main players, adding that crunchy texture.
- 1/2 cup peanut butter — this brings the creamy and nutty flavor that pairs perfectly with chocolate.
- 1/2 cup honey — for that natural sweetness that binds everything together.
- 1/2 cup mini chocolate chips — because, well, chocolate makes everything better!
- 1/2 teaspoon vanilla extract — a splash of this enhances all the other flavors.
- A pinch of salt — just a little to balance the sweetness.
- Optional add-ins: feel free to toss in some nuts, seeds, or dried fruit for extra texture and flavor.
Instructions:
Now that we have our ingredients ready, let’s get down to the fun part — making the granola bars! Follow these steps, and you’ll be enjoying your homemade snacks in no time.
Step 1: Line Your Pan
First off, grab an 8-inch square baking dish and line it with parchment paper. Let the paper stick out a bit on the sides so you can easily lift the granola bars out later. This little trick saves you a lot of cleanup time!
Step 2: Mix Dry Ingredients
In a large bowl, pour your rolled oats. If you’re adding any nuts, seeds, or dried fruit, now is the time to toss them in with the oats.
Step 3: Heat the Peanut Butter and Honey
Grab a small pot and combine your peanut butter and honey. Heat them over a low flame, stirring occasionally until they blend into a smooth mixture. Then, stir in the vanilla extract and a pinch of salt.
Step 4: Combine Everything
Pour the warm peanut butter and honey mixture over the oats in the bowl. Using a spatula or your hands (get them a little greasy so the mixture doesn’t stick), mix everything until the oats are fully coated.
Step 5: Add the Chocolate Chips
Allow the mixture to cool down a bit before adding the mini chocolate chips, to prevent them from completely melting. Gently fold them into the mix.
Step 6: Press into the Pan
Transfer the mixture to your prepared baking dish, spreading it out evenly. Press down firmly with the back of your spatula or your hands (waxed paper can help avoid sticking) to make sure the mixture is compact.
Step 7: Chill and Enjoy!
Cover the dish and pop it into the refrigerator for at least 2 hours, allowing the granola bars to firm up. Once set, lift them out of the pan using the parchment paper flaps, and cut them into bars or squares.
And there you have it — your very own homemade Sweet Chocolate Peanut Butter Granola Bars! These are fantastic for breakfast on-the-go, a midday snack, or even a post-workout treat. They’re packed with flavor, have a delightful chewy texture, and, best of all, they’re made with love by you.
Tips and Tricks:
- Storage: Keep these bars in an airtight container in the fridge for up to a week, or freeze them for longer storage.
- Variations: Feel free to get creative! Swap out peanut butter for almond or cashew butter, use maple syrup instead of honey, or throw in whatever add-ins you love.
Now that you know how to make these delicious Sweet Chocolate Peanut Butter Granola Bars, you’re all set to impress your friends and family or simply treat yourself. Enjoy the process and the tasty results! Don’t hesitate to share your creations and spread the joy of homemade goodies. Happy snacking!

