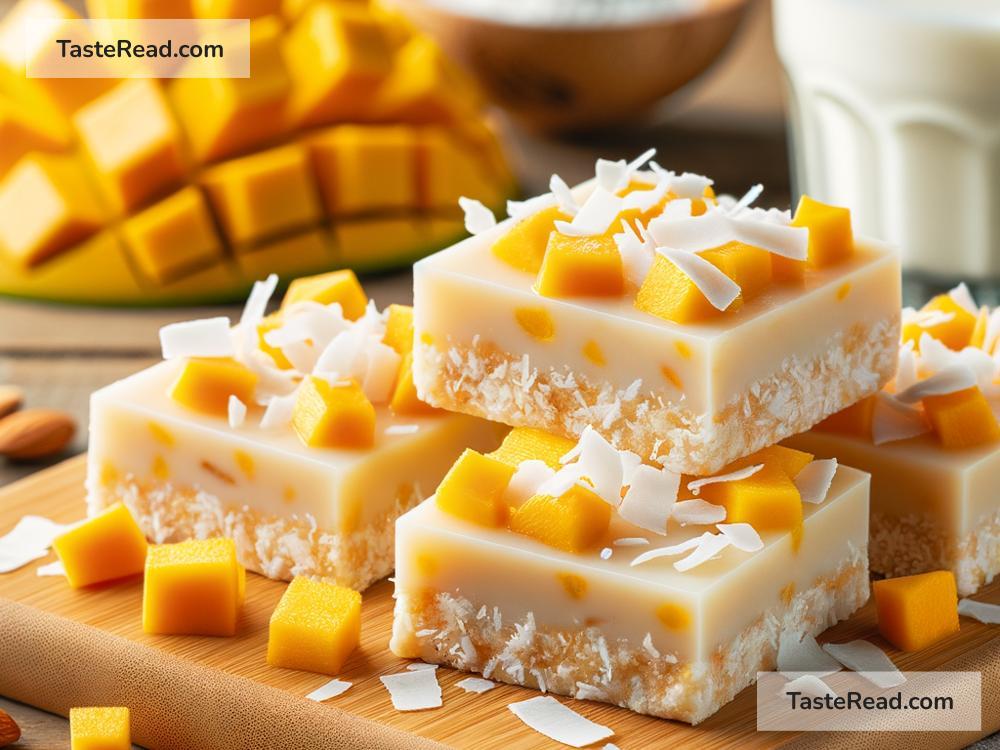
How to Make Sweet Coconut-Mango Protein Bars
Have you ever craved a sweet, delicious snack that’s not only satisfying but also packed with nutrients? Enter the sweet coconut-mango protein bars – a recipe that’s simple to make, incredibly tasty, and bursting with energy! Whether you’re rushing out the door or need a mid-afternoon pick-me-up, these bars are the perfect solution.
Let’s dive into how you can create these delightful treats right in your kitchen, using ingredients that are probably already in your pantry or fridge.
Ingredients:
First things first, let’s gather all the ingredients you’ll need. Don’t worry; everything listed below is easy to find in your local grocery store.
- 1 cup of oats (use gluten-free if necessary)
- 1 cup of shredded coconut (unsweetened)
- ½ cup of protein powder (vanilla works best)
- ½ cup of dried mango, chopped into small pieces
- ¼ cup of honey or maple syrup (for a vegan option)
- ¼ cup of coconut oil, melted
- 1 teaspoon of vanilla extract
- A pinch of salt
Instructions:
With all your ingredients ready, let’s breakdown the steps to creating these heavenly bars:
-
Prep Your Equipment: Start by lining a square baking pan (8×8 inches works great) with parchment paper, leaving some overhang on the sides. This makes removing the bars from the pan a breeze.
-
Mix Dry Ingredients: In a large bowl, combine the oats, shredded coconut, protein powder, and a pinch of salt. Stir until everything is nicely mixed. This combo is the base of your bars and gives them that perfect chewy texture, along with a boost of energy.
-
Add Mango: Toss in your chopped dried mango pieces into the mix. Mango not only adds a tropical twist but also packs a punch of vitamins.
-
Combine Wet Ingredients: In a separate bowl or jug, stir together the melted coconut oil, honey (or maple syrup), and vanilla extract until well-combined. This mixture will act as the glue that brings all your dry ingredients together.
-
Mix It Up: Pour your wet ingredients over the dry ingredients. Stir well until everything is coated and starts sticking together. It should have a sticky consistency, perfect for pressing into bars.
-
Press Into Pan: Transfer your mixture into the prepped baking pan. Use a spatula or your hands to press down firmly, ensuring the mixture is packed tight and even. The tighter the mix, the less crumbly your bars will be.
-
Chill Time: Place the pan in the freezer for at least 1 hour. This step is crucial as it helps set the bars, making them easier to cut.
-
Slice and Enjoy: Remove the pan from the freezer and, using the parchment paper, lift the entire block out of the pan. Place it on a cutting board and, with a sharp knife, slice into bars or squares, depending on your preference.
-
Storage: Store your coconut-mango protein bars in an airtight container in the fridge. They keep well for up to a week. For a longer shelf life, you can also freeze them and take one out whenever you need a quick snack.
Additional Tips:
- Customize: Feel free to add nuts, seeds, or chocolate chips to the mix for extra flavor and texture.
- Protein Powder: Choose a protein powder that you enjoy. The flavor can significantly impact the taste of your bars.
- Sticky Situation: If your mixture seems too dry, add a bit more honey or coconut oil. Too sticky? Add a bit more oats or protein powder.
Making your own sweet coconut-mango protein bars is that simple! Not only do you get to control the ingredients, ensuring they’re healthy and to your liking, but you also get the satisfaction of making a delicious snack from scratch. These bars are perfect for those who are always on the go, needing a quick breakfast, or looking for a nutritious post-workout snack. So, next time you’re in the mood for something sweet and filling, give this recipe a try – your taste buds (and body) will thank you!