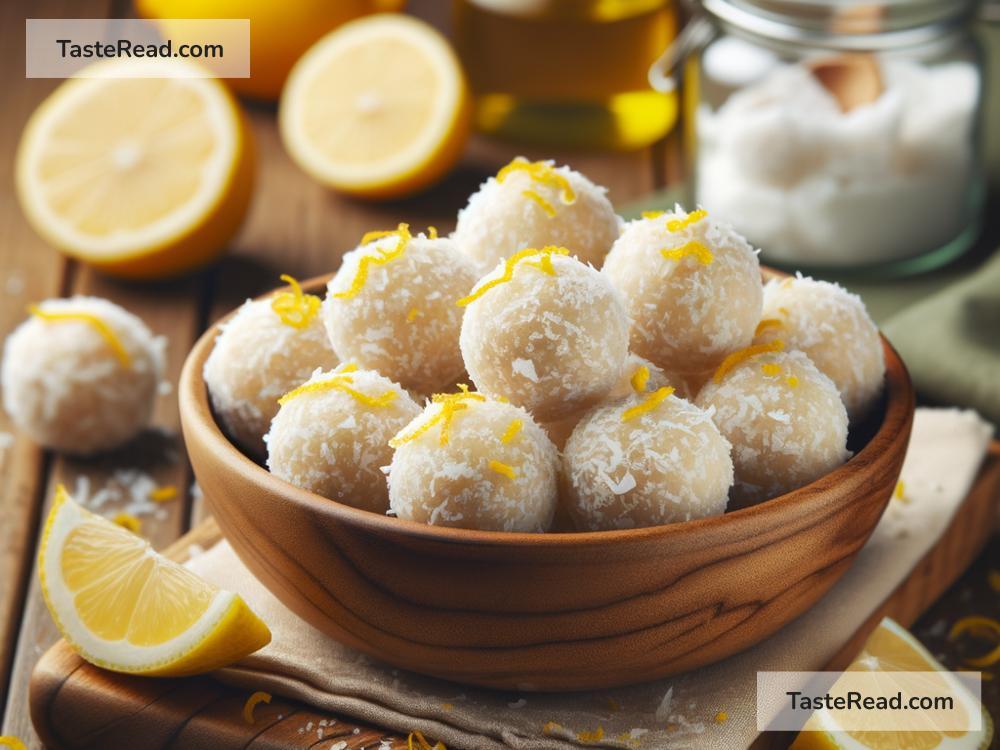
Unleash the Sweetness: Making Lemon Coconut Bliss Balls
Welcome, sweet treat enthusiasts! Are you ready to dive into a recipe that’s not just mouth-wateringly delicious but also incredibly simple to make? Yes? Then, let’s embark on a culinary journey to create the most delightful Lemon Coconut Bliss Balls.
Lemon and coconut are like the Romeo and Juliet of the culinary world – a match made in heaven. The tangy zestiness of lemon perfectly complements the tropical creaminess of coconut, creating a fusion of flavors that dance on your taste buds. The best part? You don’t need to be a pro in the kitchen to whip up these little balls of joy. So, let’s put on our aprons and get started.
What You Need:
Before we dive into the world of mixing and rolling, let’s make sure our kitchen is stocked with the necessary ingredients and tools. For this no-bake recipe, you will need:
- 1 cup of unsweetened shredded coconut (and a little extra for coating)
- 1 cup of almond flour (for that nice, nutty flavor and texture)
- 1/4 cup of coconut oil (melted)
- 1/4 cup of honey (or maple syrup, if you prefer)
- The zest of 1 large lemon (for that citrusy kick)
- 2 to 3 tablespoons of fresh lemon juice (start with 2 and adjust based on taste)
- A pinch of salt (to enhance the flavors)
And as for tools, you’ll need:
– A food processor
– A mixing bowl
– Measuring cups and spoons
– A plate (for rolling)
– A refrigerator (because these beauties need to chill)
Let’s Make Bliss Balls!
Now that we have everything ready, let’s get these bliss balls rolling. Here’s how:
Step 1: Blend the Base.
Start by adding the shredded coconut, almond flour, and salt into the food processor. Pulse these dry ingredients until they’re nicely blended. This will form the base of your bliss balls.
Step 2: Mix Wet With Dry.
To your mixture, add the melted coconut oil, honey (or maple syrup), lemon zest, and lemon juice. Blend until the mixture starts sticking together. If it feels too dry, you can add a bit more lemon juice or coconut oil to reach the desired consistency.
Step 3: Roll ‘Em Up.
Scoop out tablespoon-sized amounts of the mixture and roll them into balls using your hands. If the mixture sticks to your hands, lightly coating them with coconut oil helps.
Step 4: Coconut Coating.
Roll each ball in shredded coconut to coat. This not only adds an extra layer of flavor and texture but also makes your bliss balls look irresistibly appetizing.
Step 5: Chill Out.
Place your bliss balls on a plate and let them chill in the refrigerator for at least an hour. This waiting might be the hardest part of the recipe, but it’s crucial. Chilling helps the balls to firm up and intensifies the flavors.
And voilà! Your Lemon Coconut Bliss Balls are ready to make your day a little brighter and sweeter.
Final Touches and Tips:
Now that you’ve mastered making these bliss balls, here are a few tips to keep in mind:
- Experiment with Flavors: Once you’re comfortable with the base recipe, feel free to play around with flavors. Add in some vanilla extract, cinnamon, or even a dash of rum extract for an adults-only version.
- Storage: Your bliss balls will keep in the refrigerator in an airtight container for up to a week (if they last that long!).
- Gift Idea: These bliss balls make perfect gifts. Pop them into a pretty jar, tie a ribbon around it, and voilà! You’ve got a thoughtful, homemade present.
Conclusion:
Lemon Coconut Bliss Balls are the perfect no-bake treat for anyone looking to satisfy their sweet tooth without spending hours in the kitchen. They’re easy to make, deliciously tangy, and wonderfully sweet – a true bliss ball experience. Whether you’re making them for a healthy snack, a dessert, or a thoughtful gift, these bliss balls are sure to impress.
So, what are you waiting for? It’s time to roll up your sleeves and let the bliss ball magic begin. Happy making!