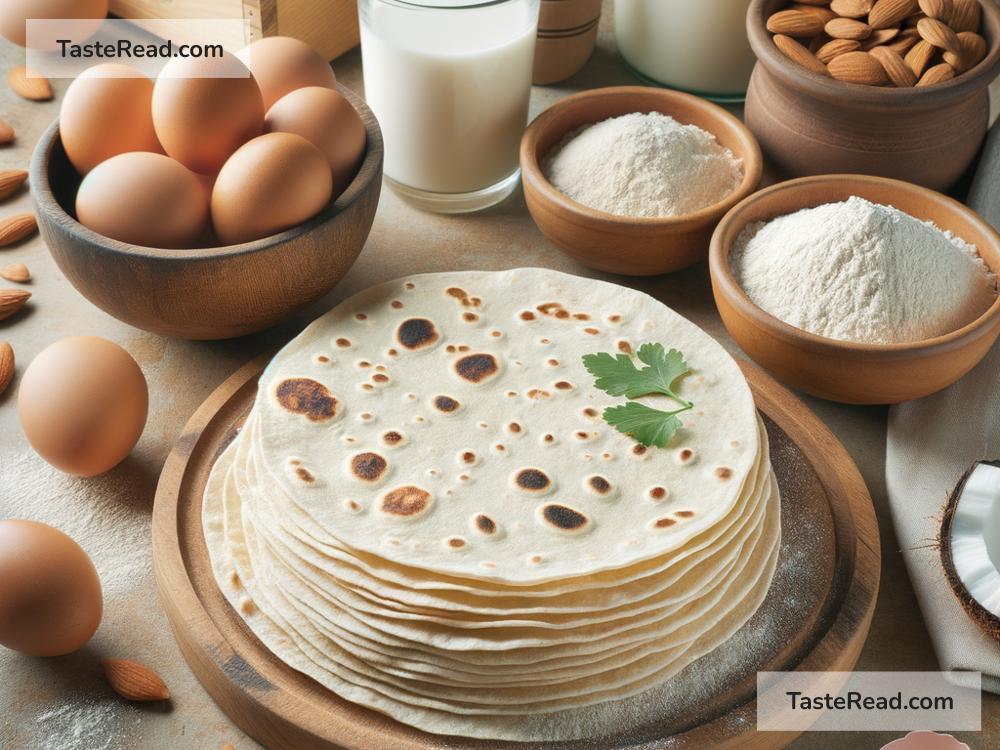
How to Make Delicious Paleo-Friendly Tortillas with Coconut Flour
Eating a paleo diet focuses on foods that our ancestors might have eaten, like meats, fish, nuts, leafy greens, regional veggies, and seeds. But what about when you crave something like a tortilla, a staple in so many diets and cultures around the world? Traditional tortillas, made from corn or wheat, aren’t paleo-friendly, but don’t worry! You can still enjoy this versatile food item in your diet with a little twist. The secret ingredient? Coconut flour.
Coconut flour is a fantastic alternative for those following a paleo diet, not just because it’s paleo-friendly but also because it’s gluten-free and high in fiber. Plus, it yields a deliciously soft and pliable tortilla, perfect for wrapping up your favorite paleo fillings.
So, let’s get into the nitty-gritty of making paleo-friendly tortillas with coconut flour.
The Ingredients:
- ½ cup of coconut flour
- 2 tablespoons of psyllium husk powder (this helps bind the ingredients together)
- ¼ teaspoon baking soda
- ½ teaspoon sea salt
- 1 cup of hot water
- 2 tablespoons of olive oil or melted coconut oil
The Equipment:
- A large mixing bowl
- A skillet or non-stick pan
- Parchment paper or a silicone mat
- A rolling pin or a tortilla press if you have one
Now, with your ingredients and equipment ready, let’s get to cooking!
Step-by-Step Instructions:
1. Mix the Dry Ingredients
Start by taking your large mixing bowl and adding the coconut flour, psyllium husk powder, baking soda, and sea salt. Give these ingredients a good whisk to ensure that they are well combined.
2. Add Liquids
To the dry ingredients, add the hot water and olive oil or melted coconut oil. Mix everything until you get a dough that starts pulling away from the sides of the bowl. It should be moist and slightly sticky but still manageable. If the dough feels too dry, feel free to add a little more hot water until you reach the right consistency.
3. Let the Dough Rest
This step is crucial. Let your dough sit for about 5 to 10 minutes. During this time, the coconut flour will absorb the moisture, and the psyllium husk will help bind everything together, making the dough easier to work with.
4. Divide and Roll the Dough
After the dough has rested, divide it into equal-sized balls – this recipe should make about 6 to 8 tortillas, depending on their size. Take a piece of parchment paper or a silicone mat and place one dough ball in the center. Press down lightly with your hand, then use another sheet of parchment paper on top. Use a rolling pin to roll the dough into a thin, round shape. If you’re using a tortilla press, follow the manufacturer’s instructions.
5. Cook the Tortillas
Heat your skillet or non-stick pan over medium-high heat. Carefully peel the tortilla from the parchment paper and place it on the hot skillet. Cook for about 1-2 minutes on each side or until each side is slightly golden and the tortilla starts to puff up a bit. Repeat this process for the remaining dough.
6. Keep Them Warm
As you cook your tortillas, you can keep them warm by wrapping them in a clean kitchen towel. This step also helps them stay soft and pliable.
Serve and Enjoy!
Once all your tortillas are cooked, they’re ready to serve. Fill them with your favorite paleo-friendly ingredients, like grilled veggies, meats, or avocado, and enjoy a delicious, healthy meal that respects your dietary choices.
Conclusion
These paleo-friendly tortillas with coconut flour are not only easy to make but are also incredibly versatile and satisfying. Whether you’re strictly following a paleo diet or just looking to try something new and healthy, these tortillas make a great addition to any meal. Plus, experimenting with coconut flour opens up a new world of gluten-free and paleo-friendly baking opportunities. Happy cooking!