How to Prepare Veggie Sushi Rolls for Appetizers in Simple English
If you’ve ever been intrigued by the idea of making your own sushi but felt intimidated by the process or the raw fish, veggie sushi rolls are a delightful and simple place to start! These little appetizers are not only delicious but also a colorful and healthy addition to any meal or gathering. Let’s dive into the steps for making them right at your home, without needing any special skills or equipment!
What You’ll Need:
To start, gather your ingredients and some basic kitchen tools. Here’s what you’ll need:
- Sushi Rice: This is a special kind of rice that gets sticky when cooked, which is perfect for sushi.
- Rice Vinegar: This adds flavor to the sushi rice.
- Nori Sheets: These are seaweed sheets that wrap around the outside of the sushi.
- Vegetables: Choose your favorites! Cucumber, avocado, bell peppers, and carrots are all great choices.
- Bamboo Mat: This helps roll the sushi tightly. If you don’t have one, you can use a clean kitchen towel.
- Water & A Small Bowl: To keep your fingers wet; this makes handling the rice easier.
- Sharp Knife: For slicing the rolled sushi.
- Soy Sauce, Pickled Ginger, and Wasabi (Optional): For serving.
Step 1: Prepare the Sushi Rice
Begin by cooking your sushi rice according to the package instructions. Once it’s cooked, transfer it to a large bowl. Mix in a little bit of rice vinegar and sugar (this step is optional but adds a nice taste). Let the rice cool down to room temperature. Remember, working with hot rice will make the process more difficult and can tear the nori sheets.
Step 2: Prepare Your Vegetables
While your rice is cooling, start prepping your veggies. You want to cut them into long, thin strips. For example, peel and deseed your cucumber, then cut it lengthways. Do the same with your avocado, carrots (these might need a quick boil first to soften), and bell peppers. Keep your prepared veggies on a plate, ready for assembling.
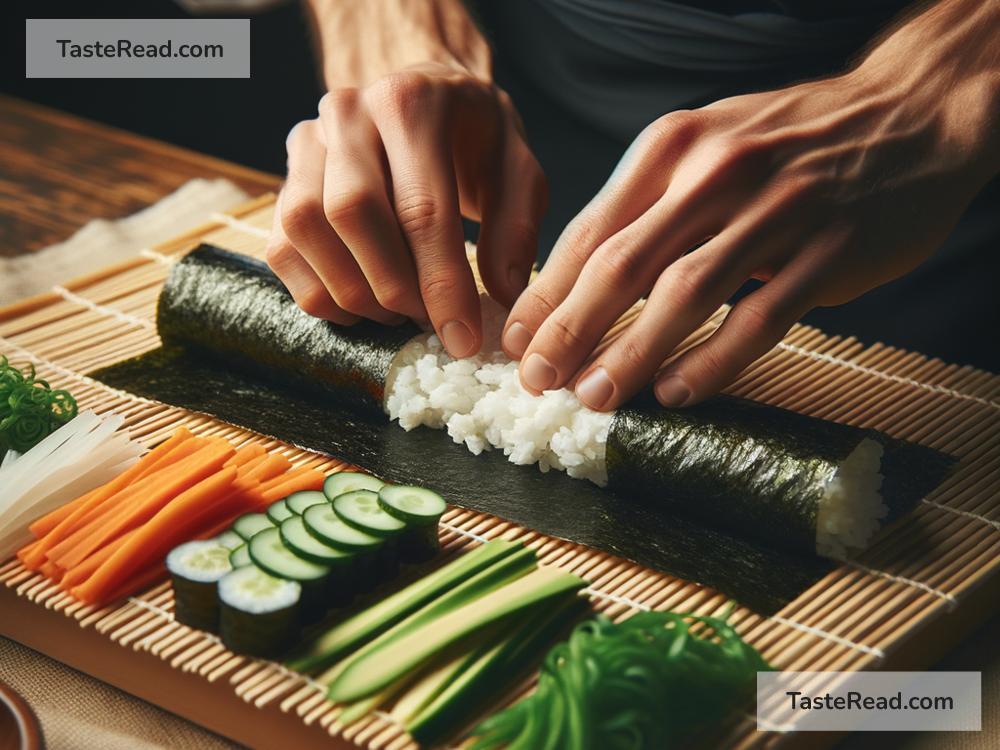
Step 3: Rolling Your Sushi
Place a nori sheet shiny side down on your bamboo mat or kitchen towel. Wet your hands (this prevents the rice from sticking) and grab a ball of sushi rice. Spread it evenly across the nori sheet, leaving about an inch empty at the top.
Arrange a small amount of your prepared veggies in a line at the bottom of the nori sheet. Don’t overfill; a few pieces of each vegetable will do.
Now, the fun part: rolling! Lift the edge of the mat closest to you, and gently roll it over the fillings, pressing slightly. Keep rolling until you’ve formed a complete roll. Use the mat to give the sushi a good final squeeze, which helps it stick together.
Step 4: Cutting the Sushi
Using a sharp knife, cut your sushi roll into bite-sized pieces. Wetting the knife with a little water before each cut helps make this process smoother.
Step 5: Serving
Arrange your beautiful veggie sushi rolls on a platter. They’re traditionally served with soy sauce for dipping and pickled ginger and Wasabi on the side, but feel free to serve them however you like!
Additional Tips:
- Get Creative with Fillings: Beyond traditional veggies, consider adding cream cheese, mango, or even beetroot for a colorful twist.
- Presentation: Serve your sushi on a bamboo mat or a clean, flat stone for an authentic look.
- Practice: Your first few rolls might not be perfect, and that’s okay! Sushi rolling is an art that improves with practice.
Conclusion
Making veggie sushi rolls at home is a fun and rewarding process that can involve the whole family. These rolls make excellent appetizers for dinners, parties, or just a tasty treat for yourself. With fresh ingredients and a bit of practice, you’ll be able to whip up these delightful bites anytime. So why not impress your friends and family with your new sushi-making skills? Dive in, get rolling, and enjoy the art of making veggie sushi!