Mastering the Art of Restaurant-Style Broths and Stocks at Home
Creating a rich, flavorful broth or stock is like capturing the very essence of umami and warmth in a pot. It’s a fundamental culinary skill that elevates simple dishes to restaurant-quality masterpieces. The secret to designing these bases lies in understanding the basic principles and then experimenting with advanced techniques that chefs use in professional kitchens. In this guide, we will uncover these methods in simple English, so you can bring the gourmet experience into your home cooking.
1. Start with High-Quality Ingredients
The foundation of a good broth or stock is the quality of your ingredients. Fresh, organic vegetables and high-grade meats or bones make a significant difference. For vegetable broths, opt for a mix of carrots, onions, celery, and mushrooms. For meat or bone stocks, use parts rich in collagen, like chicken feet, beef knuckles, or marrow bones. These ingredients contribute to a broth’s body and richness.
2. Roasting: A Game Changer
One of the most impactful techniques borrowed from restaurant kitchens is the roasting of bones and vegetables before simmering. This step, often overlooked at home, deepens the flavors, adding a complexity and richness that can’t be achieved otherwise. Spread your bones and roughly chopped vegetables on a baking tray, and roast them at 400°F (about 200°C) until they are well browned. The caramelization that occurs during roasting is what gives professional broths their signature depth of flavor.
3. The Importance of a Slow Simmer
Patience is key when it comes to making broths and stocks. A slow, gentle simmer allows for the extraction of flavors, collagen, and gelatin, without causing the liquids to become cloudy or bitter. This means keeping your pot at a temperature where it’s barely bubbling for several hours. This slow process is essential for achieving the clear, rich base that serves as the cornerstone of high-quality soups and sauces.
4. The Right Ratio of Water to Ingredients
Another crucial factor is the ratio of water to bones and vegetables. Too much water will dilute the flavor, while too little won’t extract all the goodness from your ingredients. A general guideline is to cover your ingredients with water by no more than an inch. This ensures that your broth or stock is concentrated and full-bodied.
5. Skimming the Surface
As your broth or stock simmers, impurities and fat will rise to the surface. Skimming these off regularly is vital for clarity and purity of flavor. This attention to detail is what distinguishes a homemade broth from a restaurant-quality one. A ladle or fine-mesh skimmer works well for this, ensuring you’re left with a clean base for your dishes.
6. Enhancing with Aromatics and Seasonings
Incorporating aromatics like garlic, leeks, and herbs towards the end of the cooking process infuses delicate flavors without overpowering the stock. Bay leaves, peppercorns, and thyme add layers of aroma that subtly enhance the overall taste. However, be mindful with salt. It’s best to season your final dish rather than the stock, as reducing can intensify saltiness to undesirable levels.
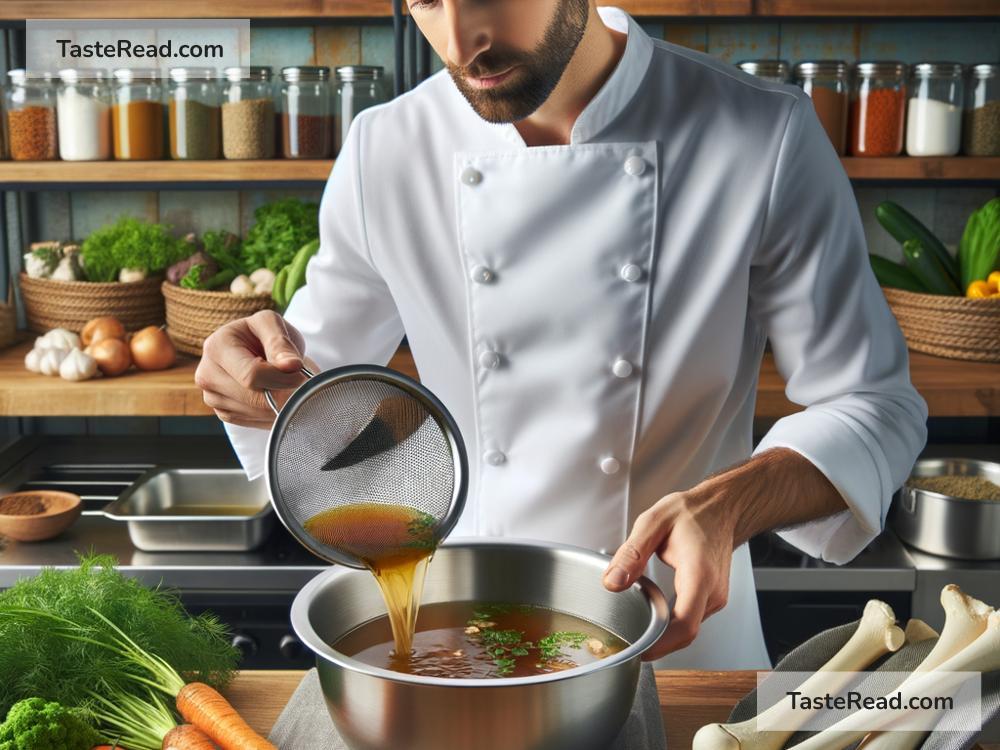
7. The Importance of Straining
Once your broth or stock has simmered for the recommended time (usually between 4 to 6 hours for meat broths and 1 to 2 hours for vegetable broths), it’s crucial to strain it properly. Use a fine-mesh strainer or cheesecloth to ensure no solid particles are left. This step is crucial for achieving the silky-smooth consistency emblematic of restaurant-style broths.
8. Cooling and Storing Correctly
Cooling your broth or stock quickly and storing it properly ensures its freshness and prevents bacterial growth. Transfer it into smaller containers to speed up the cooling process and refrigerate. For longer storage, freezing is an excellent option. Consider freezing in ice cube trays for easy, portion-sized use later on.