How to Create High-Contrast Food Photography with a Dark Background
If you’ve been scrolling through social media or gazing at food magazines and blogs, you’ve probably noticed some stunning food photographs that make your mouth water. Among various styles, high-contrast food photography against a dark background stands out significantly. It’s dramatic, it’s elegant, and it can make even the simplest dish look like a gourmet masterpiece. So, how can you create these captivating images? Let’s dive into a simple guide to crafting high-contrast food photography with a dark background.
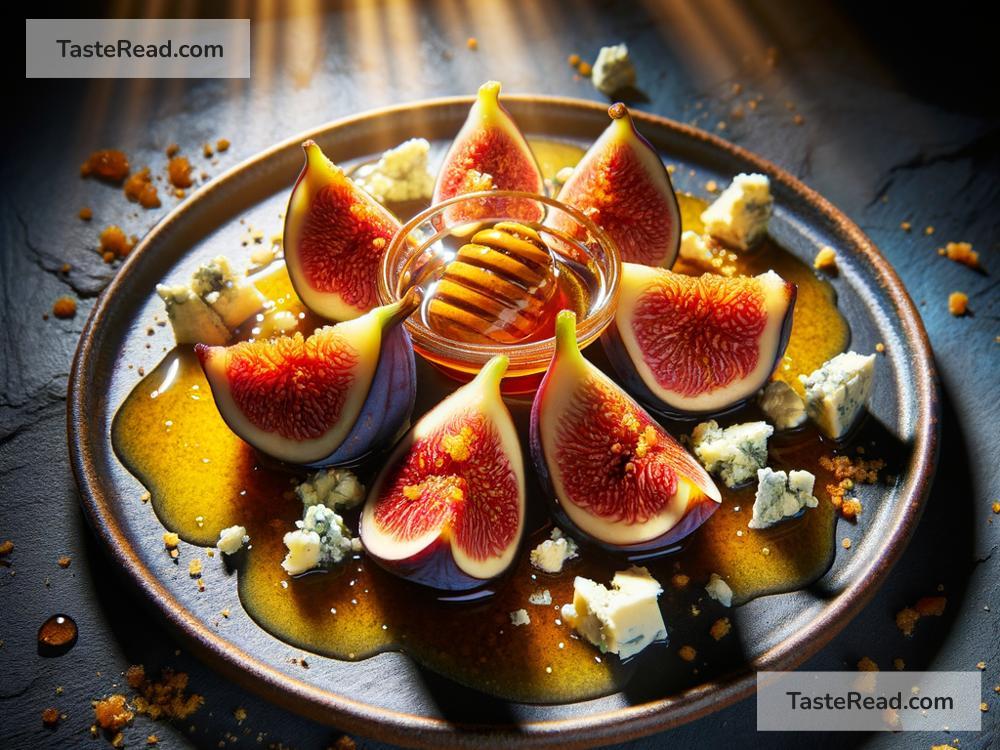
Understanding High-Contrast Photography
First things first, let’s understand what we mean by high-contrast photography. It’s all about the play of lights and shadows, and the stark differences between them. When you capture or edit a photo to have significant differences between the darkest and the lightest parts, you’re working with contrast. Doing this with a dark background not only highlights the food but also adds a rich, dramatic flair to your photograph.
Choosing the Right Background
Your journey starts with selecting the right background. You’re looking for something dark, obviously, but not just any dark surface will do. You want a background with a bit of texture or a subtle pattern – think dark wood, black marble, or even a slate board. These add depth to your photograph without stealing the spotlight from your main star, the food.
Lighting is Key
Lighting can make or break your food photograph. For high-contrast photography, you want to focus on creating a strong directional light. Side lighting, where light hits the food from the side, is particularly effective. It enhances texture and creates shadows, giving depth and dimension to your photographs.
One simple setup is to place your food near a window with natural light coming from the side. You may only need a simple reflector (a piece of white cardboard can do the trick) on the opposite side to softly fill in the darkest shadows. The idea is to control the light and shadow to create that dramatic contrast without losing details in the food.
The Role of Composition and Styling
With a dark background, your food is the uncontested center of attention. However, this doesn’t mean slapping a plate down anywhere will do. Composition – the way elements are arranged in your photo – and styling are crucial.
Firstly, think about how you can use space to create interest. Don’t be afraid to leave some of the dark background visible; it can help frame your subject and draw the viewer’s eye directly to the food.
When styling, consider adding elements that complement or contrast with the food in terms of color and texture. A brightly colored garnish or a rustic cutting board can add a lot of interests. But remember, less is often more. You want to enhance, not overshadow your main subject.
Camera Settings and Post-Processing
You don’t need a fancy camera to take good food photographs, but knowing a bit about camera settings can help. Using a lower aperture (like f/2.8 or f/4) can blur your background, making your food stand out even more. Also, play around with your ISO and shutter speed to ensure your food is well-exposed against the dark background.
After you’ve taken your photographs, a bit of post-processing can push your images from good to great. Adjusting the contrast, brightness, and saturation can help your food pop even more against the dark backdrop. However, it’s important to keep the food looking natural – you don’t want a steak that looks like it’s glowing in the dark!
Practice, Experiment, and Have Fun
Finally, the most important piece of advice: practice, experiment, and have fun with it. Not every shot will turn out perfect, and that’s completely okay. Each photograph is a learning opportunity. Try different foods, backgrounds, and lighting setups. Play with your camera settings and editing techniques. With time and patience, you’ll start seeing those mouth-watering, high-contrast food photographs coming to life right before your eyes.
Creating high-contrast food photography with a dark background might seem challenging at first, but it’s incredibly rewarding. It’s about understanding and manipulating light, shadow, and color to make your food shine. By following these simple steps and allowing yourself to experiment, you’re on your way to capturing stunning, dramatic food photographs that will grab everyone’s attention. Happy shooting!