Title: Mastering the Art of Dessert Photography: Capturing Sweetness in Soft Light
Dessert photography is an art form that celebrates the beauty and delicacy of sweets. Whether it’s the glossy sheen of a chocolate glaze or the vibrant colors of fresh fruit atop a tart, capturing these details can transform dessert into not just a treat, but a visual feast. One of the key techniques to achieving mouthwatering dessert photos is utilizing soft lighting. Soft light gently wraps around the dessert, highlighting its textures and colors without causing harsh shadows or overexposures. In this guide, we’ll share simple tips and tricks on how to create stunning dessert photography with soft lighting, making your photos irresistible.
1. Understand Soft Light
Before diving into the techniques, it’s crucial to understand what soft light is. Soft light refers to a diffused, gentle light that evenly illuminates the subject, reducing the intensity of shadows and highlights. It’s the opposite of hard light, which can create stark contrasts and sharp shadows. Soft light is flattering for dessert photography as it tends to reveal the delicate details and textures without overpowering the scene.
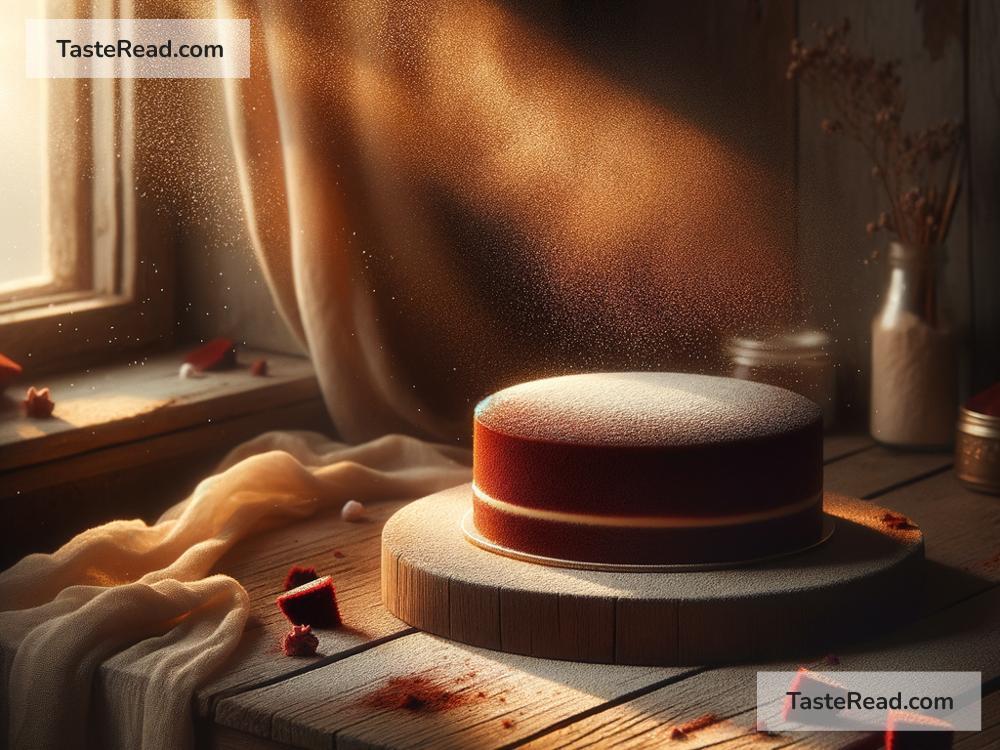
2. Choose the Right Time and Place
If you’re using natural light, the time of day can dramatically affect the quality of your photos. Early mornings or late afternoons, during the golden hour, offer a naturally soft and warm light. Positioning your dessert near a window where indirect sunlight filters through can also produce beautifully soft-lit photos. Avoid direct sunlight as it can cast harsh shadows and alter the appearance of your dessert.
3. Diffuse Your Light Source
Whether you’re using natural light or artificial lighting, diffusing the light source is key to achieving soft lighting. If you’re indoors, using sheer curtains over windows can help soften the incoming light. For artificial light sources, diffusing materials such as white fabric or a professional diffuser can be placed in front of the light to scatter and soften it. This setup mimics the soft, diffused light of an overcast day, ideal for dessert photography.
4. Bounce Light to Fill Shadows
Sometimes, soft light can still create shadows, especially if the light source is coming from one direction. To balance the light distribution and gently fill in shadows, use a reflector or even a simple piece of white cardboard. Position it on the opposite side of the light source to reflect light back onto the dessert, ensuring an even and soft illumination.
5. Experiment with Angles
The direction from which the light hits your dessert can significantly impact the outcome of your photo. Side lighting can emphasize textures and layers, making frosting glisten or showcasing the fluffiness of cakes. Backlighting, where the light comes from behind the dessert, can create a halo effect, highlighting edges and making translucent ingredients like fruit or jelly glow. Experiment with different angles and positions to find what best showcases your dessert.
6. Choose the Right Background
While the focus is on the dessert, the background plays a supporting role in enhancing its appeal. Opt for backgrounds that complement the dessert without competing for attention. Neutral tones and simple textures often work best, as they allow the colors and details of the dessert to stand out. Remember, the goal is to enhance, not overshadow, the star of the show.
7. Play with Props
Props can add context and depth to dessert photography, but it’s important to use them sparingly and thoughtfully. Select props that resonate with the dessert’s theme or ingredients, like a scattering of the same berries used in the dessert or an elegant dessert fork beside a slice of cake. Props should enhance the story you’re trying to tell without cluttering the scene.
8. Post-Processing Magic
Even with the perfect setup, most stunning dessert photos have been treated with some level of post-processing. Software like Adobe Lightroom or Photoshop allows you to fine-tune the brightness, contrast, and colors. However, always strive for a natural look, especially for dessert photography, where the goal is to evoke real-life textures and flavors.
By mastering soft lighting, you can elevate your dessert photography from simply documenting a dish to creating an irresistible visual treat. Remember, patience and practice are key. Experiment with different setups, learn from each shoot, and soon, your dessert photos will not only look delicious but will convey the artistry and passion behind every sweet creation.