How to Ferment Vegetables for Probiotic-Rich Dishes: A Simple Guide
Fermenting vegetables is like unlocking a hidden treasure trove of flavors and health benefits. It’s a centuries-old method that not only preserves vegetables but also enhances their nutritional value, thanks to the magic of probiotics. These friendly bacteria are not just good for your gut; they also play a vital role in boosting your overall health. Want to dive into the world of fermentation? Let’s break it down into simple, easy steps!
Why Ferment Vegetables?
Before we jump into the “how,” let’s talk a bit about the “why.” Fermented foods are superstars in the world of nutrition. They’re packed with probiotics, which are essential for a healthy digestive system. Plus, fermentation can increase the availability of vitamins and minerals in food, making it an excellent way to add a healthy kick to your diet. And let’s not forget the incredible flavors fermentation brings to the table – tangy, savory, and utterly delicious.
What You’ll Need
Starting your fermentation adventure is surprisingly easy, and you don’t need much to begin. Here’s a quick checklist:
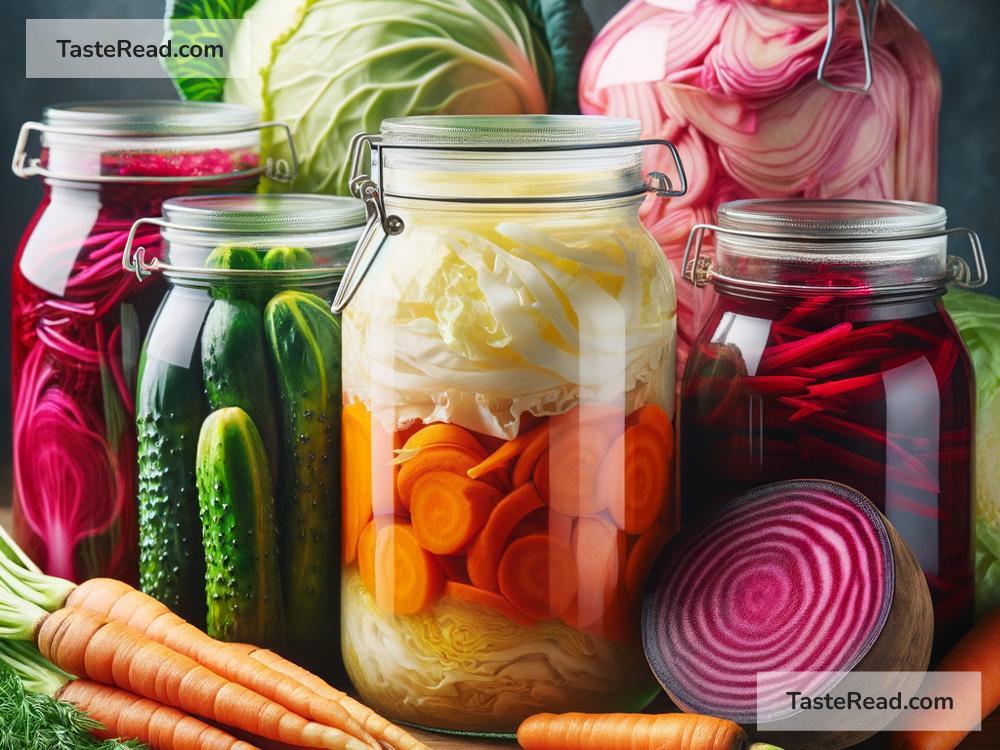
- Fresh Vegetables: Cabbage, carrots, cucumbers, and radishes are great starters.
- Salt: It inhibits harmful bacteria and allows the good bacteria to thrive.
- Water: Use filtered water to avoid chlorine, which can interfere with fermentation.
- Jars: Clean, airtight jars to pack your veggies in.
- Patience: Fermentation isn’t instant. It takes time, but it’s worth it.
Step-by-Step Guide to Fermenting Vegetables
1. Choose and Prepare Your Vegetables
Start by selecting fresh vegetables. Wash them thoroughly to remove any dirt. Depending on what you’re fermenting, you might chop, slice, or leave your veggies whole. For example, cabbage is usually shredded for sauerkraut, while cucumbers are left whole for pickles.
2. Salt Your Vegetables
Salting is crucial in fermentation. It draws out moisture from the vegetables, creating the perfect environment for good bacteria to grow. There are two main methods:
– Dry Salting: Sprinkle salt directly on your chopped or shredded veggies. Massage it in until juices start to release.
– Brine: Dissolve salt in water to create a salty solution, then pour it over your vegetables packed in jars.
The amount of salt you need varies, but a good rule of thumb is about 2-3% of the weight of the vegetable. For beginners, sticking with recipes helps until you get the hang of it.
3. Pack Your Jars
Packing your veggies tightly in jars is key. If you’re dry salting, you’ll already have your vegetables in a bowl, so once they’ve become juicy, pack them into your jars. For a brine method, place your veggies in jars first, then pour the brine over them. Ensure the vegetables are fully submerged to prevent mold. You can use fermentation weights or a clean, smaller jar to keep them under the brine.
4. Let the Fermentation Magic Happen
Once packed, close your jars loosely to allow gases to escape or use airlock lids if you have them. Store your jars at a cool, steady room temperature, out of direct sunlight. The fermentation process can take anywhere from a few days to a few months, depending on the vegetable and your taste preference. Taste testing is a crucial part of the process!
5. Store and Enjoy
After reaching the desired taste and texture, tighten the lids and transfer your fermented veggies to the refrigerator. This slows down fermentation, preserving their state. Now, you’re all set to enjoy your homemade probiotic-rich veggies!
Quick Tips for Success
- Start Small: Begin with small batches until you find what flavors you love.
- Keep It Clean: Ensure your hands, utensils, and jars are very clean to avoid introducing any harmful bacteria.
- Check Regularly: Keep an eye on your fermenting veggies for any signs of mold or unusual odors.
- Experiment: Once you’ve mastered the basics, don’t be afraid to try out different vegetable and spice combinations.
Wrapping Up
Fermenting vegetables at home is a rewarding experience that opens up a new world of flavors and health benefits. It’s a simple process that pays off with delicious, probiotic-rich dishes that can transform your meals and support your health. So why not give it a whirl? Your gut (and taste buds) will thank you!