How to Get the Perfect Depth of Field in Your Food Photos
A great food photo can make anyone’s mouth water. It’s not just about the dish itself, but how it’s presented in the photograph. One key aspect of taking stunning food photos is mastering the depth of field (DOF). This might sound technical, but it’s simply about managing how much of your photo looks sharp. It can be the difference between a flat, lifeless image and one that pops out, inviting the viewer to taste the dish. In this article, we’ll guide you through easy steps to achieve that perfect DOF, making your food photos stand out.
Understanding Depth of Field
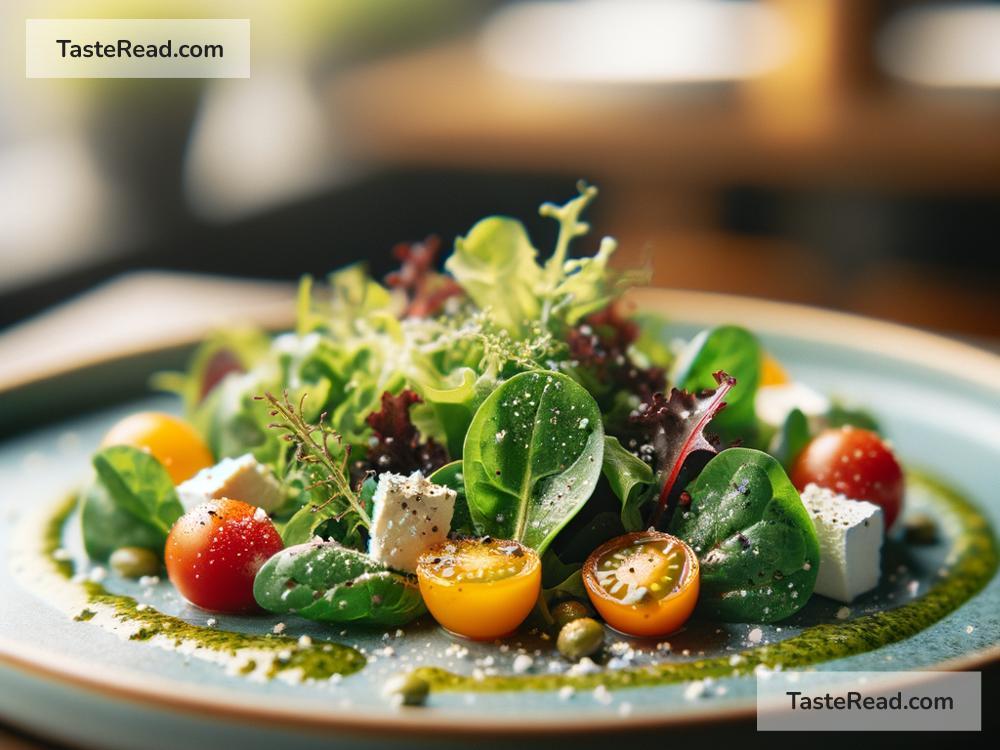
Before we dive into the how-to, let’s quickly understand what depth of field really means. Imagine looking down a long road; objects close to you are detailed, while far away, things blur into the background. That’s DOF at work in real life. In photography, DOF controls how much of your image is in focus, from the closest object to the furthest one in the frame. A shallow DOF means only a small part of the image (like your dish) is in sharp focus, with the background tastefully blurred. This makes your food the star of the show.
Step 1: Choose the Right Lens
The journey to perfect DOF starts with the right lens. For food photography, a macro lens is ideal as it allows you to get close to the food, capturing even the smallest details. If a macro lens isn’t available, a prime lens with a wide aperture (low f-number, e.g., f/1.8) works well for achieving shallow DOF. Remember, the wider the aperture, the shallower the DOF.
Step 2: Control Your Aperture
The aperture is the eye of your camera lens, and its size determines how much light enters. It also affects your DOF. For a blurred background, choose a wide aperture (a lower f-number, like f/2.8). This focuses attention on your food while softening distractions in the background. On the other hand, if you want more of the scene in focus, such as for a table spread, go for a smaller aperture (a higher f-number, like f/8 or f/16).
Step 3: Play with Distance
The distance between your camera, your subject (the food), and the background also affects DOF. By simply moving your setup closer or further away from the background, you can change how much of it appears in focus. Closer backgrounds become more blurred as you focus on your food, bringing it to the forefront. This technique lets you manipulate your DOF without changing your camera settings.
Step 4: Fine-Tune with Your Camera Mode
To have complete control over your aperture, switch your camera to Aperture Priority mode (usually denoted as A or Av on your camera dial). This lets you set the desired aperture, while the camera automatically adjusts the shutter speed. For those feeling confident, Manual mode gives you full control over both aperture and shutter speed, allowing you to dial in the perfect DOF for every shot.
Step 5: Experiment and Practice
Photography, like any art, improves with practice. Experiment with different apertures, distances, and lenses to see how each change affects your DOF. Take shots of the same dish with varying settings to understand how these adjustments alter your photo’s look and feel. Over time, you’ll develop an intuitive sense for how to achieve the perfect DOF for any scenario.
Final Tips
- Lighting matters: Good lighting can highlight the textures and colors of your food, working in tandem with DOF to create captivating images. Natural light is usually the best choice.
- Stabilize your camera: To avoid blurry photos, especially at slow shutter speeds (when using smaller apertures for deeper DOF), use a tripod.
- Post-processing: Software tools like Lightroom and Photoshop can help fine-tune your DOF in post, adding or reducing blur to achieve the desired effect.
Achieving the perfect depth of field in food photography isn’t just about technical know-how; it’s about elevating your dish to tell its story appealingly and deliciously. By mastering DOF, you draw viewers into your culinary world, making every photo a feast for the eyes. So grab your camera, experiment with these steps, and watch as your food photography transforms into irresistible visual treats.