How to Incorporate Natural Elements like Wood and Stone in Food Photography
If you’ve ever scrolled through social media feeds or food blogs, you’ve likely noticed that some of the most appealing and mouth-watering photos seem to have a touch of Mother Nature in them. Yes, we’re talking about incorporating natural elements like wood and stone into food photography. These elements can add texture, warmth, and an organic feel to your shots, making them more inviting and appealing. Whether you’re a blogger, a social media enthusiast, or someone who just loves clicking pictures of food, here’s a simple guide on how to bring the outside in and elevate your food photography game.
1. Understand Your Palette: The Importance of Natural Textures
Before you start, take a moment to understand the color and texture palette that wood and stone can offer. Wood, with its grains and knots, can range from pale beech to dark walnut, each adding a different mood to your photo. Stone, on the other hand, from sleek marble to rugged slate, provides a cooler tone and an array of textures. The key is to choose these backgrounds based on what complements your food’s colors and textures the best. For example, a warm walnut wood could enhance the golden hues of freshly baked bread, while a cool marble might make vibrant fruits pop.
2. Find Your Perfect Background: Scouting and DIY Tips
Now that you know the kind of mood you want to set with your photo, it’s time to find or create the perfect background. Thrift stores, flea markets, and even your grandma’s attic could be treasure troves for unique and rustic wood and stone pieces. If you enjoy DIY projects, you could also repurpose old furniture pieces or panels into backgrounds. For stone surfaces, consider investing in a marble or slate tile from a hardware store – they’re usually more affordable than buying a photography-specific background and work just as well.
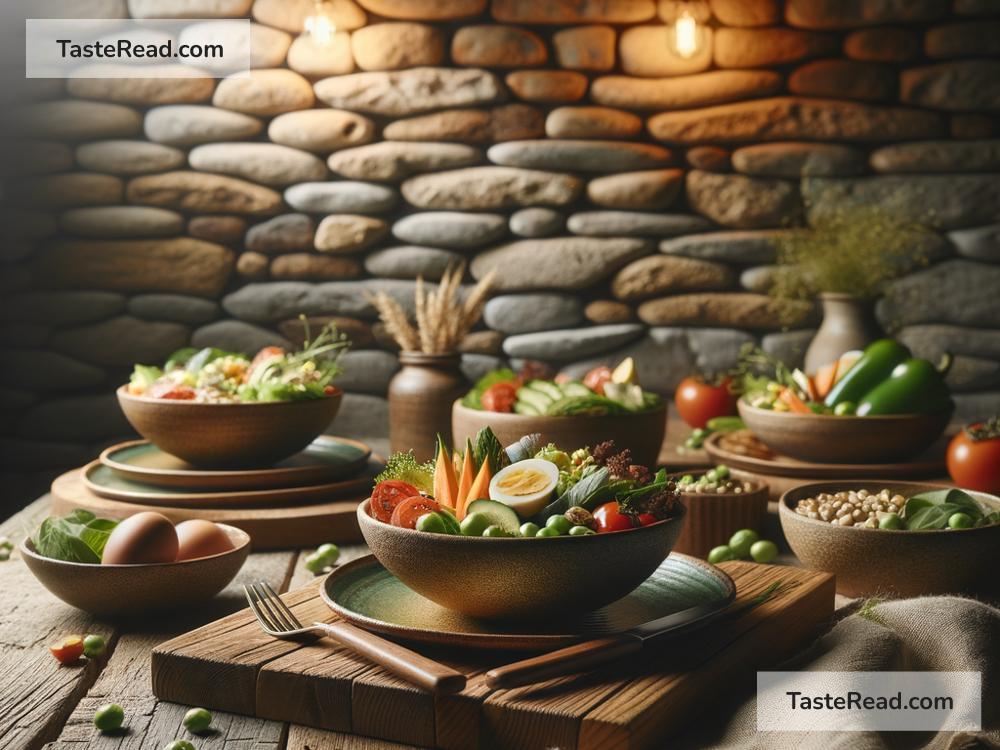
3. Setting the Scene: Less is More
When incorporating these natural elements, remember that the food is still the star. Use the wood and stone as a stage that complements the food without overpowering it. For instance, placing a vibrant salad directly on a wooden board accentuates the freshness of the ingredients, while a slate tile can offer a sophisticated base for cheese or desserts. Play around with different placements and props, but be mindful not to clutter the scene. Sometimes, less is truly more.
4. Lighting: Embrace Natural Light
One of the best lighting sources for food photography, especially when working with natural elements, is natural light. It beautifully highlights the textures of both the food and the backgrounds, adding depth to your photos. Try to set your shooting area near a window where you can control the amount of light coming in, perhaps with sheer curtains. The ideal times for such photography are during the morning or late afternoon when the light is softer and warmer.
5. Experiment with Textures and Layers
Adding layers to your setup can dramatically enhance the visual appeal of your photos. Consider using a wooden chopping board on top of a slate slab, or perhaps laying a linen napkin partially on a marble tile. These layers create depth and interest, guiding the viewer’s eye through the photo. Additionally, incorporating elements like spilled flour on wood or water droplets on stone can add a dynamic and realistic touch to your food stories.
6. Post-Production: Enhancing the Natural Feel
Even with the perfect setup, most photos could benefit from a bit of tweaking in post-production. Use editing software to adjust the exposure, contrast, and saturation gently. The goal is to enhance the photo while keeping it looking natural and not overly processed. Specifically, highlight the textures of your wood and stone backgrounds to ensure they complement the food without stealing the spotlight.
Conclusion
Incorporating natural elements like wood and stone into your food photography can add a layer of warmth and authenticity to your shots, making them stand out. By understanding the materials, scouting the perfect pieces, setting your scene thoughtfully, utilizing natural light, experimenting with textures, and fine-tuning in post-production, you’ll be well on your way to capturing stunning, nature-infused food photos that are sure to engage and enchant your audience. Remember, the journey of creating art is also about having fun and allowing your creativity to flow, so embrace experimentation and watch your food photography flourish.