How to Make a Mirror Glaze for Stunning Cakes
Have you ever scrolled through your social media and stopped in awe at those stunning, shiny cakes that look too good to be real? Those are mirror glaze cakes, and they’re not just reserved for professional bakers. You can create that show-stopping finish on your cakes right at home. In this blog, we’ll guide you through a simple way to make a mirror glaze that will transform your desserts into works of art.
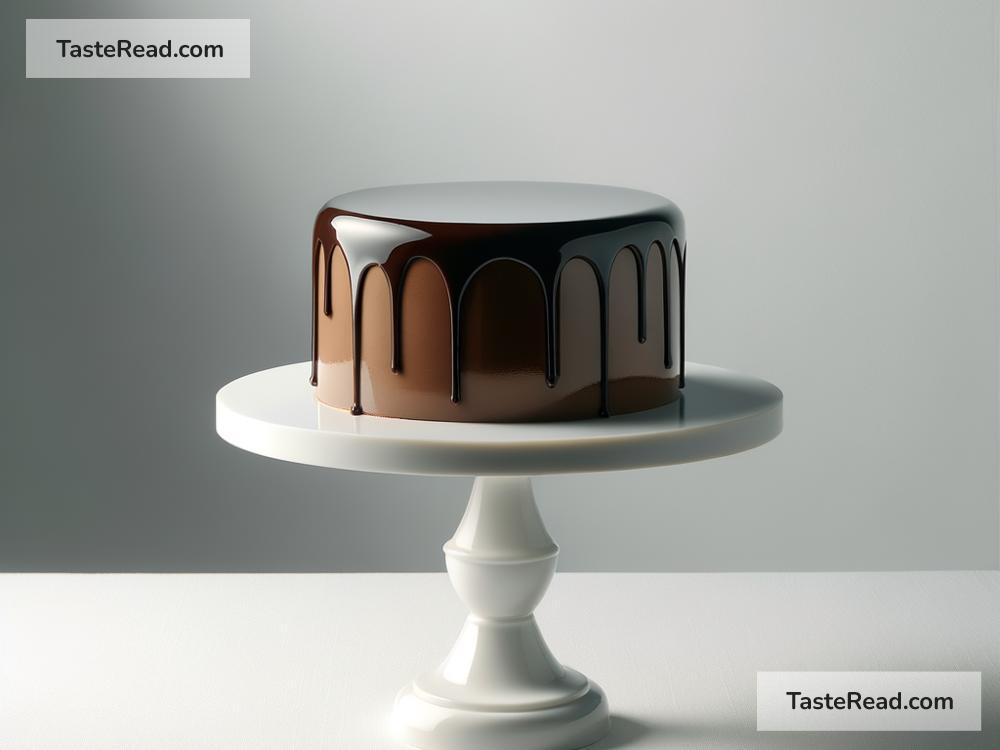
First things first, what exactly is a mirror glaze? It’s a shiny glaze that’s so glossy you can literally see your reflection in it. This glaze makes your cakes not only delicious but also incredibly beautiful. The secret to its mirror-like finish is gelatin, which sets the glaze as it cools, creating that smooth, shiny surface.
Ingredients You’ll Need:
- 1 cup (200g) granulated sugar
- ½ cup (120ml) water
- ⅔ cup (160ml) sweetened condensed milk
- 1 and ½ cups (150g) white chocolate chips or chopped white chocolate
- 2 tablespoons (about 20g) unflavored gelatin powder
- ½ cup (120ml) additional water (for the gelatin)
- Food coloring (gel or liquid, depending on your preference)
Equipment:
- A small saucepan
- A sieve or fine strainer
- A blender or an immersion blender
- A cake stand or a tray (to catch the drips)
- A thermometer (not essential, but helpful)
Step-by-Step Guide:
Preparing Your Cake
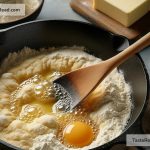
Before you start making your glaze, ensure your cake is ready and chilled. The glaze adheres best to a smooth, frozen surface, so it’s ideal to cover your cake in buttercream or ganache and then freeze it for a few hours or overnight.
Bloom the Gelatin
Start by mixing the gelatin powder with ½ cup of water. Let it sit for about 5 to 10 minutes. This process, called blooming, allows the gelatin to swell and absorb the water, which is crucial for it to dissolve correctly later on.
Make the Sugar Syrup
While the gelatin is blooming, combine the 1 cup of sugar and ½ cup of water in your saucepan. Warm it over medium heat until the sugar dissolves completely. There’s no need to boil it; just ensure that the sugar is fully dissolved.
Adding the Milk and Gelatin
Once the sugar is dissolved, add the sweetened condensed milk and gently mix it in. Then, add the bloomed gelatin (it will be thick and jelly-like by now) to the pan. The heat will help dissolve the gelatin into the mixture. Make sure to stir gently but consistently to avoid any lumps.
Melt the White Chocolate
Now, pour the hot milk and sugar mixture over your white chocolate chips or chopped chocolate in a heatproof bowl. Let it sit for a minute or two to soften the chocolate, then stir until the chocolate is completely melted and the mixture is smooth.
Blending for Smoothness
To ensure that your glaze is perfectly smooth, blend the mixture with a blender or an immersion blender. Be careful not to incorporate too much air into the glaze; you don’t want bubbles on your cake’s surface.
Coloring Your Glaze
This is where you can get creative. Divide your glaze into different containers if you want multiple colors. Add your food coloring a little at a time until you get your desired shades. Remember, the color will appear lighter on the cake, so go a bit bolder than you think.
Cooling the Glaze
Let your glaze cool to about 90°F (32°C). This temperature is ideal because it’s warm enough to pour but cool enough to start setting quickly once it hits the cold cake.
Pouring the Glaze
Place your chilled cake on a stand or tray with a rim to catch the drips. Then, pour the glaze over the cake, starting from the center and moving outward. Ensure the glaze covers the sides for that perfect mirror effect. Don’t worry about it being too thick; gravity will help create an even coating.
The Finishing Touches
Once you’ve glazed your cake, let it sit for a few minutes. If you see any air bubbles, gently pop them with a toothpick. After about 5-10 minutes, use a palette knife or spatula to clean up the drips at the bottom edge for a neat finish.
Let the glaze set completely at room temperature or in the refrigerator before adding any decorations.
And there you have it! A stunning, mirror-glazed cake that’s bound to impress anyone. Remember, practice makes perfect, so don’t be discouraged if your first try isn’t flawless. Happy baking!