Crafting a delicious aioli at home is simpler than you might think, and chances are, you probably already have all the necessary ingredients right in your pantry. Aioli, essentially a fancy term for a seasoned mayo, is a versatile sauce that can elevate many dishes from ordinary to extraordinary. In this article, we’ll guide you through making a simple aioli using basic pantry staples, ensuring you can whip up this delightful sauce anytime you’re in the mood for a flavor boost.
What You’ll Need:
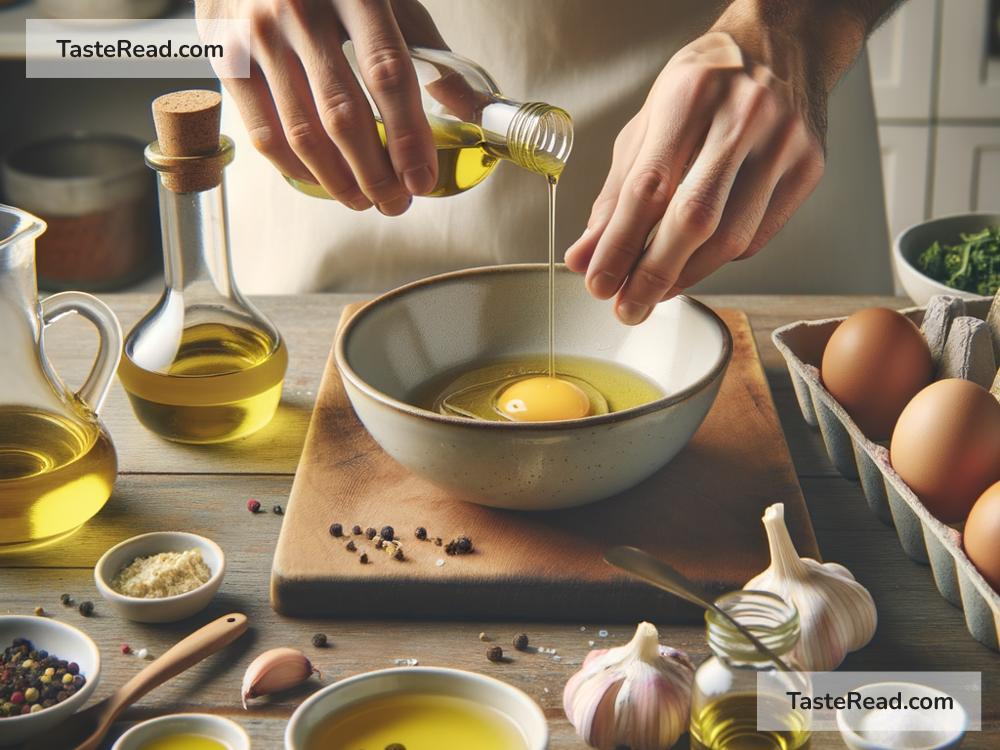
Before we dive into the creation process, let’s go over the ingredients you’ll need. Don’t worry; they’re pretty straightforward:
- 2 large egg yolks (ensure they’re fresh to avoid any risk of salmonella)
- 1 tablespoon of lemon juice (about half a lemon worth, but bottled works too)
- 1 garlic clove, minced (for that quintessential aioli taste)
- 1 teaspoon of Dijon mustard (for a bit of zest)
- 1 cup of olive oil (light or extra light for a milder flavor)
- Salt, to taste (starts with a small pinch and adjusts from there)
- Optional additions: You can add a splash of white wine vinegar for extra tang, or incorporate herbs and spices such as parsley, dill, or ground black pepper for different flavor variants.
Step 1: Combine Egg Yolks with Flavorings
In a medium bowl, whisk together the egg yolks, lemon juice, minced garlic, Dijon mustard, and a pinch of salt. This mixture is the foundation of your aioli, so make sure everything is well combined. The acids from the lemon juice and mustard not only add flavor but also help to stabilize the mixture, making it easier to emulsify with the oil.
Step 2: Gradually Add Oil
This step requires a bit of patience and a steady hand. Slowly dribble the olive oil into the bowl while continuously whisking. Begin with just a few drops at a time, ensuring each is fully incorporated before adding more. This gradual process helps to form a stable emulsion, preventing the oil and egg mixture from separating. As you whisk and the sauce starts to thicken, you can begin adding the oil in a thin, steady stream, still whisking vigorously. The aim is to achieve a creamy, smooth texture.
Step 3: Adjust and Season
Once all the oil has been whisked in, and the aioli has reached your desired consistency, it’s time to taste and adjust the seasoning. Perhaps a smidge more salt is needed, or another squeeze of lemon juice to brighten it up. This is also when you can stir in any additional flavorings such as herbs or spices that you fancy. If your aioli seems too thick, you can thin it out with a little water, adding a teaspoon at a time until you reach the perfect consistency.
Step 4: Chill and Serve
Transfer your homemade aioli to a serving bowl or a storage container if you’re not using it immediately. It’s best to let it chill in the refrigerator for at least an hour before serving. This resting period allows the flavors to meld beautifully. Your aioli will keep well in the fridge, covered, for up to two days. Remember, since it contains raw egg yolks, it’s essential to use fresh eggs and maintain proper food safety standards.
Serving Suggestions
The beauty of aioli lies in its versatility. Serve it as a dip with crispy potatoes, vegetable crudites, or as a spread on sandwiches and burgers. It’s equally delicious dolloped onto grilled fish, chicken, or steamed vegetables. Experiment and discover your favorite pairings!
Wrapping Up
Creating a flavorful aioli from scratch with pantry staples is a simple and rewarding kitchen endeavor. This basic recipe can serve as a foundation for numerous variations – feel free to get creative with additional ingredients and flavors. Homemade aioli not only tastes better than store-bought versions, but it also allows you to tailor it precisely to your liking. So next time you’re looking to elevate a meal with a touch of creamy, garlicky goodness, remember that a delightful homemade aioli is just a few simple steps away. Happy cooking!