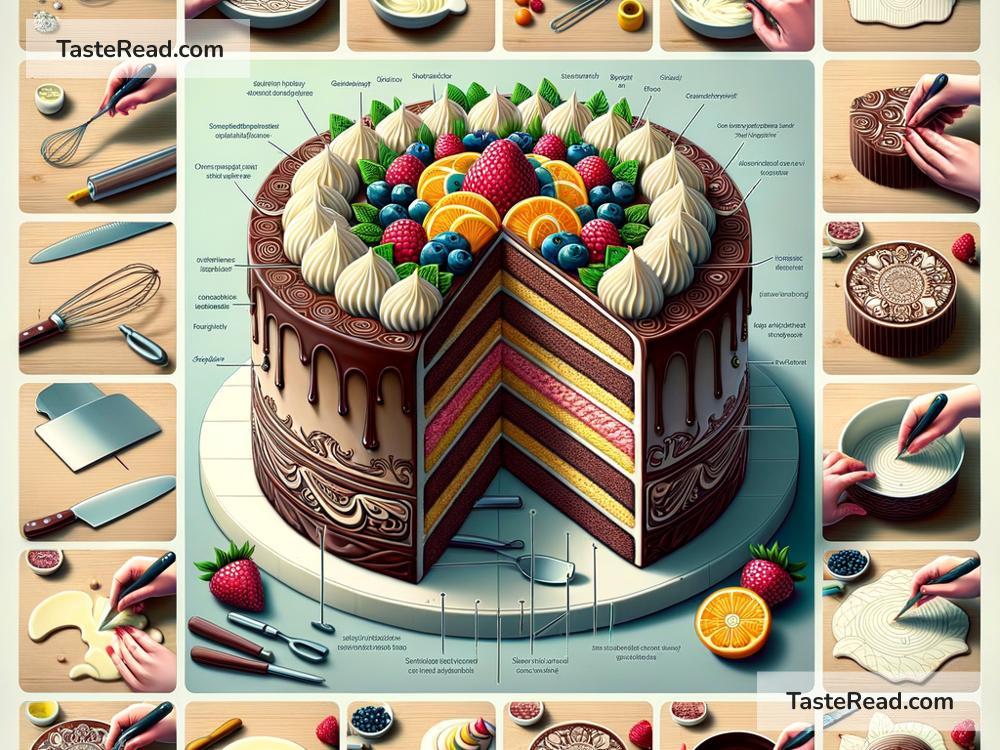
How to Make Complex Multi-Layered Cakes: An Easy Guide
Who doesn’t love a beautifully crafted multi-layered cake? It’s like a little surprise party in every slice. But, if you’ve ever swooned over these towering beauties in bakeries and thought, “I could never do that,” think again! I’m here to guide you through the surprisingly doable process of creating complex, multi-layered cakes, all in simple English. Ready? Let’s get baking!
Step 1: Equip Yourself
Before we start, you’ll need some essential tools:
– Cake pans: Having two or more of the same size will speed up your baking process.
– Mixing bowls and utensils: For preparing batter and frosting.
– Measuring cups and spoons: Precision is key in baking.
– Oven: Because raw cake batter is just sad batter.
– Cooling racks: To let your cakes cool down and avoid sogginess.
– Serrated knife or cake leveler: For slicing layers evenly.
– Offset spatula: For spreading frosting like a pro.
– Turntable (optional): Makes frosting easier, but a steady kitchen counter works too.
Step 2: Plan Your Layers
Multi-layered cakes are like little works of art. Start by deciding how many layers you want and what flavors you’re craving. Chocolate on chocolate? Vanilla with strawberry jam? The sky (or your stomach) is the limit! Once you’ve decided on the layers, jot down the recipes you’ll need for each part. This step keeps you organized and ensures you have all the ingredients before you start.
Step 3: Bake the Cake
Follow your cake recipe(s) to the letter. Baking is science, after all. If you’re new, boxed cake mixes are completely okay; they can be a great starting base to get creative with. Bake your cakes, following the sizes and the number of layers you’ve planned. Remember, if your pans are limited, you can bake in batches.
After baking, allow your cakes to cool completely on a cooling rack. Warm or hot cakes are crumbly and impossible to frost nicely.
Step 4: Slice and Layer Up
With your cakes cooled, it’s time to create the layers. Using a serrated knife or a cake leveler, trim the tops of your cakes to make them flat and even. If you’re feeling brave, you can also slice your cakes horizontally to create thinner layers. Just go slow and steady!
Step 5: Frost and Stack
Place your first layer on a cake board or plate. With your offset spatula, spread an even layer of frosting over the cake. If you’re adding fillings like jams or curds, now’s the time. Gently place the next layer of cake on top and repeat the frosting process until all layers are stacked. Don’t worry if it’s a little messy; a crumb coat is next.
Step 6: Crumb Coat
The crumb coat is a thin layer of frosting that seals in the crumbs, ensuring your final coat is clean and crumb-free. After applying, chill the cake in the fridge for about 30 minutes. This step is a game-changer, especially for beginners.
Step 7: The Final Coat
Once the crumb coat is set, apply your final layer of frosting. Use your spatula to smooth the sides and top. If you’re going for a rustic look, imperfect is perfect! If you want smooth sides, you can use a bench scraper to achieve that sleek finish.
Step 8: Decorate
This is where your cake gets its personality. Fresh fruit, edible flowers, sprinkles, additional dollops or swirls of frosting — let your creativity shine! If you’ve used different flavors for each layer, consider giving hints on the outside with decorations that match the inside flavors.
Step 9: Serve and Enjoy
The moment of truth! Slice your masterpiece and reveal the beautiful layers you’ve crafted. Enjoy the oohs and aahs — and, of course, the cake itself.
Final Thoughts
Creating a multi-layered cake might seem daunting at first, but breaking it down into manageable steps makes it not only possible but also incredibly fun. Remember, baking is as much about the process as it is about the final product. So, wear your apron with pride, and get ready to impress yourself and your loved ones with your baking skills. Happy baking!