How to Make Homemade Nut Butter with Just a Few Ingredients
Are you a fan of nut butter but not so keen on the added preservatives and sugars found in many store-bought versions? If yes, making your own nut butter at home could be the perfect solution for you. It’s simpler than you might think and requires only minimal ingredients. Plus, it gives you full control over what goes into your spread, ensuring you get all the natural, wholesome goodness of nuts with every spoonful. In this article, we will guide you through the easy steps to make your very own nut butter.
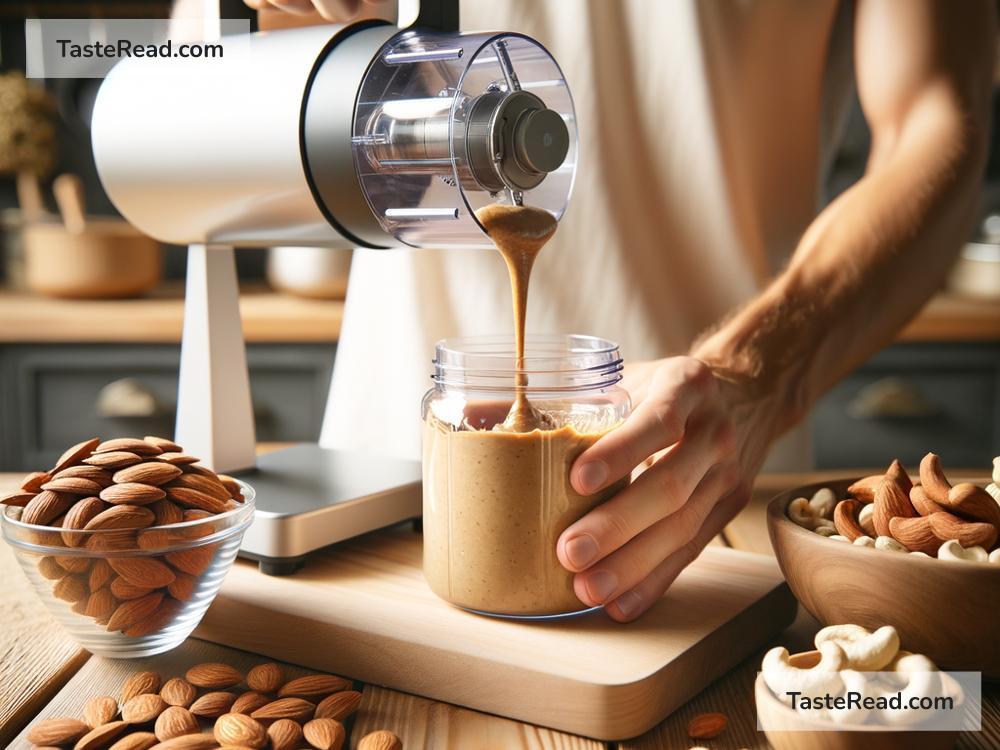
What You’ll Need:
- 2 to 3 cups of your favorite nuts (almonds, cashews, peanuts, etc.)
- A food processor or high-quality blender
- Optional: pinch of salt, a spoonful of honey, or a drizzle of oil for creaminess
Step 1: Choose Your Nuts
The first step is selecting the nuts. You can stick to one type, like classic peanuts for making peanut butter, or get creative by mixing different nuts for a unique flavor profile. Raw or roasted? It’s up to you. Roasted nuts tend to provide a richer, deeper flavor, but if you prefer the fresh, natural taste of your nuts, you can use them raw.
Step 2: Prep and Roast (Optional)
If you’re starting with raw nuts and want that roasted flavor, spread your nuts on a baking sheet and pop them in an oven preheated to around 350°F (175°C) for 10 to 12 minutes. Just be sure to keep an eye on them to prevent burning. This step is optional but recommended for that extra depth of flavor.
Step 3: Blend
Once your nuts are ready (whether raw or roasted), let them cool for a few minutes, then transfer them to your food processor or blender. Pulse a few times to break them into smaller pieces. Then, keep the machine running. First, you’ll notice the nuts turn into a thick, grainy paste. Don’t stop here though. Continue processing. If your machine heats up or starts to struggle, give it a break for a minute or two before proceeding.
Patience is key. Eventually, the nuts will release their natural oils, turning the mixture from a thick paste into a smooth, creamy butter. This process can take anywhere from 5 to 15 minutes, depending on your machine and the type of nuts you’re using.
Step 4: Customize
Here’s where you can get creative. Once your nuts have transformed into a creamy spread, you can add a pinch of salt, a spoonful of honey for sweetness, or a drizzle of oil to achieve your desired consistency. Just add your extra ingredients and blend for another few seconds to mix everything thoroughly.
Step 5: Store
Transfer your homemade nut butter into an airtight container and store it in your pantry or fridge. In the fridge, your nut butter can last for several weeks or even months, though it’s so delicious, chances are it won’t stick around for that long.
Tips and Tricks
- For a silky-smooth nut butter, high-powered blenders or food processors work best.
- Your homemade nut butter might separate over time, with oil rising to the top. This is normal and doesn’t mean it has gone bad. Just give it a good stir before using.
- Experiment with different nuts and mix-ins like cocoa powder, cinnamon, or vanilla extract for a variety of flavors.
Conclusion
Making homemade nut butter is not only easy but also allows you to enjoy a healthier version free from unnecessary additives. With just a few simple ingredients and a bit of patience, you can whip up a delicious spread that’s perfect on toast, in smoothies, or for baking. Plus, it’s a fun way to experiment with different flavors and find your perfect nut butter blend. Give it a try – your taste buds (and wallet) will thank you!