How to Perfect the Art of Poaching Eggs for Elegant Dishes
Poached eggs are like the quiet, unassuming cousins of the egg family, often overshadowed by their more flashy relatives like the sunshiny fried eggs or the luxurious scrambled eggs. But what poached eggs may lack in bravado, they more than make up for in sophistication and versatility. When done right, a poached egg can transform a simple dish into an elegant masterpiece. However, achieving that perfect poach can seem like a culinary feat shrouded in mystery. Fear not! Perfecting the art of poaching eggs is not as daunting as it seems, and with a few simple tips and tricks, you’ll be on your way to creating restaurant-quality dishes right in your own kitchen.
1. Freshness is Key
The success of your poached eggs begins at the grocery store. Fresh eggs are the secret weapon in your poaching arsenal. The fresher the egg, the tighter the egg whites, resulting in less feathering (those wispy, angel hair-like strands) in the water. If the eggs have been sitting in your refrigerator for a while, save them for your omelets or baked goods and grab some fresh ones for poaching.
2. The Right Pot and Water
You don’t need fancy equipment to poach eggs, just a pot or a deep enough pan, and water. Fill your pot with enough water to provide a good swim for the eggs – about 3 to 4 inches should do the trick. You want enough water to ensure the eggs don’t touch the bottom and stick.
3. A Splash of Vinegar
A little vinegar in the poaching water can be your best friend. It helps the egg whites to coagulate more rapidly, reducing the risk of an overly wispy egg. You don’t need much, just a tablespoon of white vinegar for every quart of water. Don’t worry about the taste; you won’t even know it’s there.
4. The Perfect Temperature
The term “boiling” in poached eggs is a misnomer. The water should be just about to simmer—think tiny bubbles forming at the bottom of the pot but not quite breaking into a full boil. This is the sweet spot. Too high of a temperature and your eggs could fall apart; too low, and they may not cook properly.
5. The Swirl Method
Here’s where you can get a bit fancy. Before sliding your egg into the pot, stir the water with a spoon to create a gentle whirlpool. This helps the egg white wrap around the yolk, resulting in a more spherical shape. It’s like giving your egg a cozy blanket wrap as it cooks.
6. Timing is Everything
Poached eggs are delicate. They need attention and timing. For a softly poached egg with a runny yolk, 3 to 4 minutes is typically all it takes. If you prefer a firmer yolk, let it poach for an extra minute or so. Keep an eye on the clock, and don’t wander off.
7. The Ice Bath Method
If you’re prepping for a brunch or simply want to poach eggs in advance, the ice bath method is your friend. Once your eggs are poached, transfer them into an ice water bath to stop the cooking process. They can hang out there until you’re ready to use them. When it’s time to serve, simply give them a quick 30-second dip in hot water to warm up.
8. The Finishing Touches
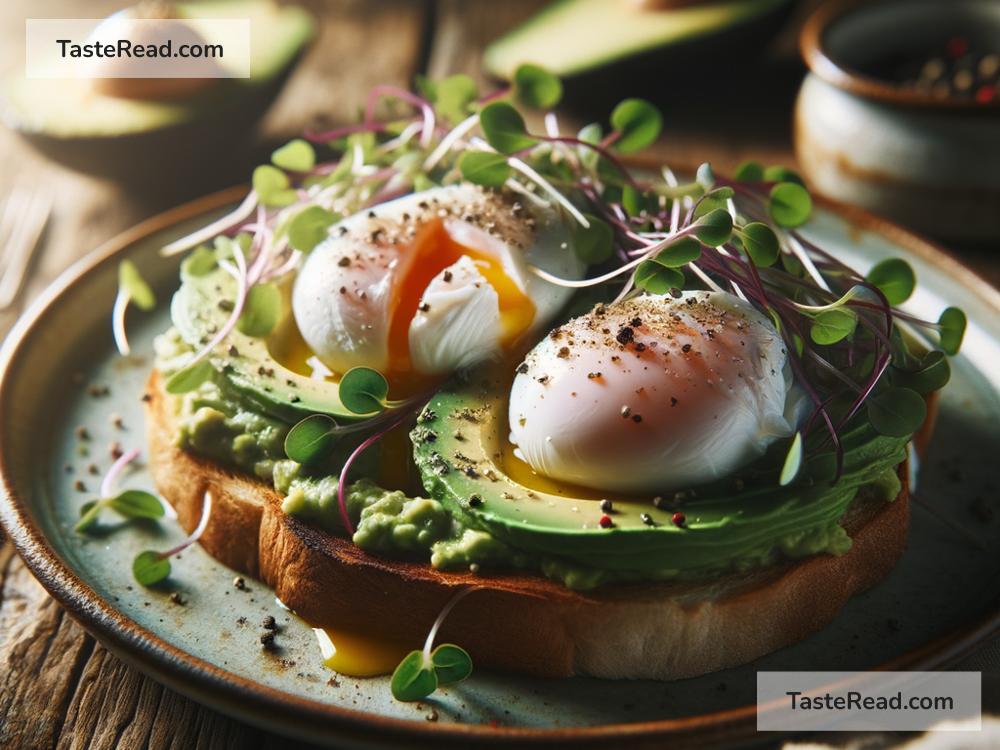
Congratulations, you’ve poached your eggs! Now it’s time to pat them dry with a paper towel (nobody wants watery eggs on their toast) and season with a little salt and pepper. Then, it’s up to you. Poached eggs are incredibly versatile; atop a salad, they add a rich, creamy dressing; over toast, they become a comforting, elegant breakfast; and alongside asparagus, they elevate a simple side dish.
Poached eggs can seem intimidating but mastering their preparation can elevate your home cooking to new heights. It takes a bit of practice, but once you’ve nailed the technique, the possibilities are endless. So, the next time you’re looking to impress with your culinary skills, remember the humble poached egg. With its silky texture and elegant appearance, it’s sure to wow your guests and your taste buds alike.