How to Perfect the Technique of Caramelizing Sugar for Desserts
Caramelizing sugar might sound like something straight out of a professional pastry chef’s handbook, but it’s actually a simple and incredibly useful technique anyone can master at home. Whether you’re whipping up a classic crème brûlée, a batch of caramel candies, or simply want to add a sweet, deep flavor to your desserts, perfecting the art of caramelizing sugar will elevate your cooking game. Let’s break down this culinary skill into easy-to-follow steps, ensuring your sugary creations come out perfectly every time.
Starting With the Basics
At its core, caramelizing sugar involves melting sugar until it becomes a golden-brown liquid. When sugar heats up, it breaks down and re-forms into complex compounds, creating that characteristic caramel flavor we all love. Sounds simple, right? Well, with a bit of patience and attention to detail, it can be!
What You’ll Need
- Granulated Sugar: The star of the show. Regular white sugar works best for learning.
- A Heavy-Bottomed Pan: This promotes even heat distribution, reducing the risk of burning.
- Wooden Spoon or Heat-Resistant Spatula: For stirring, though minimal stirring is recommended.
- Water (Optional): Some methods involve adding water to help dissolve the sugar evenly.
- A Brush and Water: To brush down the sides of the pan to prevent crystals from forming.
- Patience: Perhaps the most critical ingredient! Caramelizing sugar is all about watching and waiting.
Step-by-Step Guide to Caramelizing Sugar
-
Prep Your Pan and Ingredients: Measure out your sugar, and have all your tools ready. Speed is crucial once the process starts.
-
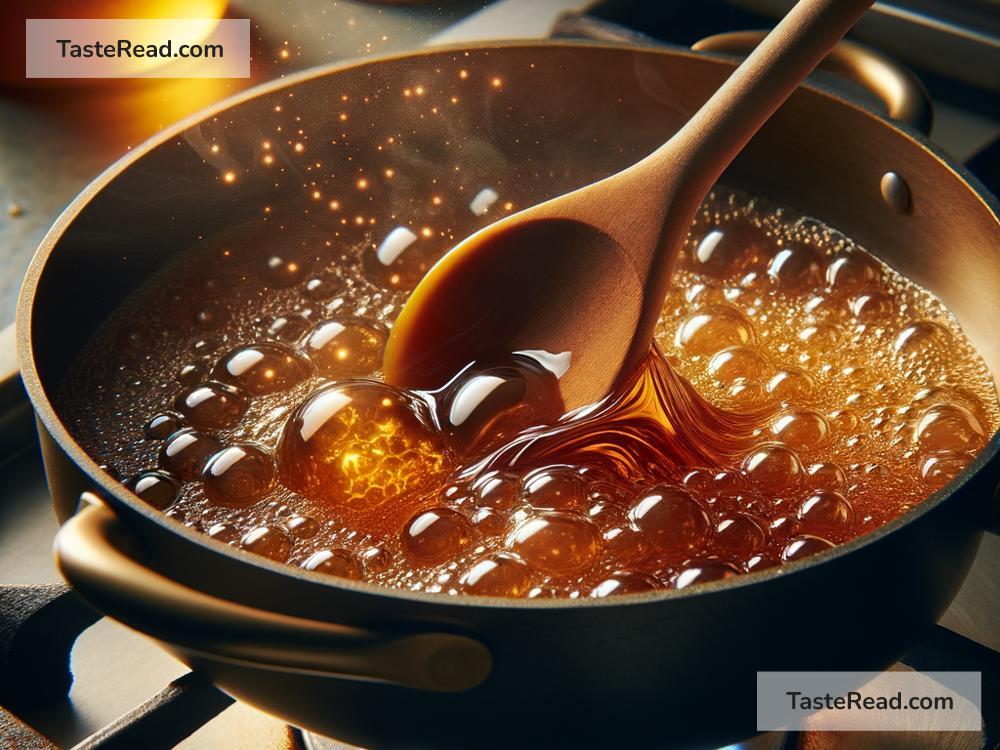
Melting the Sugar: If you’re using the wet method (with water), add enough water to just cover the sugar in the pan and cook over medium heat. For the dry method, simply spread the sugar evenly in the pan. Heat it over medium, stirring very infrequently if at all. The key is to let the sugar heat slowly so it doesn’t burn.
-
Monitoring the Color: As the sugar melts, it will first clump up before eventually melting into a clear liquid. The clear liquid will then start to color. This is where you need to be vigilant. Sugar progresses from a clear to golden to deep amber quickly. The shade of amber you’re aiming for depends on your recipe or preference, but remember that the darker it gets, the more bitter it will taste.
-
Managing the Heat: Once your sugar reaches the desired color, immediately remove the pan from the heat. Sugar retains heat and will continue to darken even off the stove. If your recipe calls for added ingredients (like cream or butter), have those measured and ready to add to cool the sugar down and stop the cooking process.
-
Final Touches and Safety: Caramel is extremely hot, so handle it with care. Pour it into prepared molds, over desserts, or whatever your recipe requires, working quickly as it hardens fast.
Troubleshooting
-
The Sugar Crystallized: This is a common issue, often caused by stirring too much or having sugar crystals on the side of the pan. You can try to salvage it by adding a bit of water and remelting the sugar, or start fresh, ensuring the pan and spoon are completely clean and you’re cautious with stirring.
-
Burnt Caramel: If the caramel gets too dark or tastes burnt, it’s best to start over. To prevent burning, keep a close eye on the sugar as it cooks, and be ready to remove it from the heat promptly.
-
Staying Safe: Sugar gets much hotter than boiling water, so avoid touching it, and if pouring it into molds or mixing with other ingredients, do so with care to avoid splashes.
Caramelizing sugar is a foundational cooking skill that opens doors to a plethora of dessert options. Like any culinary technique, it requires practice. But once you’ve got the hang of it, you’ll be surprised at how often you’ll want to incorporate this rich, complex flavor into your recipes. Happy caramelizing!