Capture the Perfect Sip: A Beginner’s Guide to Photographing Drinks with Stunning Reflections and Clarity
Have you ever drooled over those glossy images of cocktails and beverages in magazines and wondered how such perfect reflections and crystal-clear details are achieved? Photographing drinks may seem like a daunting task reserved for professionals, but with a few insider tips and a bit of practice, you too can capture beverages in all their refreshing glory. Here’s a straightforward guide to photographing drinks with perfect reflections and clarity.
1. Lighting is Key
The secret sauce to any great drink photograph is lighting. To achieve those mesmerizing reflections and clear, vibrant colors, natural light is your best friend. Set up your shooting area near a window where plenty of diffused daylight is available. However, direct sunlight can be too harsh and create unwanted shadows. If natural light isn’t enough or available, consider using a softbox or a white reflector to mimic its effects and evenly distribute light.
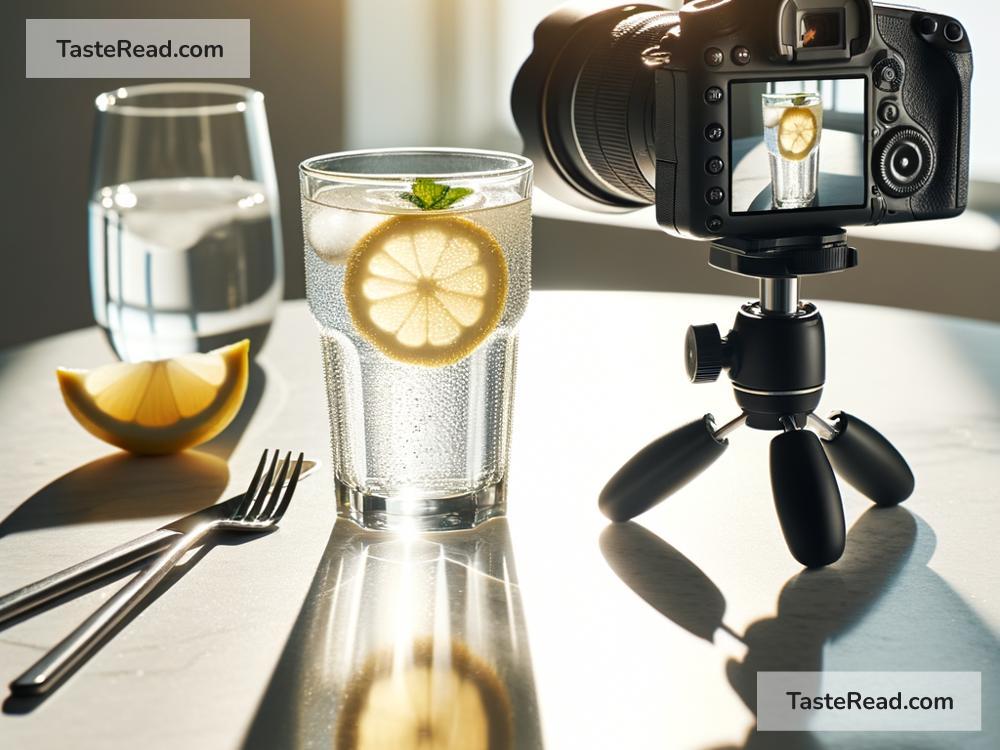
2. The Right Glassware Matters
The choice of glass plays a significant role in showcasing your drink splendidly. Always opt for a clean, smudge-free, and sparkling glass to ensure that it doesn’t distract from the drink itself. Different drinks shine in different types of glasses, so do a little research or experimentation to see what showcases your beverage best. A tall, slim glass might flatter a vibrant, layered cocktail, while a short, wide tumbler could be perfect for an old-fashioned whiskey drink.
3. Create a Scene But Don’t Overcrowd It
Setting the scene can add context and atmosphere to your drink photography, but it’s easy to go overboard. Use props and backdrops that complement the drink’s color palette and mood without overshadowing it. A couple of coasters, a straw, or some fresh ingredients that mirror the drink’s components can be excellent, subtle additions. Remember, the drink is the star of your photograph!
4. Nail the Composition
The composition is how all the elements in your photo are arranged. To make your drink really pop, consider the rule of thirds, where you divide the frame into nine equal segments. Place your drink along these lines or at their intersections to create a more balanced and engaging shot. Playing with angles can also add drama. A top-down view can work wonders for drinks with interesting textures or garnishes, while a side view can best capture the clarity and color of the beverage.
5. Achieving Perfect Reflection
Creating a perfect reflection adds a layer of sophistication to your drink photography. One simple method is to use a reflective surface like a glass or black acrylic panel. Place your drink on the panel and adjust your lighting until you get a crisp reflection. Ensure the background is plain and doesn’t distract from the reflection. The key is to experiment with both the placement of your drink and the light source until you achieve that flawless mirror image.
6. Focus on Clarity
Clarity is all about the details. Use a tripod to stabilize your camera and prevent any blurriness. Setting your camera to a high aperture (f/8 or higher) ensures that both the drink and its finer details are in sharp focus. If your camera has a macro setting or if you have a macro lens, use it! It’s perfect for capturing close-up textures, like the fizz in a soda or the delicate condensation on a chilled glass.
7. Edit Thoughtfully
Even with all the right techniques, most photos can benefit from a bit of post-processing. Use photo editing software to adjust the brightness, contrast, and saturation to make your colors pop. But be cautious – over-editing can make your drink look unnatural. Aim for enhancements that bring out the best in your photograph without altering the drink’s authentic appeal.
Conclusion
Photographing drinks with perfect reflections and clarity might sound like a challenge, but it’s definitely achievable with the right approach. Paying attention to lighting, glassware, composition, and details, while experimenting with different settings and angles, can elevate your drink photography. Remember, practice makes perfect. So, grab your camera, mix up your favorite beverage, and start shooting. Who knows? You might just capture the next iconic drink photograph.
Cheers to your success in drink photography! 🍹✨