How to Photograph Food with Different Textures: Crisp vs. Soft
Photographing food is an art form that allows us to capture the beauty and deliciousness of a dish in a single frame. One of the challenges of food photography is dealing with different textures, especially when it comes to contrasting textures like crisp versus soft. Whether you’re snapping pictures for a food blog, social media, or just for fun, understanding how to highlight these textures can take your food photography to the next level. Let’s dive into some easy-to-follow tips on how to photograph food with different textures.
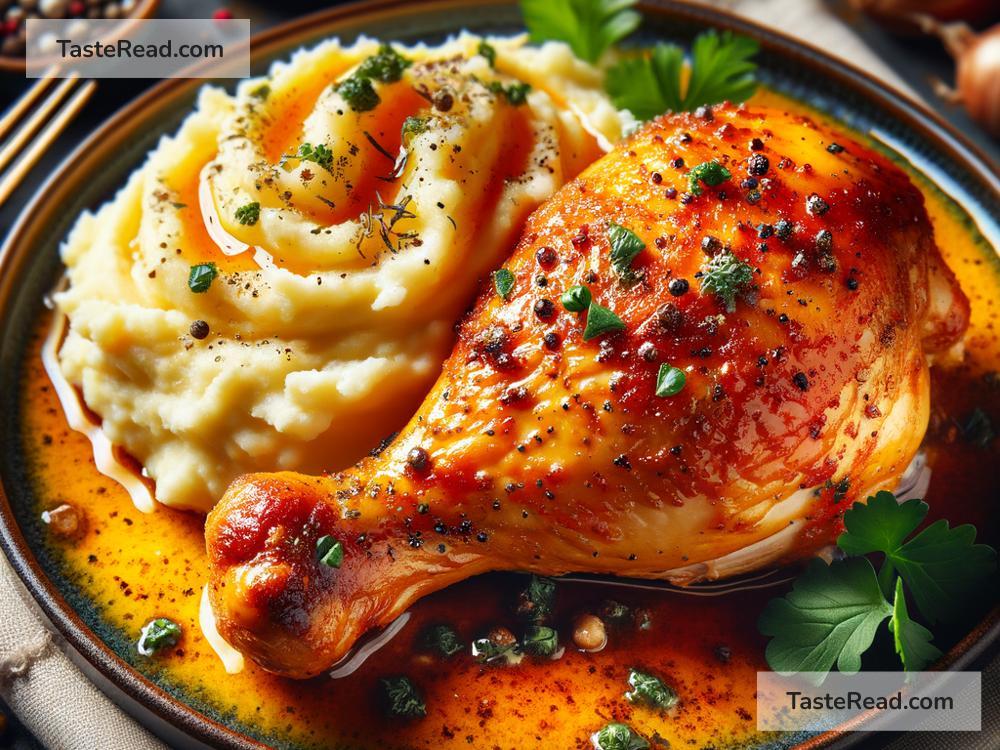
Understanding Texture in Food Photography
Texture in food photography is about how the surface of the food looks. It’s what makes a crispy fried chicken look different from a smooth and creamy ice cream. The texture is a key element that adds interest and depth to your photos, making them more appealing and engaging. When photographing food, our goal is to make the viewer taste the dish with their eyes. This means making the texture of the food as palpable as possible.
Lighting: Your Best Ally
Lighting plays a crucial role in highlighting textures. For crisp textures, you want to create shadows that accentuate the edges and crinkles of your food. This means sidelighting is your best friend. Place your light source to the side of the food, which will cast shadows and emphasize the texture of the crisp elements.
On the other hand, for soft textures like mousse or whipped cream, you’ll want to soften the shadows to avoid harsh lines. Diffused lighting works wonders here. You can achieve this by placing a diffuser (like a white cloth or a piece of baking paper) between your light source and the food. This will scatter the light more evenly and highlight the velvety smoothness of soft-textured foods.
Angle and Composition
Your shooting angle can significantly impact how texture is perceived in your photos. For crisp textures, an angle that slightly looks down on the food often works well. This allows the light to catch those rough edges and crispy bits effectively. Close-ups are great for showing off texture, so don’t be afraid to zoom in and fill the frame with the food.
When dealing with soft textures, a straight-on angle can be quite effective. It gives a sense of depth and layers, especially if you’re photographing foods with multiple components, like a layered cake. The key is to find an angle that shows off the smooth surface and the delicate nature of the food.
Focus and Depth of Field
Sharp focus is essential when emphasizing texture. Use a narrow aperture (a higher f-number) to keep the entire dish in focus, especially for dishes where both crisp and soft elements are present. This ensures that the viewer’s eye can wander through the photo, appreciating the different textures.
For an artistic touch, use a wider aperture (a lower f-number) to create a shallow depth of field. This technique blurs the background and some parts of the foreground, drawing attention to the part of the food you want to highlight, such as the crispiness of a crust or the soft swirl of cream on top of a dessert.
Enhance with Editing
Post-processing is a tool that shouldn’t be underestimated in food photography. Software like Lightroom or Photoshop can help you enhance textures that didn’t quite pop in the original shot. Increasing the clarity and contrast can make crisp textures stand out more. For soft textures, softening the highlights and shadows can enhance the gentle, smooth feel of the food.
Practice Makes Perfect
Like all forms of photography, mastering the art of photographing different food textures takes practice. Experiment with different lighting setups, angles, and compositions. Try photographing a variety of foods with distinct textures to get a feel for what techniques work best for each type.
In conclusion, photographing food with different textures requires an understanding of lighting, angle, focus, and post-processing techniques. By using these strategies to emphasize the unique textures of the food, you can create mouth-watering images that appeal to the senses. So grab your camera, play around with these tips, and watch as your food photography skills grow. Remember, the goal is always to make the viewer feel like they can reach into the photo and take a bite!

