How to Photograph Sweet Treats: Styling and Lighting Tips
Are you a baking enthusiast or a food blogger looking to make your sweet treats the stars of your social media feed or blog? Well, you’re in the right place! Capturing the gooey, sprinkle-topped, and sugar-dusted glory of desserts can truly be an art form. But fear not, with some simple styling and lighting techniques, you can transform your photographs from dull to drool-worthy. Here’s how:
Understanding the Basics: Lighting
First things first, lighting is everything in photography, especially when it comes to food. Natural lighting is your best friend. The soft, diffused sunlight of early morning or late afternoon brings out the textures and colors of your sweet treats like nothing else. So, set up your shooting space near a window where plenty of natural light flows in. Remember to avoid using flash as it can create harsh shadows and alter the colors of your sweets.
Getting the Set Ready: Styling Tips
Once you’ve got the light situation sorted, it’s time to set the stage for your delicious subjects. Here’s how to do it:
-
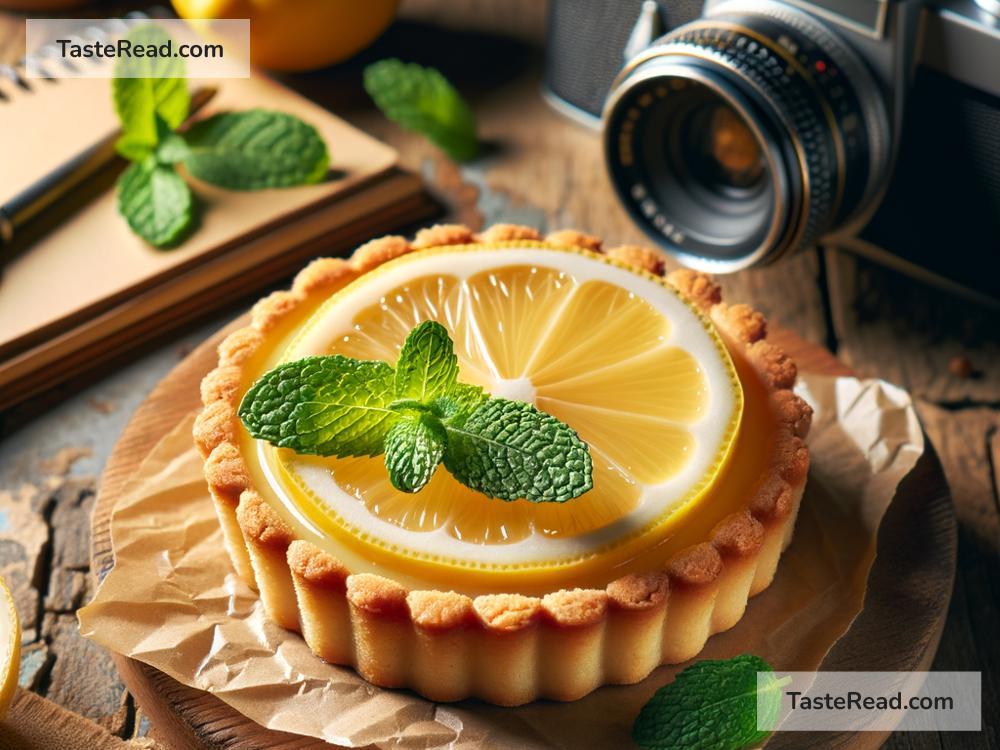
Choose the Right Backgrounds: Keep it simple. Use neutral tones and textures that complement without overpowering the dessert. Think marble slabs, wooden boards, or plain colored fabrics. These backgrounds work wonders in making your treats pop.
-
Incorporate Props Wisely: Props can add context and depth to your photos, but it’s easy to overdo it. Select props that match the vibe of what you’re shooting. Vintage cutlery, rustic napkins, or even ingredients that went into making the dessert can add a lovely touch without distracting from the main attraction.
-
Play With Colors: While neutral backgrounds are great, adding a pop of color through props or the treats themselves can make your photos stand out. If your dessert is rich in color, let it be the star; keep everything else understated.
-
Textures and Layers: Introducing different textures and layers can add depth to your photos. A sprinkling of powdered sugar on a brownie or a glossy glaze on a donut not only makes them more tempting but also more photogenic.
The Magic of Angles:
Not every dessert demands the same angle. Play around to see what showcases your treat’s best side. For tall, layered cakes, a side shot can show off those beautiful layers. Flat lays work wonders for capturing the spread of multiple items, like cookies or cupcakes, allowing you to show patterns or the abundance of goodies. Sometimes, a 45-degree angle can give the viewer an almost-real taste of what it would be like to grab a piece.
Lighting Like a Pro
Now that you’re a bit more familiar with styling, let’s dive a bit deeper into lighting:
-
Diffuse the Light: If the natural light is too harsh, diffuse it with a sheer white curtain or a diffuser. It softens the light, reducing harsh shadows and highlights.
-
Use Reflectors: Place a reflector or even a simple piece of white cardboard on the side opposite to the light source. This helps bounce light back onto the subject, filling in shadows, and making the dessert look more inviting.
-
Experiment with Backlighting: Backlighting (light coming from behind the subject) can enhance the texture and make transparent or semi-transparent treats, like jellies or drinks, glow beautifully.
Final Touches: Post-Processing
Even the best photos can benefit from a bit of tweaking. Use photo editing apps to make minor adjustments to brightness, contrast, and saturation to make those colors truly pop. Remember, the goal is to enhance, not drastically change. Your treats should look as natural and appetizing as they do in real life.
Practice, Practice, Practice
Like baking, photography is all about experimenting and discovering what works best for you. Don’t be disheartened by initial failures. With practice, your photos will start to match your vision, maybe even surpass it!
By following these simple styling and lighting tips, you’ll be well on your way to capturing the beauty of your sweet treats. So, don your baker’s hat, grab your camera, and start shooting. Soon, you’ll not only impress your followers with your baking skills but also with your drool-worthy photographs!
Happy shooting, and remember, the best part about photographing sweet treats is getting to eat them afterward!