Title: The Easy Guide to Clean and Prep Leafy Greens Like a Pro!
Leafy greens are a fundamental part of a healthy diet, packed with essential vitamins and nutrients that can supercharge your health. But before you toss them into your next salad or smoothie, it’s crucial to clean and prepare them correctly. Why? Because greens can harbor dirt, pesticides, and even little bugs that you definitely don’t want to end up on your plate. Fear not! Cleaning and preparing leafy greens is a breeze with these simple steps. Let’s dive in!
Step 1: Choose Your Greens Wisely
First things first, whether you’re shopping at your local farmers’ market or your neighborhood grocery store, look for greens that are fresh and vibrant. Avoid leaves that are wilted, yellow, or have dark, slimy spots. Fresh, healthy greens are the foundation of a delicious and clean meal.
Step 2: Rinse Away
Once home, the real magic begins. Start by separating the leaves from the stems if you’re dealing with something like kale or Swiss chard (don’t worry, we’ll deal with those stems later!). For lettuces, it’s usually enough to just tear them into smaller pieces. Now, fill a large bowl with cold water and immerse your greens. Gently swish them around to help loosen any dirt or unwanted little critters that might be clinging on. This process is like giving your greens a relaxing spa day, ensuring they’re clean and refreshed.
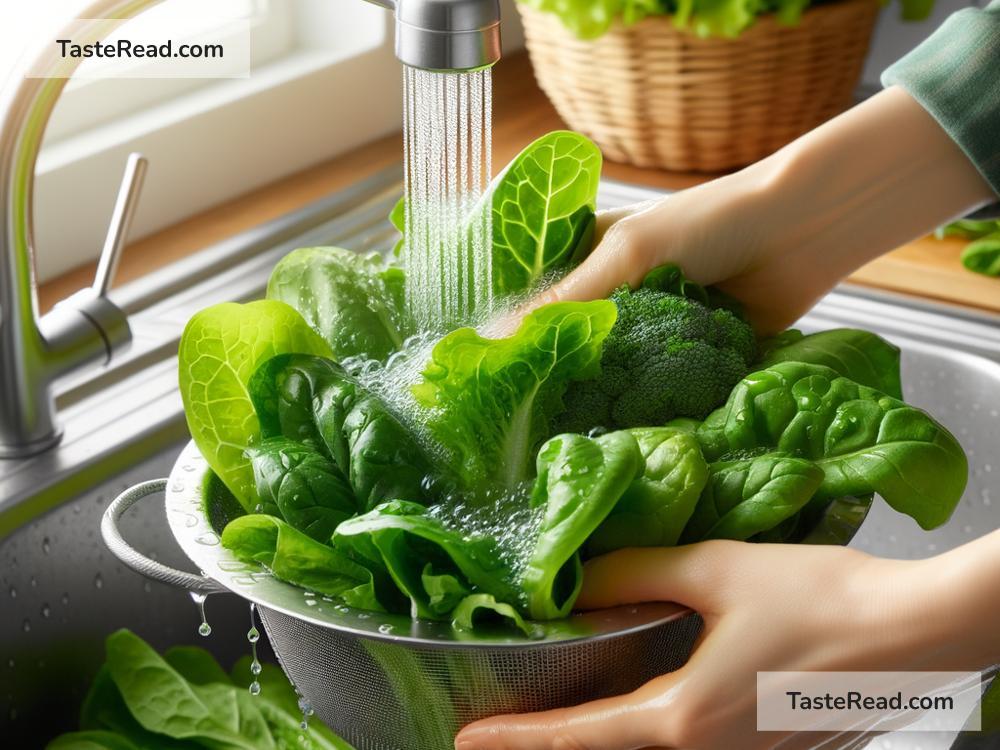
Step 3: The Double Rinse
After their initial bath, it’s time for a rinse under running water. This extra step helps to ensure you’ve really gotten rid of all the grimy bits. Think of it as a final rinse cycle in a washing machine, making sure everything is squeaky clean.
Step 4: Spin to Win
Now that your greens are washed, they need to be dried. A salad spinner is your best friend here, efficiently whisking away moisture without bruising the leaves. No spinner? No problem! Lay out your greens on a clean kitchen towel or paper towels and gently pat them dry. Remember, too much moisture can ruin the texture of your greens and make your salads soggy, so don’t skip this step!
Step 5: Dealing with the Stems
For tougher greens like kale or collard greens, you’ll often need to remove the stem. The easiest way is to simply strip the leaves away with your fingers or use a knife to cut them out. But don’t throw those stems away! They can be chopped up and sautéed as a crunchy addition to dishes or saved for making stock.
Step 6: Storage Smart
If you’re not using your greens right away, proper storage is key to keeping them fresh. Lightly wrap your greens in a paper towel to absorb any excess moisture and then place them in a plastic bag or storage container. This setup helps maintain the right humidity level, extending the life of your leafy greens significantly. Most greens will stay fresh for up to a week when stored this way, but always check them before use just to be safe.
Step 7: Enjoy!
Congratulations, you’re now a leafy green cleaning expert! Whether you’re making a crisp salad, a nutrient-packed smoothie, or a comforting stir-fry, your greens are ready to be the star of the show.
Bonus Tips:
- Vinegar Bath: For an extra level of cleanliness, some people like to add a bit of white vinegar to their initial washing water. A ratio of 1 part vinegar to 3 parts water is a good rule of thumb. Just be sure to rinse thoroughly after to avoid any vinegar taste.
- Buying Organic: If you’re concerned about pesticides, buying organic can be a great choice. Just remember, organic doesn’t mean dirt-free, so you’ll still need to wash them properly.
Cleaning and preparing leafy greens might seem like a chore, but it’s truly the foundation of healthy eating. With these simple steps, you’ll ensure your greens are not only delicious but also safe to eat. Happy cooking!