How to Use a Dehydrator for Creating Unique Flavors and Textures
Have you ever munched on a bag of crunchy apple chips or savored the intense flavor of sun-dried tomatoes and wondered how they’re made? These delicious treats, along with many others, can be created in your very own kitchen using a magic tool: the food dehydrator. This magnificent device can help you unlock a world of unique flavors and textures, turning ordinary fruits, vegetables, and even meats into tasty, shelf-stable snacks. But how do you use a dehydrator? Let’s break it down into simple steps and explore the exciting culinary adventures it offers.
1. Understand Your Dehydrator
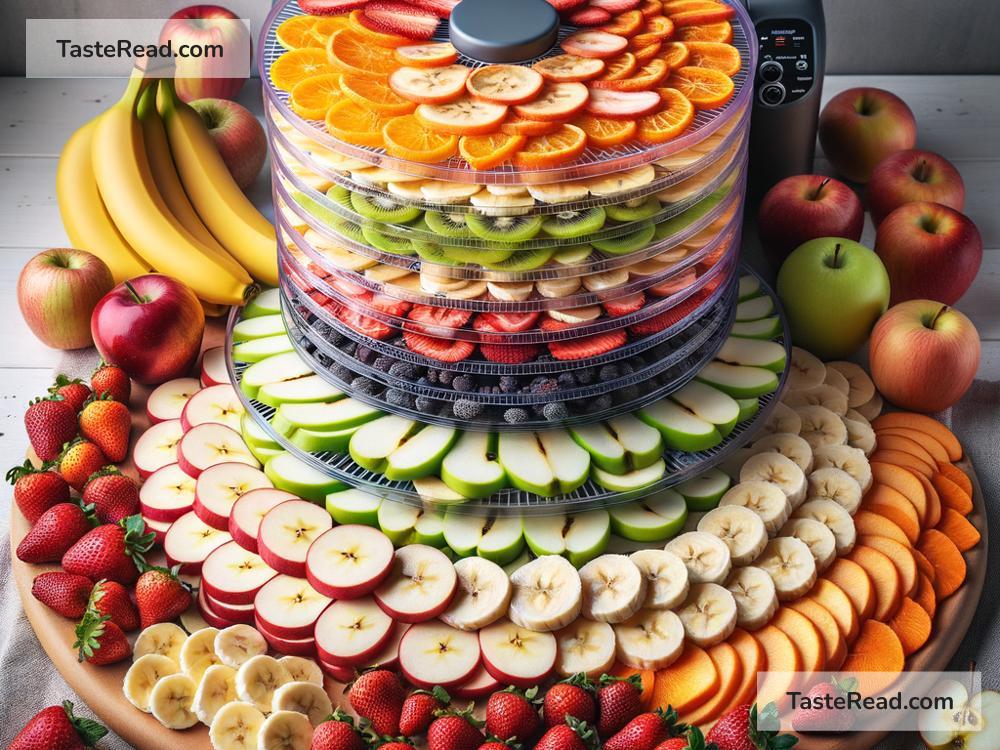
First things first: get to know your dehydrator. While there are various models out there, most work on the same basic principle—using low heat and a fan to remove moisture from food, thus preserving it and concentrating its flavors. There are round and square types, some with adjustable shelves, and others with temperature settings. Familiarize yourself with its parts, capacity, and how to adjust the settings according to what you’re dehydrating.
2. Choose Your Ingredients
The fun part begins with choosing what to dehydrate. Fruits and vegetables are the most popular choices due to their natural sugars and flavors which intensify during dehydration. However, don’t limit yourself—herbs, meats (for making jerky), and even flowers (for teas) can all be dehydrated. Fresh, ripe, and high-quality ingredients yield the best results. Wash and prepare everything before you start—slice thinly and evenly for uniform drying.
3. Pre-Treat Some Foods
Certain foods benefit from a quick pre-treatment before dehydrating. Fruits like apples, bananas, and pears may turn brown; a dip in lemon juice or ascorbic acid solution can help preserve their color. Vegetables like carrots and potatoes might need blanching (briefly boiling) to speed up drying time and achieve a more vibrant color. Research your specific ingredient to determine if pre-treatment is necessary.
4. Lay It All Out
Once you’ve prepped your ingredients, lay them out on the dehydrator trays. Ensure nothing overlaps; air must circulate around each piece for even drying. Arrange similar items on the same tray, as different foods have varying drying times. This not only makes the process more efficient but also prevents flavors from mixing.
5. Set It and Forget It (But Don’t Really Forget It)
Adjust the temperature based on what you’re dehydrating. Fruits and veggies do well at a lower heat, around 135°F (57°C), while meats require higher temperatures, about 155°F to 160°F (68°C to 71°C), to ensure safety. Depending on what you’re drying, it can take anywhere from a few hours to a whole day. Start checking periodically after the first few hours, as drying times can vary based on moisture content and thickness.
6. Know When It’s Done
Identifying when food is adequately dehydrated is crucial. Vegetables should be crispy or very brittle. Fruits may be slightly chewy or crispy, depending on your preference. Meats should be tough and completely dry. If you’re unsure, it’s better to over-dry than under-dry, as leftover moisture can lead to mold.
7. Store Properly
Once done, let your dehydrated treasures cool before storing. Use airtight containers, vacuum-sealed bags, or mason jars to keep moisture and bugs out. Properly dehydrated and stored food can last months, even years, without refrigeration.
Ideas to Get You Started
- Fruit Leather: Puree ripe fruits, spread on a dehydrator sheet, and dry for a chewy, sweet snack.
- Veggie Chips: Slice veggies (beets, sweet potatoes) thinly, season to taste, and dehydrate for a crunchy treat.
- Beef Jerky: Marinate thin slices of beef in your favorite spices and dry until chewy.
The Final Chew
Using a dehydrator opens up a world of culinary possibilities, from healthy snacks and convenient camping food to homemade gifts and pantry staples. It’s an exploration of texture and flavor, transforming the ordinary into the extraordinary. Whether you’re making tangy fruit rolls, spicy jerky, or savory vegetable chips, each batch is a chance to experiment and discover new favorite treats. So, dive into dehydrating and watch as your kitchen becomes a flavor factory!
Remember, dehydrating is both an art and a science—timing, temperature, and preparation all play vital roles in achieving perfect results. But don’t be afraid to experiment. Sometimes, the best discoveries come from happy accidents. Happy dehydrating!