How to Use Props and Backgrounds to Complement Food in Photography
Food photography is an art that goes beyond simply snapping a picture of your meal. It involves a deep understanding of how different elements like lighting, angles, props, and backgrounds work together to transform an ordinary dish into a mouth-watering spectacle. Today, we’re focusing on two crucial but often overlooked components: props and backgrounds. These elements, when used thoughtfully, can elevate your food photography from good to great. Here’s how to use props and backgrounds to complement food in your photography.
Understanding the Role of Props
Props are the supporting actors in the storytelling of your food photography. They add depth, context, and interest to the main subject – which is, of course, the food. But how do you decide which props to use? Here’s a simple guide:
-
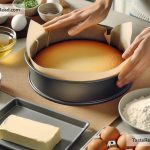
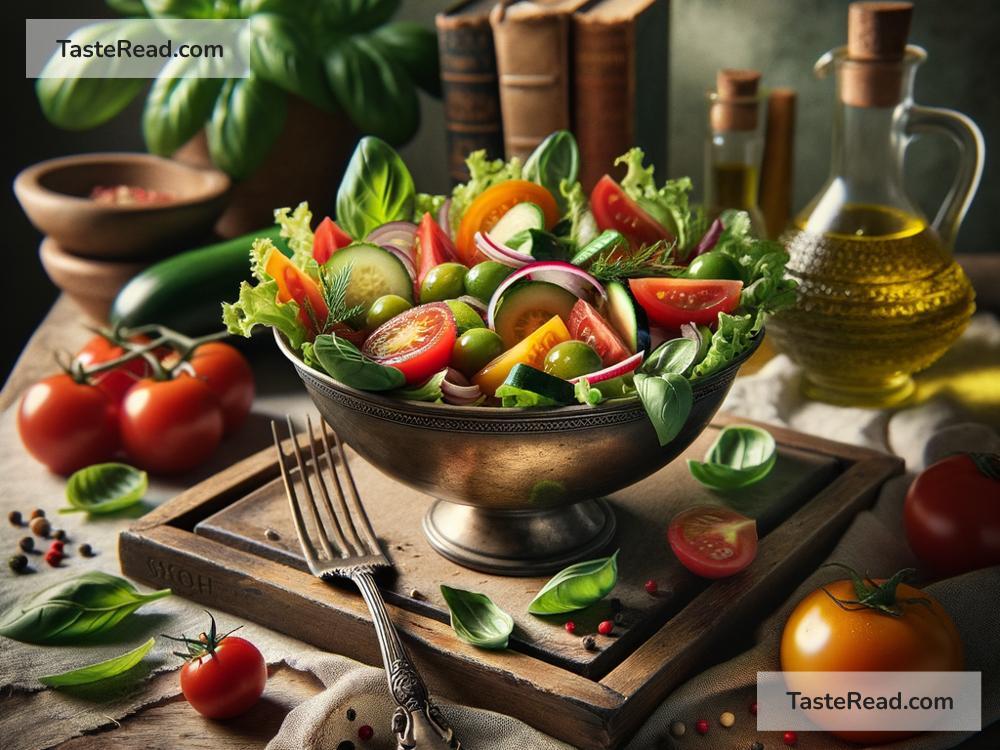
Keep It Relevant: Choose props that make sense to the food you’re photographing. If you’re shooting a bowl of pasta, consider a rustic table, a piece of cloth, a fork, or even some raw ingredients like tomatoes or basil leaves. The idea is to select items that could naturally be found alongside the dish.
-
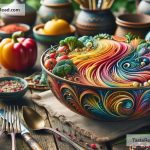
Texture and Color: Props can introduce texture and color, adding layers to your composition. A rough wooden board can add warmth and a sense of rustic charm, whereas a sleek marble surface might suggest elegance and sophistication. Similarly, a brightly colored napkin can make a dull dish pop, or a neutral-toned plate can tone down a visually busy meal.
-
Less Is More: It’s easy to get carried away with props, but sometimes, simplicity is key. Too many items can distract from the main subject. If in doubt, remove one item from your setup and see if it looks better. Remember, every prop should serve a purpose.
Choosing the Right Background
The background in food photography is like the canvas for a painting. It sets the stage and influences the mood and atmosphere of the shot. Here’s how to choose and use backgrounds effectively:
-
Contrast and Complement: Your background should either contrast with or complement the food. For instance, vibrant dishes often stand out against neutral backgrounds, while a more monochromatic dish might benefit from a colorful backdrop. The key is balance; the background should never overshadow the food.
-
Texture Matters: Just like with props, texture in your background can add a lot of interest. A distressed wood table can convey a sense of history and warmth, whereas a smooth, reflective surface can create a modern, minimalistic look.
-
Depth of Field: Sometimes, what makes a background perfect is how much of it you can see. Using a shallow depth of field (achieved by using a wide aperture) can blur the background, ensuring the food remains the star of the show while the background adds a subtle hint of color or texture.
Combining Props and Backgrounds
The magic happens when props and backgrounds are combined thoughtfully. Here are a few tips:
-
Tell a Story: Think about what story you want to tell with your photograph. A morning breakfast scene might call for a sunny window as a background and a newspaper, coffee cup, or eyeglasses as props. Each element contributes to the narrative.
-
Experiment with Layers: Layering props can create a sense of depth and richness. A cutting board atop a burlap sack, with scattered flour and a rolling pin, can beautifully set the scene for a baker in action.
-
Adjust According to Scale: Be mindful of the size of your props and background elements in relation to your food. Oversized props can dwarf your dish, while too small props might get lost in the composition.
In the end, the goal of using props and backgrounds in food photography is to complement the dish, creating an engaging and harmonious composition that appeals to the senses. By carefully selecting and strategically placing these elements, you can tell a story that celebrates the beauty and artistry of the food. Remember to experiment, adjust, and most importantly, have fun with it. Your unique perspective is what will ultimately make your food photography stand out.