The Ultimate Guide: Transforming Stale Cookies into Divine Milkshakes
Have you ever found yourself staring at a pack of cookies that didn’t quite make it to the “freshly-baked” benchmark anymore? Before you consider tossing them into the nearest bin, pause for a moment. What if I told you that those seemingly unappealing, stale cookies could be the star ingredient for your next favorite treat? Yes, we’re diving into the delightful world of turning stale cookies into irresistible milkshakes! It’s not just a rescue mission; it’s an upgrade. So, let’s embark on this culinary adventure together.
Embrace the Crunch!
First things first, understand that the firmness of stale cookies is actually a blessing in disguise when it comes to milkshakes. They not only blend into the perfect consistency easier than their fresher counterparts but also still manage to leave those nostalgic, crunchy bits that make every sip a surprise. Now, let’s move on to the “how-to” part.
Step 1: Gather Your Ingredients
Besides your stale cookies (any kind will do – chocolate chip, Oreo, snickerdoodle, you name it!), you’ll need a few staples:
– Ice cream (Vanilla works best as a base, but feel free to experiment)
– Milk (Any type, from whole milk for creaminess to almond milk for a lighter option)
– Optionally, whipped cream, chocolate syrup, or any other topping you crave
Step 2: The Blend
Start by crumbling your stale cookies. Don’t worry about getting them too fine, as they’ll be blended anyway. Take a blender and first add in about two cups of your ice cream of choice. Follow this with a generous splash of milk—how much exactly depends on how thick or runny you like your milkshakes. For a thick shake, go easy on the milk; for a runnier consistency, add a bit more.
Now, for the magic part – toss those crumbled cookies into the blender. The rule of thumb here is about one cup of cookies for every two cups of ice cream, but hey, rules in the kitchen are made to be broken. Feeling extra decadent? Go wild with those cookies!
Blend these ingredients on a medium to high setting until smooth. Pause halfway to give it a stir, ensuring those cookie pieces are getting evenly mixed.
Step 3: Customize
This is where you can let your creativity shine. Add in a dash of vanilla extract for a flavor boost or a blob of peanut butter for a nutty twist. Chocolate syrup, caramel sauce, or even a handful of berries can take your shake to the next level. Blend again briefly to incorporate your add-ins.
Step 4: Serve with Flair
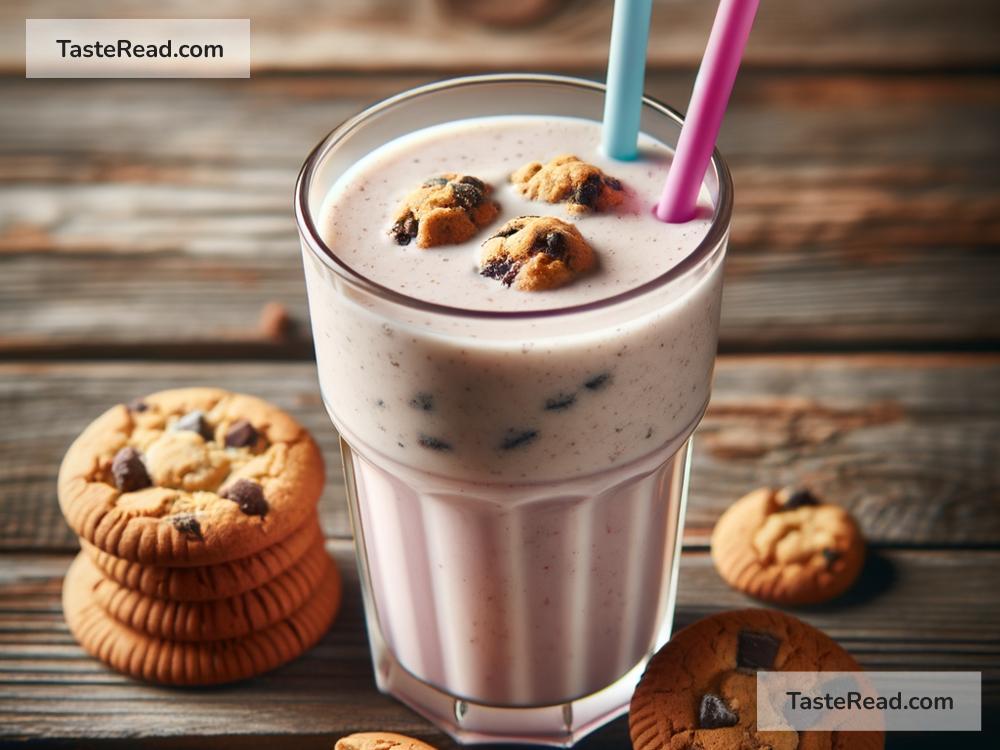
Pour your velvety milkshake into a tall glass, leaving room for some flair on top. A dollop of whipped cream, a sprinkle of cookie crumbs, a drizzle of syrup, or even a whole cookie as a garnish – this is your moment to impress. Don’t forget to pop in a wide straw or even a spoon to tackle those chunky bits!
Tips for Milkshake Mastery
- Balance is Key: Finding the right ratio of ice cream to milk is essential. Experiment to discover what works best for you.
- Cold is Gold: Chill your glasses in the freezer prior to serving. This simple trick keeps your milkshake colder and thicker for longer.
- Texture Talk: For those who adore bits in their shake, add a few cookie pieces after blending the initial batch for extra crunch.
- Flavor Fusion: Don’t be afraid to mix cookie types. A combination of chocolate chip and oatmeal cookies offers a delightful contrast.
Conclusion
Turning stale cookies into milkshakes isn’t just about salvaging what’s on the verge of being wasted; it’s about creativity, customization, and enjoying the simple pleasures. This approach not only applies to cookies but is a testament to looking at our kitchen leftovers with innovative eyes. So, the next time you come across stale cookies, see them not as a culinary dead-end but as the beginning of your next delicious project. Cheers to that!
Now go forth, blend, and transform those neglected cookies into a concoction that will leave you wondering, “Why haven’t I done this sooner?”