Unlock the Secrets of Texture and Contrast in Food Photography
In the dazzling world of food photography, where every detail counts, harnessing the power of texture and contrast can transform a simple snapshot into a mouthwatering masterpiece. Whether you’re a budding Instagram foodie, a culinary blogger, or just passionate about capturing your culinary creations, knowing how to play with these elements can elevate your food photography to new heights. Let’s dive into some simple techniques to make your food photos stand out, making every viewer hungry for a bite.
1. Embrace the Power of Textures
Think about the last time a food photo made you stop scrolling. Chances are, its texture played a big part in catching your eye. Texture in food photography is about capturing the essence of food’s physical feel – crunchy, smooth, creamy, or fluffy – in a visual format. Here’s how you can make those textures pop:
-
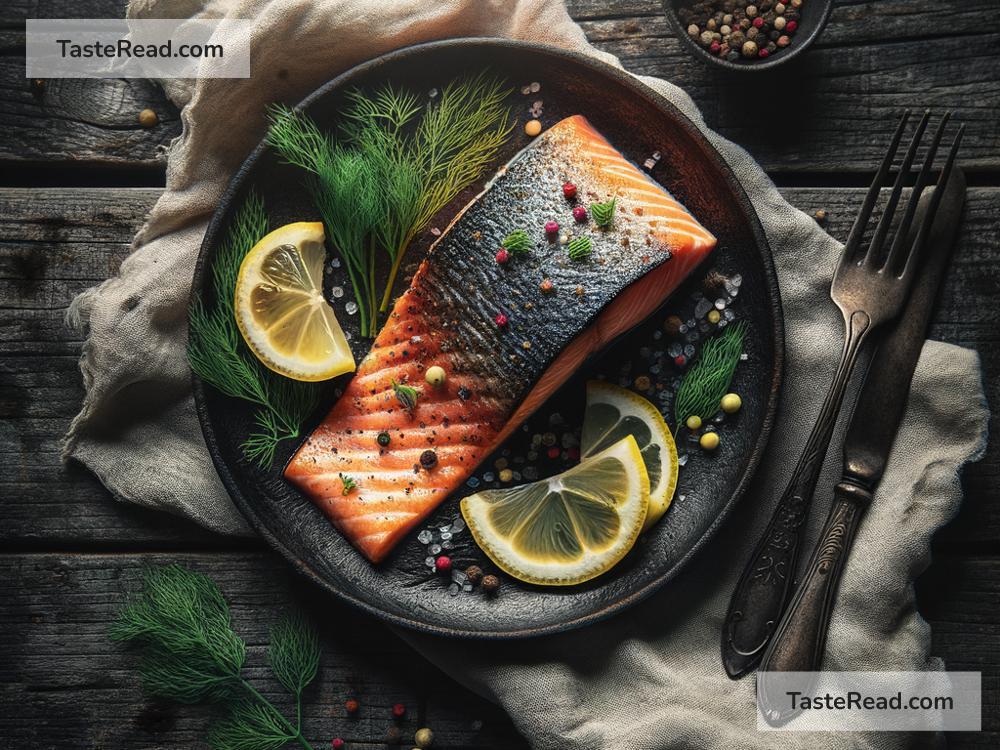
Get Up Close: Use a macro lens or simply zoom in (without losing image quality) to capture the intricate textures of your food. The closer you get, the more detailed your photo will be, allowing viewers to imagine the crunch of that toasted bread or the smoothness of that silky chocolate ganache.
-
Play with Light: Side lighting can dramatically enhance the texture of your dish. Position your light source (natural light from a window works great) to the side of your food. This creates shadows and highlights, giving your food a more three-dimensional look and making textures stand out.
-
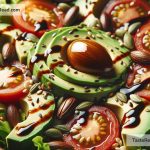
Contrast Soft and Rough Textures: Combine different textures in your composition. Place a smooth, creamy soup next to some rustic, crusty bread, or sprinkle some coarse sea salt on a smooth caramel dessert. This not just adds visual interest but also tells a story of varied tastes and experiences.
2. Master the Art of Contrast
Contrast isn’t just about black versus white; it’s about the juxtaposition of opposites. In food photography, playing with contrast can mean different things – contrasting colors, textures, or even temperatures (imagine the steam of a hot soup against a cool background). Here’s how you can use contrast to your advantage:
-
Color Contrast: Use complementary colors (those opposite each other on the color wheel) to make your dish stand out. A vibrant green basil leaf on a plate of spaghetti pomodoro or a dash of bright red paprika on a creamy white soup can make your photo much more visually appealing.
-
Textural Contrast: As mentioned earlier, contrasting textures within the photo can captivate the viewer. But don’t stop at the food. Think about the surfaces and backgrounds too. A glossy chocolate tart on a rough, matte stone slab? Perfection.
-
Light and Shadow: High contrast lighting can add drama to your food photos. Play around with intense side lighting or backlighting to create deep shadows and bright highlights. This technique can bring a simple dish to life, giving it an almost theatrical appeal.
3. The Simple Background Strategy
While textures and contrasts play starring roles, the background is the unsung hero of food photography. A cluttered or overly busy background can distract from your main subject. However, a well-chosen background can amplify textures and contrasts.
-
Go Neutral: Neutral, solid-colored backgrounds can make your food the star of the show. Whites, blacks, greys, and earth tones can enhance the colors and textures of your dish without competing for attention.
-
Texture Matters: Sometimes, a textured background can add to the photo’s overall appeal. A wooden table, a marble countertop, or a linen cloth can add depth and interest without overwhelming the viewer. Just make sure the texture complements the food rather than overshadowing it.
Wrapping It Up
Creating impactful food photos is an art form that combines technical skills with your unique creative vision. By mastering the use of texture and contrast, you can bring your culinary captures to life, making viewers feel like they can reach out and take a bite. Practice these techniques regularly, experiment with different combinations, and most importantly, have fun with it. Remember, the best food photos are the ones that not only look stunning but also tell a delicious story.
So, the next time you’re about to capture a culinary creation, take a moment to consider how texture and contrast can enhance your photo. With these tips in your toolkit, you’re well on your way to capturing food photos that are not just seen but felt and tasted with the eyes. Happy shooting!