Making Chips from Kale Stems: A Simple and Delicious Snack!
Kale has climbed the ranks to become a superstar among vegetables, loved by many for its nutritional benefits and versatility in the kitchen. While we often savor the leafy greens in salads, smoothies, or sautés, the stems are usually tossed aside, seen as too tough and fibrous. But what if I told you that those stems could be transformed into a crunchy, savory snack that’s both delicious and waste-reducing? Yes, I’m talking about making chips from kale stems!
Kale stem chips are a simple, cost-effective, and eco-friendly way to enjoy every part of your kale. Not only do you get to taste something uniquely delightful, but you also contribute to reducing food waste in your home. Let’s dive into how you can make this crunchy treat in the comfort of your own kitchen.
Ingredients:
- Kale stems (from about 1 bunch of kale)
- Olive oil (around 2 tablespoons)
- Salt (to taste)
- Optional: other seasonings like garlic powder, smoked paprika, or nutritional yeast for added flavor.
Equipment:
- Baking sheet
- Parchment paper (or a silicone baking mat)
- Oven
- Mixing bowl
- Knife (for trimming)
Steps:
-
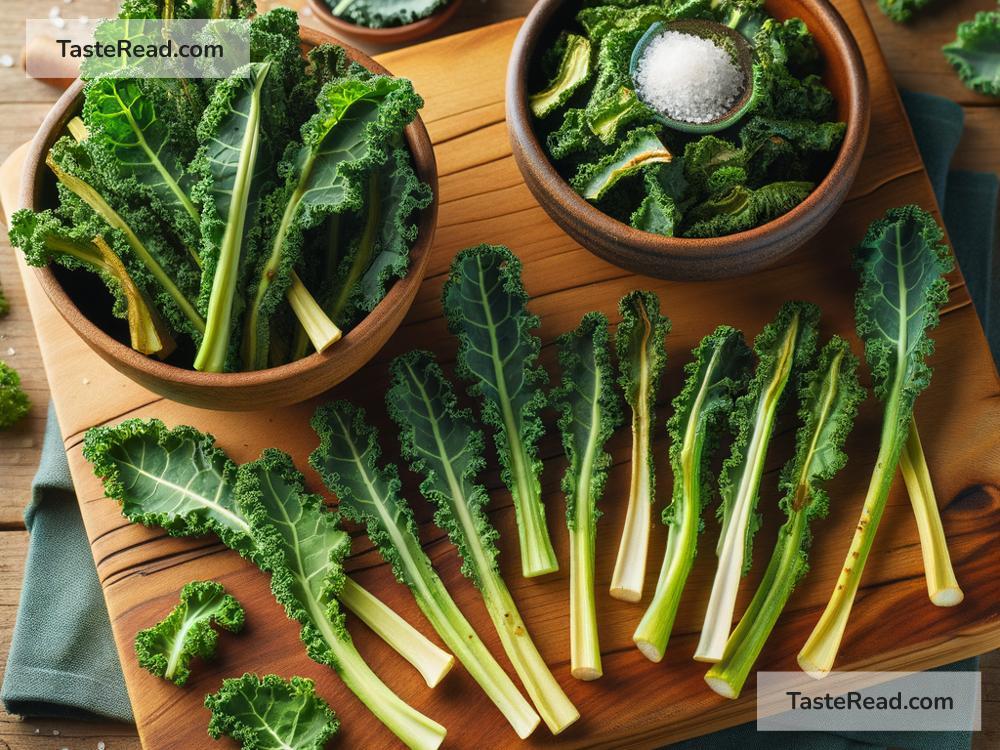
Prep Your Kale Stems: After you’ve used the kale leaves for another dish, gather the stems. Wash them thoroughly under cold water to remove any dirt or debris. Pat them dry with a clean kitchen towel or paper towels.
-
Trim and Cut: Using a knife, trim any excessively tough ends off the stems. Then, slice the stems into pieces about 2 inches long. This size is ideal for a bite-sized snack, but you can adjust according to your preference.
-
Season: Preheat your oven to 350°F (about 175°C). While it’s warming up, put your kale stem pieces in a mixing bowl. Drizzle the olive oil over them, ensuring all pieces are lightly coated. This helps them crisp up in the oven. Sprinkle your desired amount of salt, and if you’re feeling adventurous, add your choice of extra seasonings. Toss everything together so the stems are evenly coated.
-
Arrange for Baking: Line your baking sheet with parchment paper or a silicone mat to prevent sticking. Spread the seasoned kale stems out in a single layer, making sure they aren’t too crowded. This helps them bake evenly and become perfectly crispy.
-
Bake to Perfection: Place your baking sheet in the oven and bake for about 10-15 minutes. The exact time can vary depending on your oven and how thick the stems are, so it’s a good idea to check on them periodically. You’re aiming for a golden brown color and a crispy texture.
-
Cool and Enjoy: Once baked to your satisfaction, take them out of the oven and let them cool for a few minutes. They will crisp up a bit more as they cool. Then, they’re ready to be enjoyed as a healthy, crunchy snack!
Additional Tips:
-
Experiment with Flavors: Don’t be shy to experiment with different seasonings. Kale stem chips can take on a wide variety of flavors, from cheesy (with nutritional yeast) to spicy or smoky.
-
Watch Closely: Keep an eye on your kale stem chips, especially the first time you make them. They can go from perfectly crispy to overly brown rather quickly.
-
Storage: If you have leftovers, store them in an airtight container. They can lose their crispiness over time, but a quick toss back in the oven or toaster oven can revive them.
Making chips from kale stems is a fantastic way to utilize the entire vegetable, reducing waste and offering you a tasty, nutritious snack. It’s a simple process that brings out a wonderful crispy texture and deepens the flavors of these often-overlooked parts of kale. So next time you’re cooking with kale, save those stems and give them a delicious second life as chips. Happy snacking!