How to Bake a Decadent Red Velvet Cake at Home
There’s nothing quite like the rich, velvety taste of a freshly baked red velvet cake. This classic dessert is loved for its soft texture, striking red color, and subtle cocoa flavor. It’s perfect for birthdays, celebrations, or any time you want to impress your family and friends. The best part? You can easily bake one at home without needing fancy equipment or skills. Let’s walk you through a simple but foolproof process to create a decadent homemade red velvet cake.
Ingredients Needed
Before jumping into the recipe, let’s check if your pantry has all the essential ingredients. Here’s everything you’ll need:
For the Cake:
– 2 ½ cups (310g) of all-purpose flour
– 1 teaspoon baking soda
– 1 teaspoon baking powder
– 1 teaspoon salt
– 1 teaspoon cocoa powder
– 1 ½ cups (300g) sugar
– 1 cup (240ml) buttermilk
– 1 cup (240ml) vegetable oil
– 2 large eggs
– 1 teaspoon vanilla extract
– 1 teaspoon white vinegar
– 2 tablespoons red food coloring (gel or liquid)
For the Frosting:
– 8 ounces (226g) cream cheese, softened
– ½ cup (115g) unsalted butter, softened
– 4 cups (500g) powdered sugar
– 1 teaspoon vanilla extract
Step-by-Step Instructions
You’ve got your ingredients ready—now it’s time to dive into the baking process. Follow these steps for a delicious red velvet cake.
Step 1: Preheat Your Oven
Preheat your oven to 350°F (175°C). Grease and lightly flour two round cake pans (9-inch), or line them with parchment paper to prevent sticking.
Step 2: Mix the Dry Ingredients
In a large bowl, sift together the flour, baking soda, baking powder, salt, and cocoa powder. Sifting ensures there are no lumps and keeps your cake light and airy. Set this bowl aside.
Step 3: Combine Wet Ingredients
In another bowl, whisk together the sugar, buttermilk, vegetable oil, eggs, vanilla extract, and white vinegar until smooth. Then, add the red food coloring to the mixture and blend it until you achieve a uniform red color.
Tip: Start with a small amount of food coloring and add more if needed. Keep in mind that gel food coloring is more concentrated, so it’ll require less than liquid food coloring.
Step 4: Mix Wet and Dry Ingredients
Gradually add the dry ingredient mixture into the wet ingredients. Use a whisk or an electric mixer to combine everything until the batter is smooth. Be careful not to overmix—the batter should just come together. Overmixing can result in a dense cake.
Step 5: Pour and Bake
Divide the batter evenly between your prepared cake pans. Smooth the tops with a spatula and place them in the preheated oven. Bake for 25-30 minutes, or until a toothpick inserted into the center comes out clean.
While the cakes are baking, take a moment to clean up your workspace or begin preparing the frosting.
Step 6: Cool the Cakes
Once done, remove the cakes from the oven and let them cool in the pans for about 10 minutes. Then, carefully transfer them to wire racks to cool completely. This step is crucial because if the cakes are warm, your frosting will melt and become messy.
Making the Cream Cheese Frosting
Now, let’s whip up a creamy frosting to complement your red velvet cake.
Step 7: Beat the Cream Cheese and Butter
In a bowl, beat the softened cream cheese and butter together until smooth and fluffy. You can use a handheld mixer or a stand mixer for this step.
Step 8: Add Powdered Sugar and Vanilla
Gradually add the powdered sugar (1 cup at a time), mixing on low speed to avoid a sugar explosion in your kitchen. Once all the sugar is incorporated, add vanilla extract and continue mixing until the frosting is smooth and creamy.
Assembling Your Red Velvet Cake
It’s time to bring your masterpiece to life!
Step 9: Layer and Frost
Place one of the cake layers on your serving plate or cake stand. Spread a generous amount of frosting evenly over the top. Then, place the second cake layer on top and frost the entire cake—top and sides. Use a spatula or frosting knife to make it as smooth as possible.
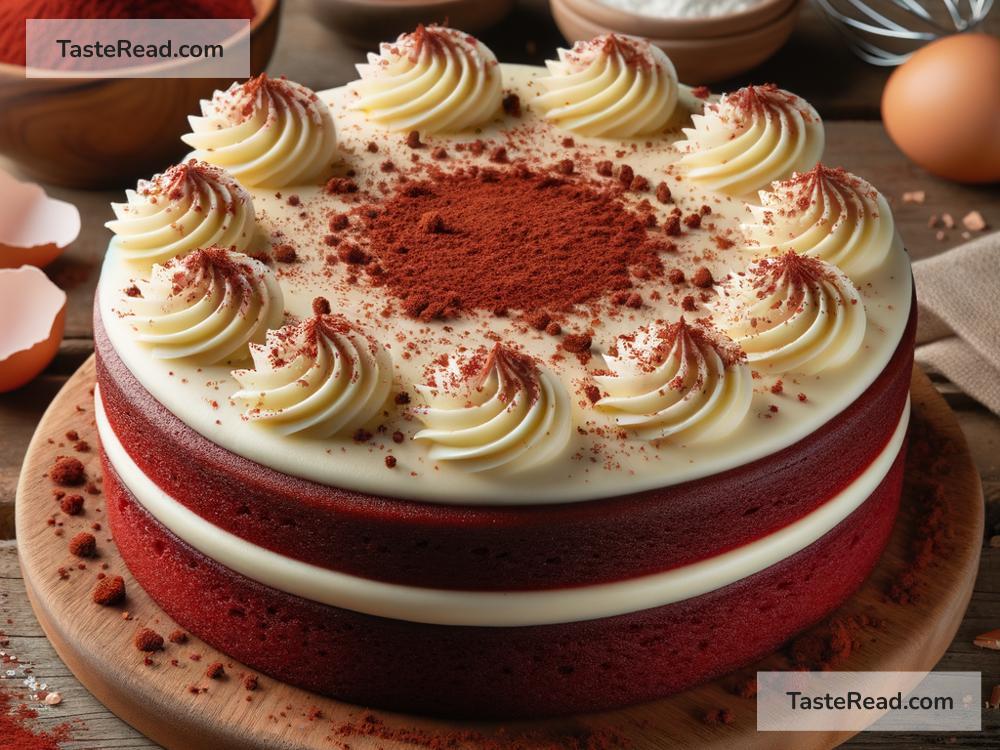
Step 10: Add the Final Touches
For a professional finish, you can decorate your cake with cake crumbs, sprinkles, or fresh berries. Alternatively, keep it simple—the rich frosting and vibrant red color already make an eye-catching dessert.
Enjoy Your Red Velvet Creation
Once your cake is frosted and decorated, slice it up and serve! Pair it with a cup of coffee or a glass of milk for an indulgent treat.
Homemade red velvet cake is not only delicious but also incredibly satisfying to make. With this simple recipe, you’ve learned how to create a bakery-quality dessert right in your home kitchen. So, what are you waiting for? Grab your baking tools and start whipping up this dreamy delight today!
By following these steps, you’ll have a decadent red velvet cake that’s guaranteed to impress your taste buds and loved ones. Happy baking!