Mastering the Simplicity of Classic French Baguette Baking
When you think of French cuisine, one thing that always comes to mind is the classic baguette. Long, golden, crunchy on the outside, and soft on the inside, a fresh baguette is more than just bread—it’s part of French culture. While a baguette may seem fancy, its magic lies in its simplicity. With just four ingredients—flour, water, yeast, and salt—this humble loaf has captured the hearts (and bellies) of people all over the world.
If you’ve always dreamed of baking your own baguette, don’t worry—it’s not as complicated as it might seem. Classic French baguette baking is about patience, technique, and love for the art of breadmaking. By focusing on these basics, you can create a loaf that’s as beautiful and delicious as anything you’d find in Paris. Let’s dive into how to master the simplicity of baguette baking at home.
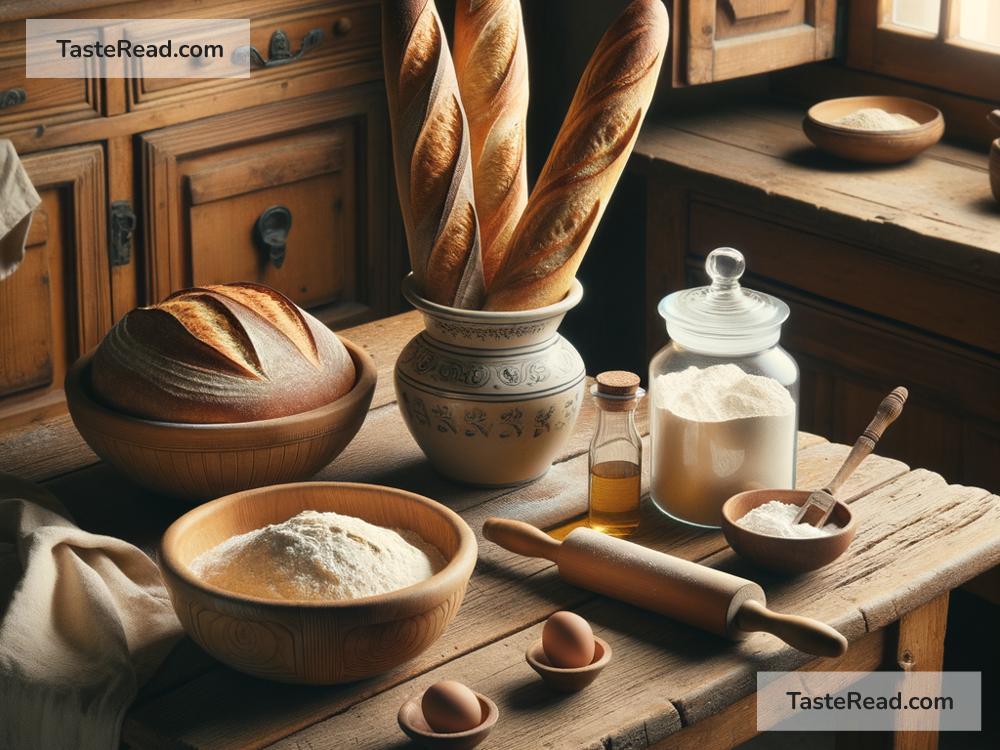
The Ingredients: Simple and Pure
The beauty of a French baguette lies in its simplicity. There are no fancy flours, oils, or special additives. Traditional baguette recipes use only:
– Flour: All-purpose or bread flour works best.
– Water: Room-temperature water is perfect for mixing the dough.
– Yeast: Active dry yeast or instant yeast helps the dough rise.
– Salt: Enhances flavor and balances the yeast.
Since these are your only ingredients, quality matters. Opt for good-quality flour and use clean, fresh water. These small details can make a big difference.
Step 1: Mixing the Dough
Start by combining the ingredients. Typically, you’ll mix flour, salt, water, and yeast together until a shaggy dough forms. Don’t be tempted to overmix; the goal is simply to combine everything at this stage. Once mixed, let it sit for about 20 minutes. This rest phase, called autolyse, allows the flour to hydrate fully, making it easier to knead later.
Step 2: Kneading and Folding
Kneading is where the texture of the bread begins to develop. A baguette dough needs to be sticky yet strong, which creates the airy bubbles inside the bread. If hand kneading, work the dough for about 8-10 minutes until it’s smooth and elastic.
For a shortcut, you can use a stretch-and-fold technique. Instead of kneading nonstop, you stretch one side of the dough and fold it over, turning the bowl slightly with each fold. Let your dough rest for 20-30 minutes before repeating the stretch-and-fold method a few more times. This gradual process develops the gluten while keeping the dough tender.
Step 3: Letting the Dough Rise
Patience is key when making baguettes. After kneading, let the dough rise slowly, which brings out its complex flavors. Cover the dough with a damp towel or plastic wrap, and let it rise for 1-2 hours. If you’re not in a hurry, you can even let it rise in the fridge overnight for an even richer taste.
The dough should double in size during this stage. If it looks fluffy and bouncy, you’re ready for the next step.
Step 4: Shaping the Baguettes
Shaping a baguette takes a little practice, but it’s fun! First, divide your dough into equal portions (you’ll usually get 2–4 baguettes from a batch). Roll each piece gently into a rectangle, then fold the dough lengthwise, sealing the edge with your fingers. Keep repeating this folding process until you’ve formed a long, slender shape. A baguette’s characteristic length and thinness make it unique.
Place your shaped baguettes onto a parchment-lined baking tray or baguette pan. If you’re using a tray, create a folded “couche” with parchment paper or a floured cloth to support the baguettes and prevent them from spreading.
Step 5: Scoring and Baking
Before baking, use a sharp knife or razor blade to score the tops of your baguettes with shallow diagonal cuts. These slashes let steam escape and give the baguettes their signature look.
For that perfect crunch, you need steam in the oven. Professional bakers use steam ovens, but at home, you can fill a pan with hot water and place it on the bottom rack while the baguettes bake. This keeps the crust crisp while the inside stays soft.
Bake your baguettes at 450°F (230°C) for about 20–25 minutes. They should turn a lovely golden brown, with an irresistible aroma filling your kitchen.
Step 6: Cooling and Enjoying
The hardest part? Letting your baguettes cool! It’s tempting to dive in right away, but letting them rest for 10–15 minutes helps the flavor settle and keeps the crumb intact. Once cooled, slice into your baguette and marvel at the airy, chewy interior and crunchy golden crust.
Pair it with butter, jam, cheese, or soup—or just eat it plain. A fresh baguette needs no fancy topping; it’s delicious on its own!
Mastering the Art of Simplicity
Making a classic French baguette isn’t about perfection; it’s about enjoying the process. Each time you bake, you’ll learn something new—how the dough feels, rises, and bakes in your oven.
With practice and patience, you’ll discover that simplicity is the secret to great bread. Just like the French, you’ll come to appreciate how a humble baguette transforms a meal into something unforgettable. So roll up your sleeves, grab your flour, and start baking your way to baguette mastery. Bon appétit!