How to Bake a Perfect Lemon Tart: A Step-by-Step Guide
Lemon tarts are bright, tangy, and perfectly sweet desserts that can steal the show at any gathering. Made with simple ingredients, this classic dish is a wonderful combination of zesty lemon filling and buttery tart crust. Whether you’re a first-time baker or have some experience, you can master the art of making a perfect lemon tart. Follow this easy guide, and you’ll impress your family and friends with your baking skills!
Ingredients You’ll Need
Here’s what you’ll need for the crust and the filling:
Crust Ingredients:
- 1 ¼ cups (160g) all-purpose flour
- ½ cup (115g) unsalted butter (cold and cubed)
- ¼ cup (50g) sugar
- 1 egg yolk
- Pinch of salt
- 2–3 tablespoons cold water
Lemon Filling Ingredients:
- 3 large eggs
- 3 large egg yolks (use the leftover yolk from the crust!)
- ¾ cup (150g) sugar
- ¾ cup (180ml) freshly squeezed lemon juice (around 4–5 lemons)
- ½ cup (120ml) heavy cream
- Zest of two lemons
- Pinch of salt
Tools You’ll Need
- Tart pan (9-inch or 10-inch, preferably one with a removable base)
- Mixing bowls
- Whisk
- Rolling pin
- Food processor (optional for making the crust)
- Citrus zester or grater
- Strainer
- Cooling rack
Step 1: Prepare the Tart Crust
The crust is the base of your lemon tart, so it’s important to get it right. This buttery, flaky crust seamlessly complements the creamy lemon filling.
- In a large mixing bowl, combine the flour, sugar, and salt.
- Add the cubed cold butter. Using your fingers or a food processor, rub or pulse the butter into the dry ingredients until the mixture looks like coarse crumbs.
- Add the egg yolk and mix lightly. Gradually add one tablespoon of cold water at a time, mixing gently until the dough starts to come together.
- Once the dough forms a ball, wrap it in plastic wrap and chill it in the fridge for at least 30 minutes. This helps the dough firm up and prevents it from shrinking while baking.
- Preheat your oven to 375°F (190°C).
- Roll out the chilled dough on a lightly floured surface until it’s large enough to cover your tart pan. Carefully transfer it to the pan and press it into the edges.
- Trim the excess dough hanging over the edges and prick the bottom of the crust with a fork (this prevents air bubbles).
- Place parchment paper on top of the crust and add some pie weights or dried beans. Bake for 15 minutes, then remove the weights and parchment paper. Bake for another 5–7 minutes, or until the crust is golden. Let it cool while you prepare the filling.
Step 2: Make the Lemon Filling
The filling is the heart of any lemon tart, and it should be smooth, tangy, and full of flavor.
- In a large bowl, whisk together the eggs, egg yolks, sugar, lemon juice, heavy cream, lemon zest, and salt. Your goal is to create a creamy and well-blended mixture.
- Strain the mixture through a fine-mesh strainer into another bowl. This step removes any lumps or bits of zest, ensuring a silky smooth filling.
Step 3: Combine and Bake
Now that you have the crust and filling ready, it’s time to combine them and finish baking.
- Reduce the oven temperature to 325°F (160°C).
- Pour the prepared lemon filling into the cooled tart crust. Be careful not to overfill!
- Bake the tart for around 25–30 minutes. You’ll know it’s done when the edges are set and the center has a slight wobble. Don’t overbake—it continues to firm up as it cools.
- Remove the tart from the oven and let it cool to room temperature. Once cooled, refrigerate it for at least an hour to allow the filling to fully set.
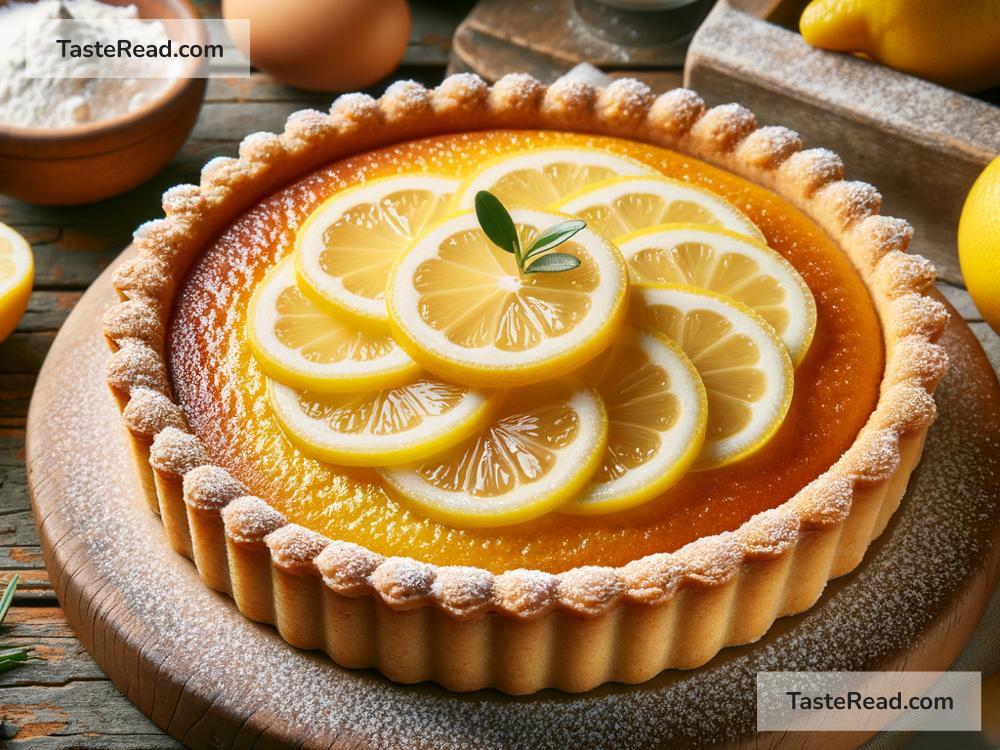
Step 4: Decorate and Serve
Your lemon tart is now ready to be enjoyed! If you’d like, you can decorate it to make it even more appealing.
- Dust the top with powdered sugar for a classic finish.
- Add thin slices of fresh lemon or lime for a pop of color.
- Serve with a dollop of whipped cream or even some fresh berries like raspberries or blueberries.
Slice it up, and savor the rich, buttery crust with the refreshing citrus filling. It’s truly heavenly!
Tips for Success
- Always use freshly squeezed lemon juice for the best flavor. Bottled lemon juice doesn’t give the same bright taste.
- Chill the crust dough before rolling it out—it’s easier to work with and bakes better.
- Keep an eye on the tart while baking the filling. Remove it from the oven as soon as it’s set but still a little wobbly in the center.
- Refrigerating the tart after baking is essential. It enhances the texture and flavor of the filling.
Final Thoughts
Making a lemon tart doesn’t have to be tough. With practice and these simple steps, you’ll bake a dessert that’s both impressive and delicious. Whether it’s for a party or just a treat for yourself, this lemon tart is sure to brighten your day. So grab your apron, roll up your sleeves, and enjoy baking your masterpiece. Happy baking!