How to Make Flavored Kombucha in Simple English
Kombucha is a fizzy, slightly sweet drink made from tea, sugar, and a SCOBY (Symbiotic Culture of Bacteria and Yeast). It’s not only tasty but also packed with probiotics, which are great for gut health. If you enjoy store-bought flavored kombucha, why not try making your own at home? It’s easier than you think, and you can create custom flavors that match your taste.
In this blog, we’ll walk you through the step-by-step process of making flavored kombucha at home using simple methods and ingredients.
Step 1: Brew the Basic Kombucha
Before you can flavor kombucha, you need a batch of plain kombucha, also known as the “first fermentation.” Here’s what you’ll need:
Ingredients:
- 1 gallon of water
- 8-10 black or green tea bags
- 1 cup of white sugar
- 1 SCOBY
- 1-2 cups of plain kombucha (as a starter liquid)
Instructions:
- Boil the Water: Heat one gallon of water until it boils. Then, turn off the heat.
- Steep the Tea Bags: Add your tea bags to the hot water and let them steep for 10-15 minutes.
- Add Sugar: Stir one cup of sugar into the tea until it dissolves completely. Let the sweet tea cool to room temperature.
- Combine Ingredients: Pour the cooled sweet tea into a large glass jar or container. Add 1-2 cups of plain kombucha (starter liquid) and place your SCOBY on top.
- Cover the Jar: Use a clean cloth or coffee filter to cover the jar, and secure it with a rubber band to keep out dust or bugs.
- Let It Ferment: Place the jar in a warm, dark spot (about 70–75°F) for 7-10 days. Taste it after a week—you’ll want it to be slightly tangy but not too sweet.
Once your kombucha is ready, it’s time for the exciting part: adding flavors during the second fermentation!
Step 2: Prep for Second Fermentation
The second fermentation is where you add delicious flavors and bottle the kombucha to make it fizzy.
What You’ll Need:
- Your plain kombucha from Step 1
- Glass bottles with airtight lids (like swing-top bottles)
- Fresh fruit, juice, herbs, or spices for flavoring (examples below)
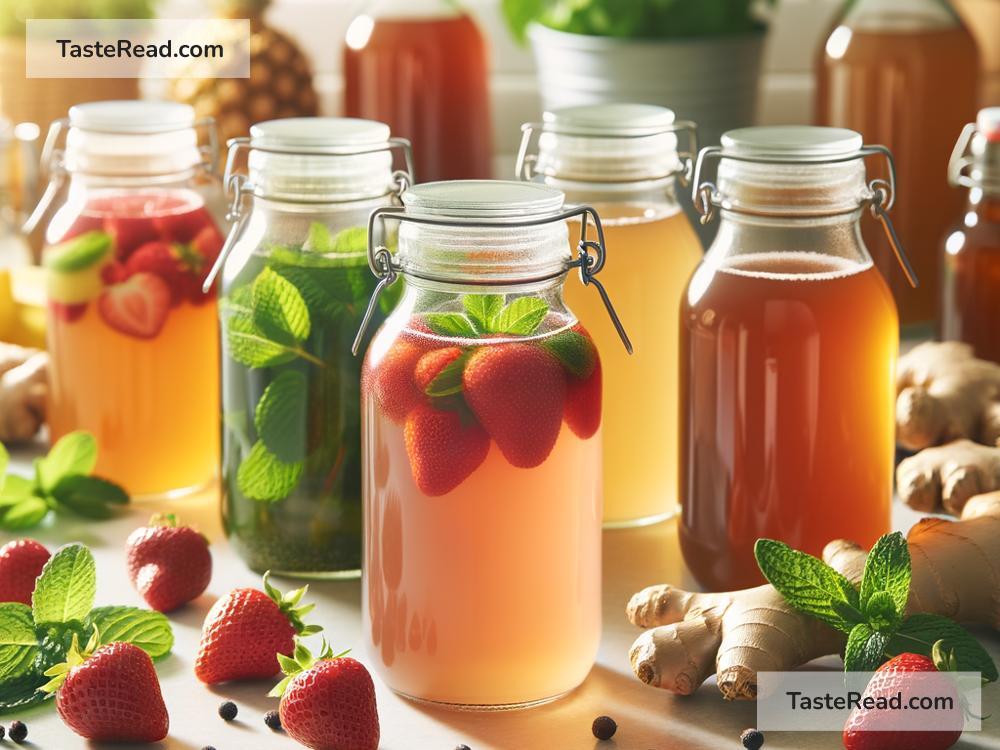
Flavor Ideas:
You can use just about any combination of fruits, herbs, or spices to flavor your kombucha. Here are a few ideas:
– Berry Blast: Strawberries, raspberries, or blueberries
– Citrus Zing: Orange slices, lemon, or lime
– Tropical Fun: Pineapple, mango, or coconut
– Spicy Kick: Ginger, cinnamon, or turmeric
– Herbal Bliss: Mint, basil, or lavender
Step 3: Add Flavors
Now let’s flavor your kombucha!
Instructions:
- Prepare Bottles: Wash your glass bottles thoroughly with soap and hot water to ensure they’re clean.
- Add Flavors: Place your chosen fruits, herbs, or spices into the bottles. You can use whole fruits, cut-up pieces, or fresh juices—whatever you prefer! For example, add a few slices of strawberry and a sprig of mint for a refreshing combo.
- Fill with Kombucha: Pour your plain kombucha into the bottles over the flavors. Leave about an inch or two of space at the top to avoid overflow once carbonation occurs.
Step 4: Ferment Again
The second fermentation helps the kombucha become carbonated and absorb the flavors you’ve added.
Steps:
- Seal and Store: Close the bottles tightly and store them in a warm, dark spot for 2-3 days. Check them daily to see how fizzy they are.
- Burp the Bottles: Carefully open the lids once a day to release built-up pressure (this is called “burping”), so the bottles don’t explode.
- Taste Test: After 2-3 days, taste your flavored kombucha. If you’re happy with the flavor and fizz, transfer the bottles to the fridge to slow down fermentation.
Step 5: Enjoy Your Homemade Flavored Kombucha!
Congratulations—you’ve made your own flavored kombucha! Serve it cold in a glass, or share it with friends and family. The possibilities for flavors are endless, so feel free to experiment with new combinations. You can also use seasonal fruits to keep things fresh.
Tips for Success
- Don’t Overfill Bottles: Leave space at the top to prevent overflow during fermentation.
- Check SCOBY Health: Your SCOBY is key to making kombucha. Keep it healthy by always storing it in some starter liquid and avoiding direct contact with metal.
- Stay Safe: If your kombucha smells off or has visible mold, it’s best to throw it out and start fresh.
- Label Bottles: Write down your flavor combinations and fermentation dates to keep track of your batches.
Final Thoughts
Making flavored kombucha at home is fun, easy, and delicious. Plus, it’s much cheaper than buying pre-made bottles at the store! With just a little effort, you can create refreshing, probiotic-packed drinks that are tailored to your taste. Grab your favorite fruits and herbs, and start creating your own unique flavors today!
Happy brewing!