How to Make Freshly Baked Dinner Rolls at Home
There’s nothing quite like the smell of freshly baked dinner rolls wafting through your kitchen. Soft, fluffy, and golden brown, these rolls are the perfect addition to any meal. The best part? You don’t have to be a professional baker to make them at home! With simple ingredients and a step-by-step process, you can easily create delicious dinner rolls that your family will love.
Whether you’re serving them with soups, roasted chicken, or as part of a festive holiday feast, freshly baked dinner rolls are sure to be a hit. Let’s dive into the recipe and learn how to make them from scratch.
Ingredients You’ll Need
To make these rolls, you only need a handful of everyday ingredients:
- 3 ¾ cups all-purpose flour: This gives the rolls their structure and texture.
- 2 tablespoons sugar: Adds a touch of sweetness to the dough.
- 2 teaspoons salt: Enhances the flavor.
- 1 packet (2 ¼ teaspoons) active dry yeast: This makes the rolls rise and become fluffy.
- 1 cup warm milk (100°F – 110°F): Warm liquid activates the yeast.
- ⅓ cup unsalted butter, melted: Adds richness to the dough.
- 1 large egg: Helps bind the dough and adds moisture.
Optional for topping:
– Butter for brushing: Gives the rolls a soft, shiny finish.
Step-by-Step Instructions
Now that you have all your ingredients ready, let’s walk through the steps to make your dinner rolls.
Step 1: Activate the Yeast
Start by activating your yeast. In a small bowl, combine the warm milk, sugar, and yeast. Stir gently and let it sit for about 5–10 minutes. You’ll know the yeast is ready when it becomes frothy and bubbly. This step is crucial for helping the dough rise.
Step 2: Mix the Dough
In a large mixing bowl, whisk together the flour and salt. Then pour in the yeast mixture, the melted butter, and the egg. Stir everything together until the dough starts to come together. At this point, switch to kneading.
Step 3: Knead the Dough
Knead the dough by hand on a lightly floured surface or use a stand mixer with a dough hook attachment. Knead for about 8–10 minutes until the dough is smooth, elastic, and slightly sticky. If the dough feels too sticky while kneading, sprinkle a little more flour (a tablespoon at a time) until it’s easier to work with.
Step 4: Let the Dough Rise
Grease a large bowl lightly with butter or oil, and place the kneaded dough inside. Cover the bowl with a clean kitchen towel or plastic wrap. Let the dough rise in a warm place for 1–2 hours, or until it has doubled in size. If your kitchen is cold, you can turn on your oven’s light or set the bowl near a warm spot.
Step 5: Shape the Rolls
Once the dough has risen, punch it down gently to release excess air. Divide it into 12 equal portions for medium-sized rolls. You can use a knife or kitchen scale to make even portions. Roll each piece of dough into a smooth ball and place them onto a greased or parchment-lined baking dish, leaving a bit of space between each ball for them to expand.
Step 6: Second Rise
Cover the baking dish with a cloth and let the rolls rise again for about 30–45 minutes. This step gives the rolls their final puffiness and ensures they’re light and airy when baked.
Step 7: Bake the Rolls
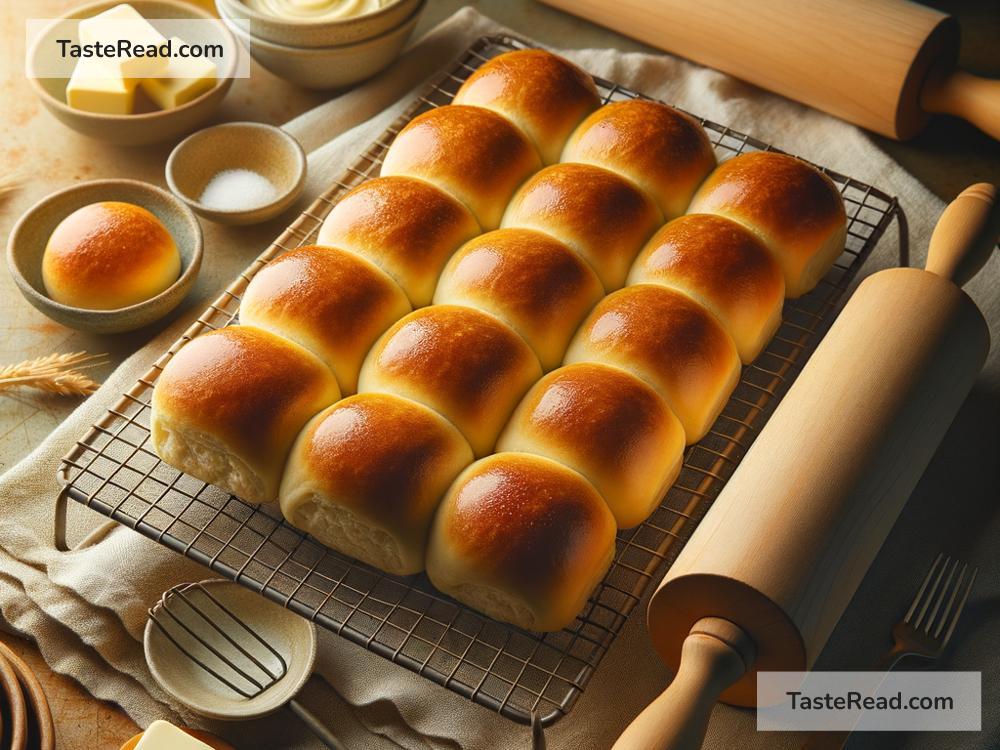
Preheat your oven to 375°F (190°C). Once the rolls have risen, bake them for 18–22 minutes, or until they’re golden brown on top and cooked through. Keep an eye on them during the last few minutes to ensure they don’t overbake.
Step 8: Brush with Butter
When the rolls come out of the oven, brush the tops lightly with melted butter. This gives them a beautiful shine and extra flavor. Allow the rolls to cool slightly before serving.
Tips for Perfect Dinner Rolls
- Warm your liquids: Always use warm milk (not hot!) to activate the yeast. If the milk is too hot, it will kill the yeast, and your rolls won’t rise.
- Don’t rush rising: Be patient during the rising process. This step is key to getting soft and fluffy rolls.
- Try add-ins: If you want to get creative, mix in garlic powder, fresh herbs, or shredded cheese to the dough for a unique twist.
Why Bake Rolls at Home?
Homemade dinner rolls are fresher and tastier than store-bought ones. Baking them yourself allows you to control the flavor and ingredients, ensuring they fit your preferences. Plus, you won’t believe how satisfying it feels when you pull a tray of steaming, golden rolls out of the oven!
Serving Suggestions
Serve these rolls warm with a little butter, jam, or honey on the side. They pair wonderfully with hearty soups, roasted meats, or even a simple salad. You can also use them as sliders or mini sandwiches by stuffing them with your favorite fillings.
Conclusion
Making freshly baked dinner rolls is easier than you might think. With this step-by-step guide, you’ll have homemade rolls that are soft, fluffy, and perfect for any occasion. So, the next time you want to impress your family or guests, try baking your own dinner rolls. They’ll marvel at your baking skills, and you’ll enjoy every bite!
Happy baking!