How to Make Homemade Almond Milk: A Simple Guide
Almond milk has become a popular alternative to dairy milk, thanks to its creamy texture and health benefits. It’s vegan, lactose-free, and packed with nutrients like vitamin E, antioxidants, and healthy fats. While store-bought almond milk is convenient, it often contains additives and preservatives. Making almond milk at home is simple, healthier, and more budget-friendly. Plus, you get to customize the flavor, sweetness, and thickness. Let’s dive into an easy step-by-step guide to making your very own almond milk!
Why Make Almond Milk at Home?
Homemade almond milk is:
– Purity and freshness: It’s free from artificial preservatives and additives.
– Customizable: You control the flavor and consistency.
– Cost-effective: Over time, it’s cheaper than buying store-bought options.
– Eco-friendly: Less packaging waste means it’s better for the environment.
Ingredients and Tools You’ll Need
To make almond milk, you only need a handful of ingredients:
Ingredients:
- 1 cup raw almonds (unsalted)
- 4 cups water (for blending; plus additional for soaking)
- Optional flavors:
- Sweetener (honey, maple syrup, dates, or sugar)
- Vanilla extract (for extra flavor)
- A pinch of salt (to balance the taste)
- Cinnamon or cocoa powder (for fun twists)
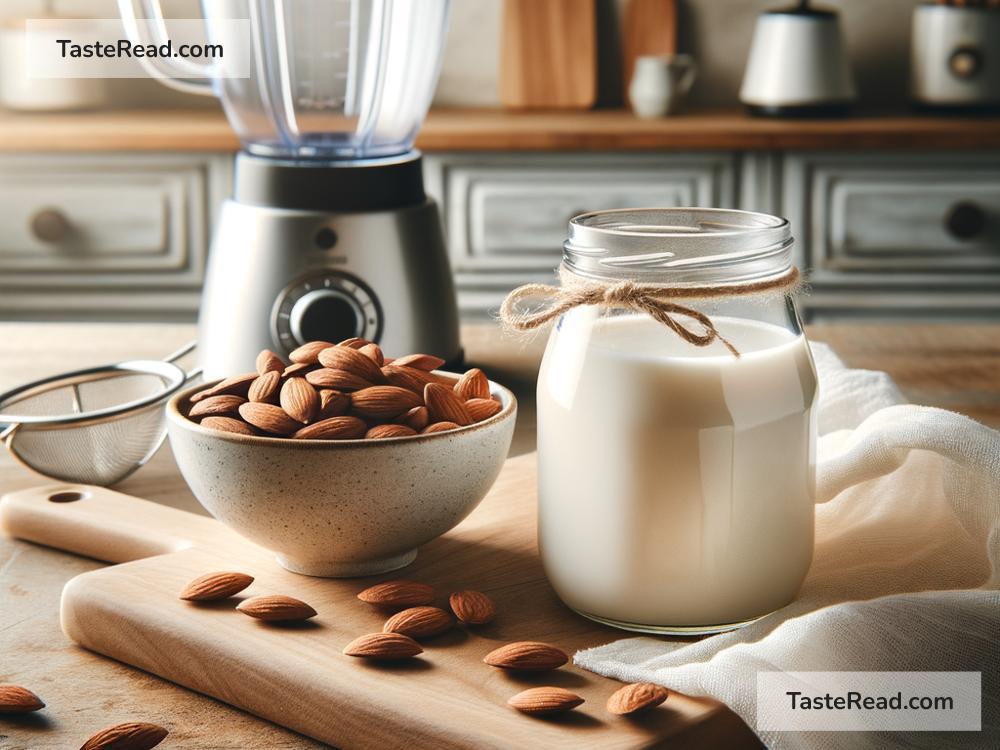
Tools:
- Blender (A high-speed blender works best.)
- Nut milk bag or cheesecloth (For straining; if unavailable, you can use a fine mesh strainer.)
- Large bowl (To hold strained milk.)
- Glass jar or container (For storing your almond milk later.)
Step-by-Step Instructions
Step 1: Soak the Almonds
Soaking softens the almonds, making them easier to blend. It also improves the texture and enhances the creaminess of your milk.
-
Add raw almonds to a bowl: Place 1 cup of almonds in a bowl and cover them with water. Make sure there’s enough water to fully submerge the almonds, as they’ll expand while soaking.
-
Let them soak: Cover the bowl and let the almonds soak for at least 8–12 hours. Overnight soaking is ideal, but if you’re short on time, soaking for 4 hours can still work. The longer you soak, the creamier your almond milk will be.
-
Drain and rinse: After soaking, drain the almonds and rinse them thoroughly under running water. This removes the enzyme inhibitors and helps create fresh-tasting milk.
Step 2: Blend the Almonds
-
Combine almonds and water: Add the soaked almonds to your blender along with 4 cups of fresh water.
-
Blend until smooth: Blend on high speed for 1–2 minutes, or until the almonds are thoroughly broken down and the liquid looks creamy white.
Step 3: Strain the Milk
Blending creates almond pulp (ground bits of almonds), which you’ll need to strain out.
-
Prepare your straining tool: Place a nut milk bag, cheesecloth, or fine mesh strainer over a large bowl or container.
-
Pour the almond mixture: Slowly pour the blended almond mixture into the strainer.
-
Squeeze out the liquid: Gather the edges of the nut milk bag or cheesecloth and gently squeeze it to extract as much liquid as possible. The creamy almond milk will flow into the bowl, and you’ll be left with almond pulp inside the strainer.
Step 4: Add Flavor (Optional)
Once the milk is ready, you can customize it to your liking.
-
Sweeten your milk: Add a tablespoon of honey, maple syrup, or two pitted dates for natural sweetness. Blend the milk again for a few seconds to incorporate the sweetener.
-
Enhance with vanilla: A teaspoon of vanilla extract adds a warm hint of flavor.
-
Experiment with extras: Sprinkle in cinnamon or a dash of cocoa powder for unique variations.
Step 5: Store and Enjoy
Pour the strained almond milk into a clean glass jar or container with a lid. It will stay fresh in the refrigerator for 3–5 days. Shake well before using, as it can naturally separate.
What to Do with Leftover Almond Pulp?
Don’t toss the almond pulp—it’s a versatile ingredient! You can:
– Add it to smoothies for extra fiber.
– Use it in baked goods like muffins or cookies.
– Turn it into almond flour by drying and grinding it.
– Mix it into oatmeal or pancakes for a nutrition boost.
Tips for Perfect Almond Milk
- Use raw almonds: Avoid toasted or salted almonds, as they may affect the taste.
- Experiment with ratios: For creamier milk, use less water (e.g., 3 cups instead of 4).
- Make small batches: Homemade almond milk doesn’t last as long as store-bought versions, so make only what you’ll use within a few days.
Final Thoughts
Making almond milk at home is easy, healthy, and satisfying. It’s a great way to enjoy a fresh, customizable milk alternative, whether you’re vegan, lactose-intolerant, or just looking for a nutritious drink. Once you try homemade almond milk, you might never go back to store-bought versions!
So, grab some almonds and give it a go. Happy milk-making!