How to Make Homemade Apricot Jam: A Step-by-Step Guide
Making homemade apricot jam is a fun and rewarding experience. Apricots are sweet and tasty fruits that make delicious jam. Best of all, you won’t need any fancy equipment or advanced cooking skills to create your own. In this article, we’ll walk you through a simple method to turn those fresh apricots into a jar of sweet goodness that you can enjoy all year round.
Why Make Apricot Jam at Home?
Store-bought jams can be convenient, but homemade apricot jam is special for many reasons:
1. Fresh Ingredients: You know exactly what goes into your jam. No preservatives or artificial flavors.
2. Control Over Sweetness: You can adjust how sweet your jam is based on your preference.
3. Personal Satisfaction: There’s nothing like the feeling of making something from scratch at home.
4. Gift Option: Homemade jam also makes a thoughtful and unique gift for family and friends.
Now that you know why homemade apricot jam is awesome, let’s dive into the steps!
Ingredients You’ll Need:
To make apricot jam, you’ll need only a few simple ingredients:
– Fresh apricots (approximately 2 pounds or 1 kg)
– Sugar (about 2 cups, but you can adjust depending on how sweet you want your jam)
– Lemon juice (2 tablespoons)
That’s it! You don’t need any special ingredients. Apricots, sugar, and lemon juice are the perfect combination to create a balanced jam.
Tools You’ll Need:
Here are some basic kitchen tools to help you make the jam:
– A heavy-bottomed pot or saucepan
– A wooden spoon or heat-resistant spatula
– A knife and cutting board
– A small plate (to test if the jam is ready)
– Mason jars or glass containers for storing the jam
Step-by-Step Guide to Making Apricot Jam
Step 1: Prep the Apricots
Start by washing the apricots thoroughly under cool water to remove dirt and debris. Once clean, cut the apricots in half and remove the pits (seeds). You don’t need to peel the apricots—the skin will break down during cooking.
For a smoother texture in your jam, you can chop the apricots into smaller pieces. If you like chunky jam, leave them in larger chunks.
Step 2: Mix Your Ingredients
Place the chopped apricots into your heavy-bottomed pot. Add the sugar and lemon juice to the pot as well. Stir everything together so the sugar evenly coats the apricots. Let this mixture sit for about 15–30 minutes. This step allows the sugar to draw out the juices from the apricots, which helps create that jammy consistency.
Step 3: Cook the Jam
Place the pot on the stove over medium heat and bring the mixture to a boil. Stir occasionally to prevent the sugar or fruit from sticking to the bottom of the pot.
As the apricots cook, they will soften and release more liquid. You can use a wooden spoon or spatula to gently mash the apricots as they cook if you want a smooth jam. If you prefer chunky jam, let the fruit pieces remain intact.
Reduce the heat to low and let the mixture simmer for about 20–30 minutes. Keep stirring every few minutes to prevent burning.
Step 4: Test if the Jam is Ready
Wondering if your jam is done? Here’s an easy trick:
1. Take a small plate and place it in the freezer for a few minutes to make it cold.
2. Once the plate is chilled, spoon a small amount of the jam onto the plate.
3. Tilt the plate slightly—if the jam doesn’t run and feels thick after cooling for a minute, it’s ready!
If the jam is still too runny, keep simmering for another 5–10 minutes and test again.
Step 5: Cool and Store
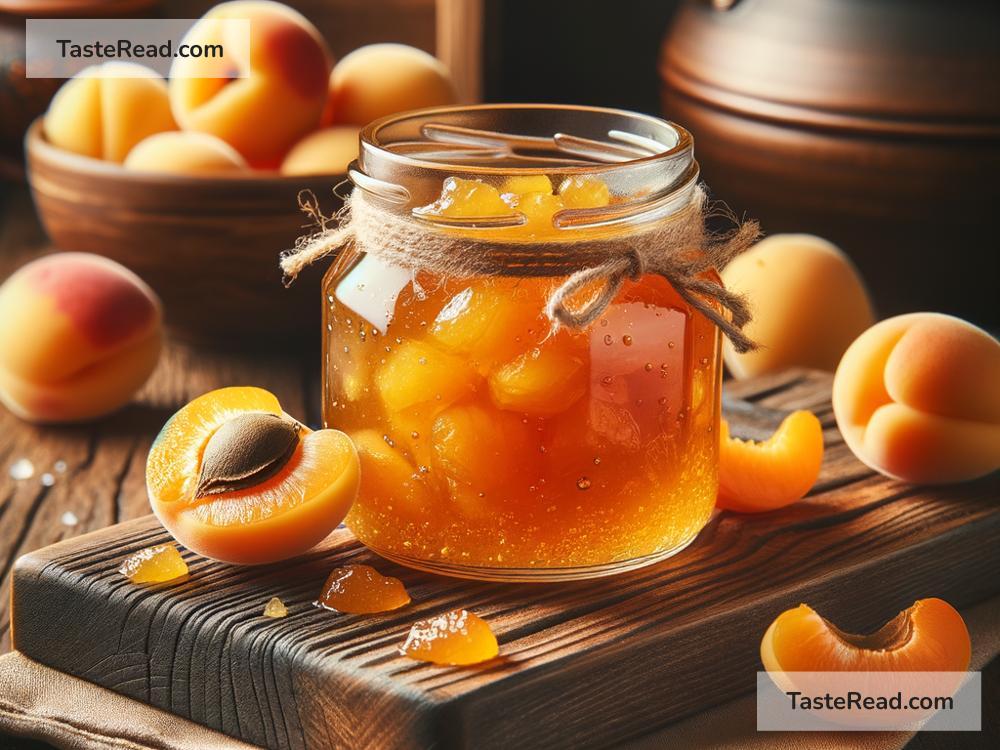
When your jam is done cooking, remove it from the heat and let it cool for about 10–15 minutes. Pour the jam into clean, sterilized mason jars or glass containers. Seal the jars tightly, and allow them to fully cool at room temperature before storing them in the fridge.
Homemade apricot jam can last for up to 2–3 weeks in the refrigerator. If you’ve canned the jam properly, it can last for several months on the shelf.
Tips for Success:
- Ripe Apricots Are Best: Choose apricots that are soft and ripe for the best flavor. If the apricots are under-ripe, add a little more sugar to balance the taste.
- Adjust the Sugar: If you prefer less sweetness, reduce the amount of sugar. Taste the jam as it cooks to find your perfect balance.
- Sterilize Your Jars: To keep your jam fresh for longer, sterilize your jars by boiling them in water or washing them in hot, soapy water before use.
Ways to Enjoy Homemade Apricot Jam
Now that your jam is ready, here are a few delightful ways to enjoy it:
– Spread it on toast or bagels for breakfast.
– Drizzle it over pancakes or waffles.
– Stir it into yogurt or oatmeal for added flavor.
– Use it as a topping for ice cream or desserts.
– Pair it with cheese and crackers for a tasty snack.
Conclusion
Homemade apricot jam is easy, fun, and delicious. You only need a few simple ingredients and basic kitchen tools to turn ripe apricots into a jar of golden sweetness. Whether you spread it on toast or use it in desserts, this homemade jam is sure to impress family and friends—and it makes a great gift too!
So grab those fresh apricots and start jamming—your homemade apricot jam adventure awaits!