How to Make Perfectly Poached Eggs: Simple Step-by-Step Guide
Poached eggs are a classic breakfast dish that many people love, but they can be a little tricky to make. If you’ve ever tried poaching eggs and ended up with a messy pot of water or a broken yolk, don’t worry—you’re not alone! The good news is that poaching eggs doesn’t have to be hard. With a few tips and tricks, you can make perfectly poached eggs every time. In this article, we’ll walk you through the process step by step using simple instructions.
Why Poached Eggs Are Worth It
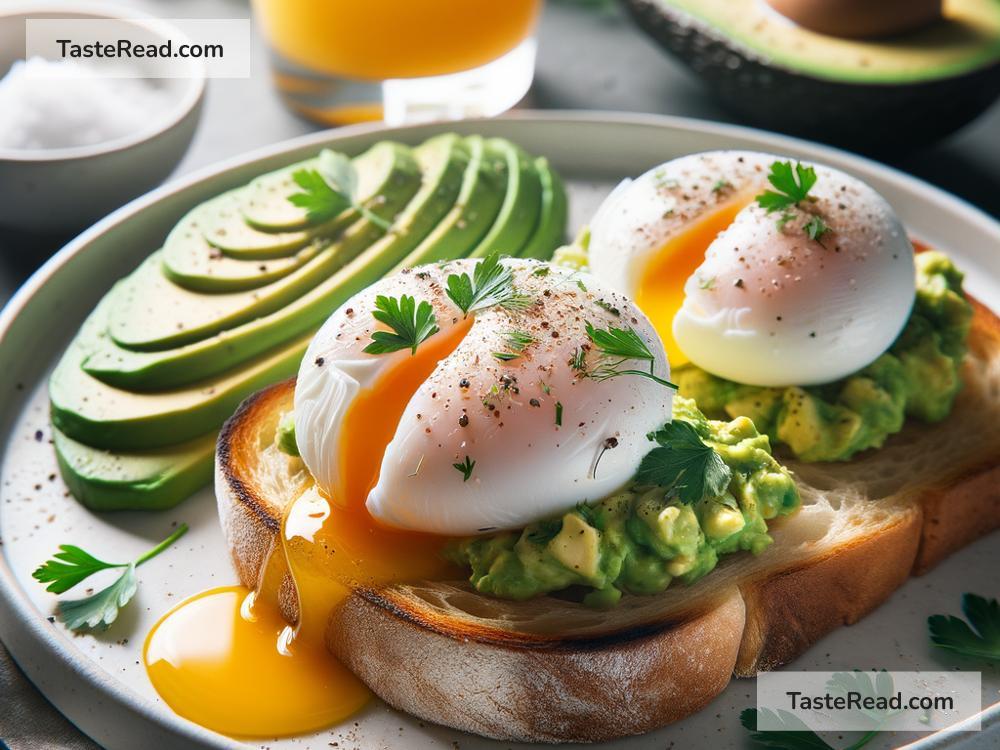
Poached eggs are soft, delicate, and delicious. The whites are tender and the yolks are perfectly runny, which makes them perfect for putting on toast, salads, or bowls. They look impressive too, so they’re great to serve when you want to wow your family or guests. Plus, poached eggs are healthy because they’re cooked without oil or butter.
Now that you know why poached eggs are worth making, let’s get started!
What You’ll Need
Before you start poaching eggs, gather these simple ingredients and tools:
Ingredients:
- Fresh eggs (the fresher, the better!)
- Water
- A splash of vinegar (optional)
Tools:
- A medium-sized saucepan
- A slotted spoon or regular spoon
- A small bowl or cup
- Paper towels or napkins
Step-by-Step Instructions for Perfectly Poached Eggs
Step 1: Prepare the Water
Fill your saucepan with water. You don’t need to fill it all the way—about two-thirds full is fine. Place the saucepan on the stove and heat the water over medium heat until it’s steaming but not boiling. This is important because boiling water can break your eggs apart. The water should be at a gentle simmer, with small bubbles forming at the bottom but not bubbling all over.
If you want, you can add a splash of vinegar to the water. Vinegar helps the egg whites stay together, so it’s a good trick if you’re new to poaching eggs. Don’t worry—it won’t affect the taste of your eggs.
Step 2: Crack the Egg Into a Bowl
Instead of cracking the egg directly into the water, crack it into a small bowl or cup first. This makes it easier to gently slide the egg into the water later. It also lets you check for eggshell bits before cooking.
Step 3: Create a Whirlpool (Optional)
This step isn’t essential, but it can help your eggs look neater. Use a spoon to stir the water in the saucepan and create a gentle whirlpool. The swirling motion helps the egg whites wrap around the yolk, giving your poached egg a nice round shape.
Step 4: Add the Egg
Carefully slide the egg from the bowl into the center of the saucepan. Be as gentle as possible—you don’t want to break the yolk. You can poach more than one egg at a time, but make sure to leave space between them so they don’t stick together.
Step 5: Cook the Egg
Let the egg cook in the gently simmering water for about 3–4 minutes. This will give you a soft, runny yolk—perfect for breaking open over toast! If you prefer a firmer yolk, cook it for 5–6 minutes. Avoid stirring the water while the egg is cooking; let it sit undisturbed so the egg whites can set around the yolk.
Step 6: Remove the Egg
Once the egg is cooked to your liking, use a slotted spoon or regular spoon to lift it out of the water. Be gentle, as poached eggs can be delicate. Place the egg on a paper towel or napkin to drain any excess water.
Step 7: Serve and Enjoy!
Your perfectly poached egg is ready to serve! You can place it on a slice of buttered toast, a bed of greens, or a bowl of grains like quinoa or rice. Add your favorite toppings, like salt, pepper, avocado, or hot sauce, and enjoy!
Tips for Success
-
Use Fresh Eggs: Fresh eggs have firmer whites, which hold together better when poaching. If your eggs are older, the whites may spread more in the water.
-
Don’t Skip the Simmer: Boiling water creates too much movement, which can break the eggs apart. Stick to gentle, simmering water for the best results.
-
Practice Makes Perfect: If your first poached egg isn’t perfect, don’t worry! It takes a little practice to get the hang of it. Try again, and you’ll improve with each attempt.
-
Clean Your Pan Between Batches: If you’re poaching multiple eggs, skim any leftover egg bits from the water before adding the next egg. This will keep your water clean and make the next egg look better.
Final Thoughts
Poaching eggs can feel intimidating at first, but it’s actually a simple process once you understand the steps. With a little patience and practice, anyone can learn to make perfectly poached eggs. Whether you’re cooking breakfast for yourself, your family, or hosting a brunch, poached eggs add a touch of elegance to any meal. Now that you know the secrets, give it a try—you just might fall in love with this classic cooking method.
So, grab some fresh eggs, heat up some water, and get ready to enjoy the delicious magic of perfectly poached eggs. Happy cooking!