How to Prepare a Classic Beef Jerky
Your Step-by-Step Guide to Making Delicious Homemade Snacks
Beef jerky is a classic snack loved by many for its intense flavor, chewy texture, and long shelf life. It’s perfect for road trips, hiking, or when you need a protein-packed snack on the go. Although store-bought jerky is convenient, making your own at home guarantees better flavor and healthier ingredients because you control everything! In today’s blog, we’ll walk you through how to prepare a classic beef jerky using simple, easy-to-follow steps.
What is Beef Jerky?
Beef jerky is essentially dried meat that has been seasoned and cured. The process involves removing moisture from the meat, which prevents bacterial growth and makes it last for weeks without refrigeration. The result is a flavorful snack that’s great for anyone looking for something delicious and filling.
Step 1: Gather Your Ingredients and Tools
Before you begin, make sure you have the following:
Ingredients:
– 2 pounds of lean beef (top round, bottom round, sirloin, or flank steak work best)
– 1/2 cup soy sauce
– 1/4 cup Worcestershire sauce
– 2 tablespoons brown sugar
– 1 teaspoon black pepper
– 1 teaspoon garlic powder
– 1 teaspoon onion powder
– 1 teaspoon smoked paprika (optional, for a smoky flavor)
– 1/4 teaspoon cayenne pepper (optional, for heat)
– 1/2 teaspoon salt
Tools:
– Sharp knife
– Cutting board
– Large resealable plastic bag or airtight container
– Oven or food dehydrator
– Baking sheets and cooling racks (if using an oven)
– Paper towels
Step 2: Choose the Right Meat
Choosing the right cut of meat is important for beef jerky. You want lean beef with little fat because fat doesn’t dry as well and can make the jerky spoil faster. Top round, bottom round, and flank steak are all excellent choices.
Ask your butcher to trim off excess fat, or do it yourself at home. If the meat has visible fat, carefully slice it away with a sharp knife before you begin.
Step 3: Slice the Meat
Thin slices are key to good jerky. The thinner the slices, the quicker the meat will dry, and the easier it will be to chew. Aim for slices that are about 1/8 to 1/4 inch thick.
To make slicing easier, freeze the meat for about 30-60 minutes before cutting. Partially frozen meat is firmer, making it easier to get even slices. You can cut it against the grain for tender jerky or along the grain for a chewier texture—this depends on your preference.
Step 4: Prepare the Marinade
The marinade is what gives jerky its signature flavor. In a bowl, mix soy sauce, Worcestershire sauce, brown sugar, black pepper, garlic powder, onion powder, smoked paprika, cayenne pepper, and salt. Feel free to experiment with flavors by adding other spices like ginger, chili powder, or honey for sweetness.
Once your marinade is ready, place the beef slices into a resealable plastic bag or airtight container. Pour the marinade over the meat, making sure each piece is coated. Seal the bag or container and refrigerate for at least 6 hours, or overnight for maximum flavor.
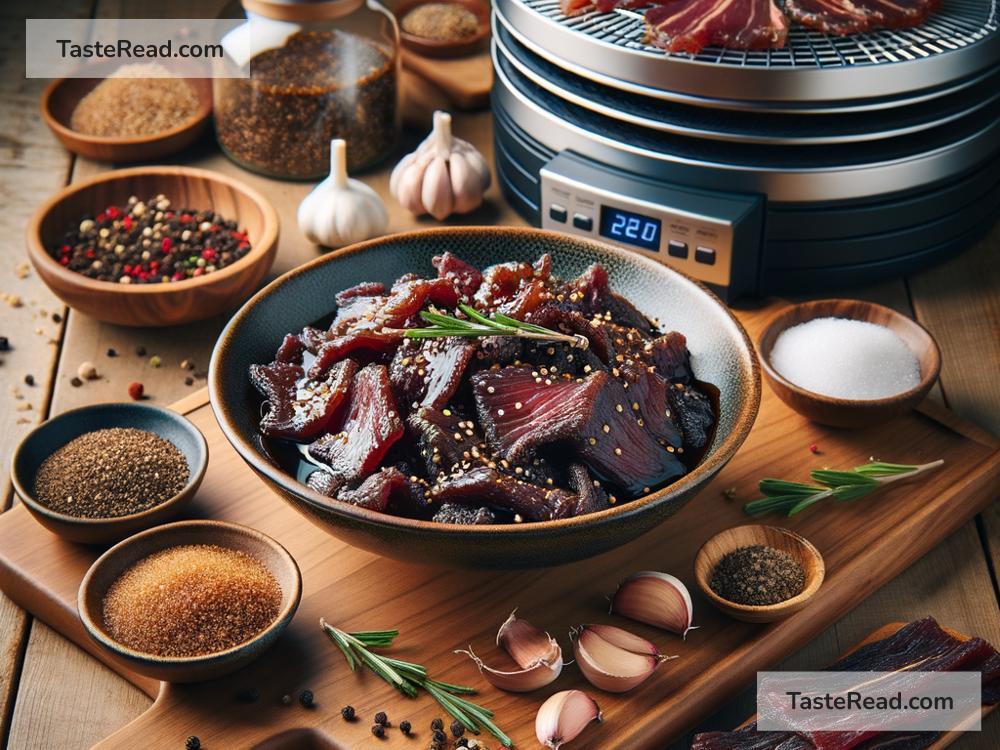
Step 5: Dry the Jerky
After marinating, remove the beef slices and pat them dry with paper towels. This step is important because excess liquid can prevent the jerky from drying properly.
Using a food dehydrator: Lay the beef slices in a single layer on the dehydrator trays, ensuring no slices overlap. Follow your dehydrator’s instructions, but most jerky takes 4-6 hours at 160°F.
Using an oven: Preheat your oven to 160°F or the lowest setting. Place cooling racks onto baking sheets, and lay the beef slices on the racks in a single layer. The racks allow air to circulate, helping the jerky dry evenly. Prop the oven door open slightly with a wooden spoon to let moisture escape. Let the beef dry for about 4-6 hours, checking occasionally.
Step 6: Check for Doneness
The jerky is done when it’s completely dry but still pliable. It should bend slightly without breaking. If it feels sticky or moist, it needs more drying time.
Once the jerky is ready, let it cool completely before storing.
Step 7: Store Your Beef Jerky
You can store your homemade beef jerky in an airtight container or resealable bag. Keep it in the refrigerator or a cool, dry place for up to 2 weeks. For longer storage, vacuum-seal the jerky and freeze it—it can last for months this way!
Bonus Tips for Success
- Experiment with flavors: Customize your marinade to suit your taste buds! Try teriyaki style, spicy chili, or honey mustard marinades.
- Don’t rush the process: Drying the jerky takes time, but patience guarantees great results!
- Use lean meat: Fatty cuts of beef can spoil quickly, so always use lean meat for safe, long-lasting jerky.
Conclusion
Making homemade beef jerky might take a little time, but the rewards are worth it. With simple tools, a flavorful marinade, and a bit of patience, you can create jerky that’s tastier and healthier than store-bought versions. Plus, you’ll have the satisfaction of knowing you made it yourself!
So, why not give this classic beef jerky recipe a try? It’s a great way to impress your friends and family with your cooking skills while enjoying a protein-packed snack anytime. Happy jerky-making!