How to Prepare a Classic Chicken Kiev
If you’re looking to impress your family or guests with a dish that’s both comforting and fancy, Chicken Kiev might just be the answer. This delicious classic features tender chicken breasts stuffed with buttery, garlicky filling, coated in breadcrumbs, and fried to perfection. Despite its elegant taste, it’s surprisingly simple to prepare at home. In this blog post, we’ll show you step-by-step how to make Chicken Kiev in plain and easy-to-understand language. Let’s get started!
What Is Chicken Kiev?
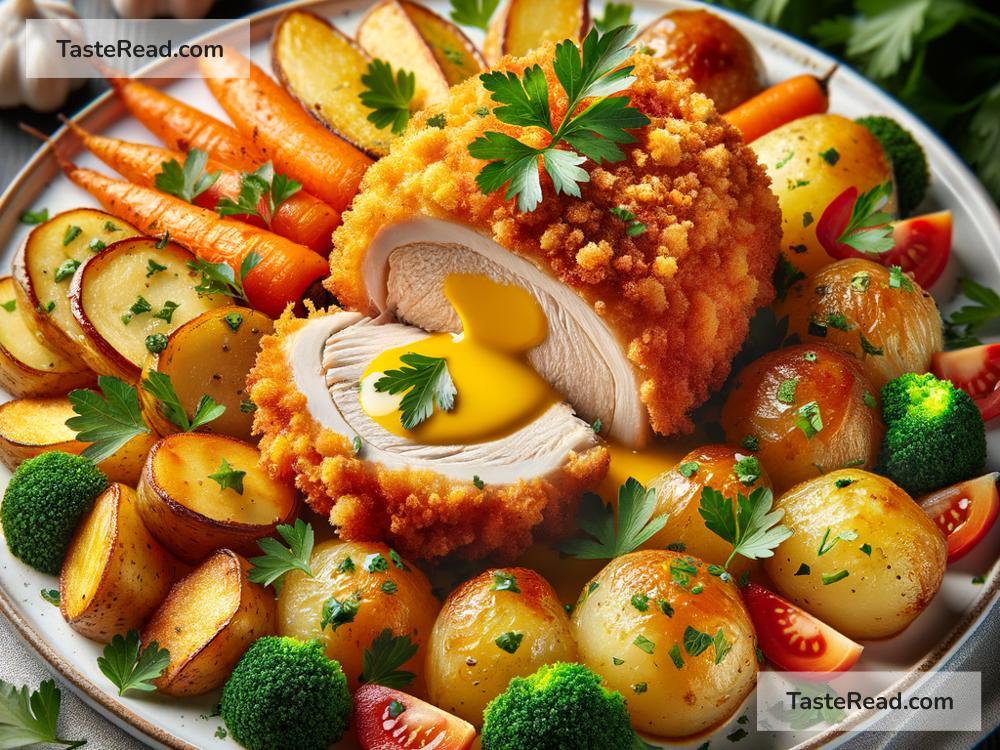
Chicken Kiev is a popular dish that originated in Eastern Europe. It’s thought to have ties to Russian and Ukrainian cuisines, though its exact origin is a matter of much debate. What makes Chicken Kiev so special is the creamy garlic butter hidden inside the crispy chicken, which oozes out when you cut into it—a delightful treat for your taste buds!
Ingredients
Before diving into the recipe, let’s make sure you have everything you need. Here’s a list of ingredients for preparing two servings:
- 2 boneless, skinless chicken breasts
- 100g (7 tablespoons) of unsalted butter (softened)
- 2 garlic cloves, minced
- 2 tablespoons fresh parsley, chopped
- 1 cup all-purpose flour
- 2 large eggs
- 1 cup breadcrumbs (plain or seasoned)
- Salt and pepper, to taste
- Vegetable oil (for frying)
- Optional: Lemon wedges for serving
Step 1: Make the Garlic Butter
The star of Chicken Kiev is the garlic butter that melts deliciously inside the chicken. Here’s how to make it:
- In a small bowl, mix the softened butter, minced garlic, and chopped parsley until fully combined.
- Add a pinch of salt and pepper to the butter mixture for extra flavor.
- Roll the butter mixture into a log shape (use plastic wrap or parchment paper to help), then freeze it for about 10-15 minutes. This step makes it easier to insert the butter into the chicken later.
Step 2: Prepare the Chicken
The secret to Chicken Kiev is forming a pocket in the chicken for the filling. Follow these steps:
- Place the chicken breast on a clean cutting board. Use a sharp knife to cut a deep pocket into the thickest part of each breast. Be careful not to cut all the way through!
- Take your butter log out of the freezer and cut it into two pieces.
- Gently stuff one piece of butter into the pocket of each chicken breast. Fold the edges to seal the opening as best as you can. If needed, you can use toothpicks to secure the chicken.
Step 3: Coat the Chicken
Coating the chicken gives it the signature crispy texture. It’s super easy to do:
- Prepare three separate bowls or plates:
- First bowl: Add the flour.
- Second bowl: Whisk the eggs.
- Third bowl: Pour in the breadcrumbs.
- Lightly season the chicken breasts with salt and pepper.
- Coat each chicken breast by dipping it in the flour first, then the egg, and finally the breadcrumbs. Make sure it’s completely covered for the best crunch.
- For an extra crispy coating, you can repeat the egg and breadcrumb steps one more time.
Step 4: Cook the Chicken
It’s time to bring the Chicken Kiev to life by frying and finishing it in the oven.
- Heat enough vegetable oil to cover the bottom of a skillet. Use medium heat so the chicken cooks evenly without burning.
- Carefully place the coated chicken breasts into the skillet once the oil is hot. Fry for 3-4 minutes on each side, or until the coating turns golden brown.
- Transfer the fried chicken to a baking sheet and finish cooking in an oven preheated to 180°C (350°F). Bake for 15-20 minutes to ensure the chicken is thoroughly cooked inside. You can use a meat thermometer to check that the internal temperature reaches 75°C (165°F).
Step 5: Serve and Enjoy
Once the Chicken Kiev is ready, remove it from the oven and allow it to rest for a few minutes. Serve the dish with lemon wedges on the side—you can squeeze some fresh lemon juice over the chicken for added flavor. Pair it with mashed potatoes, roasted vegetables, or a crisp green salad for a complete meal.
Tips for Success
Here are a few extra pointers to make sure your Chicken Kiev turns out perfect:
- Seal the butter properly: Try to secure the chicken so the butter doesn’t ooze out while cooking. If you’re worried, use toothpicks or press the edges firmly.
- Freeze before frying: After coating the chicken, you can freeze it for 10 minutes to help the breading stick better and prevent the butter from melting too quickly.
- Check the oil temperature: Make sure the oil is hot enough before frying—if it’s too cold, the chicken may absorb excess oil and become soggy.
Final Thoughts
Chicken Kiev is one of those dishes that anyone can master with a little practice. The combination of crispy coating, juicy chicken, and creamy garlic butter is simply irresistible. Whether you’re preparing it for a special occasion or a cozy dinner at home, this classic recipe is bound to be a hit.
So grab your ingredients, follow these simple steps, and wow everyone at the table. Once you cut into the Chicken Kiev and see the butter flow, you’ll understand why this dish has stood the test of time. Happy cooking!


