How to Prepare Japanese Bento Boxes: A Step-by-Step Guide
Japanese cuisine is known for its beautiful presentation, fresh ingredients, and well-balanced flavors. Among its many culinary traditions, the bento box stands out as a unique way to enjoy a delicious, nutritious meal on the go. A Japanese bento box is a single-portion meal that combines various dishes in a compact, visually appealing container. Whether you’re packing lunch for work, school, or a picnic, making a bento box is a fun and creative way to express yourself through food.
In this blog, we’ll show you how to prepare a Japanese bento box in simple steps. Don’t worry—you don’t need to be a professional chef to make a beautiful and tasty bento. Just follow along and enjoy!
What Is a Bento Box?
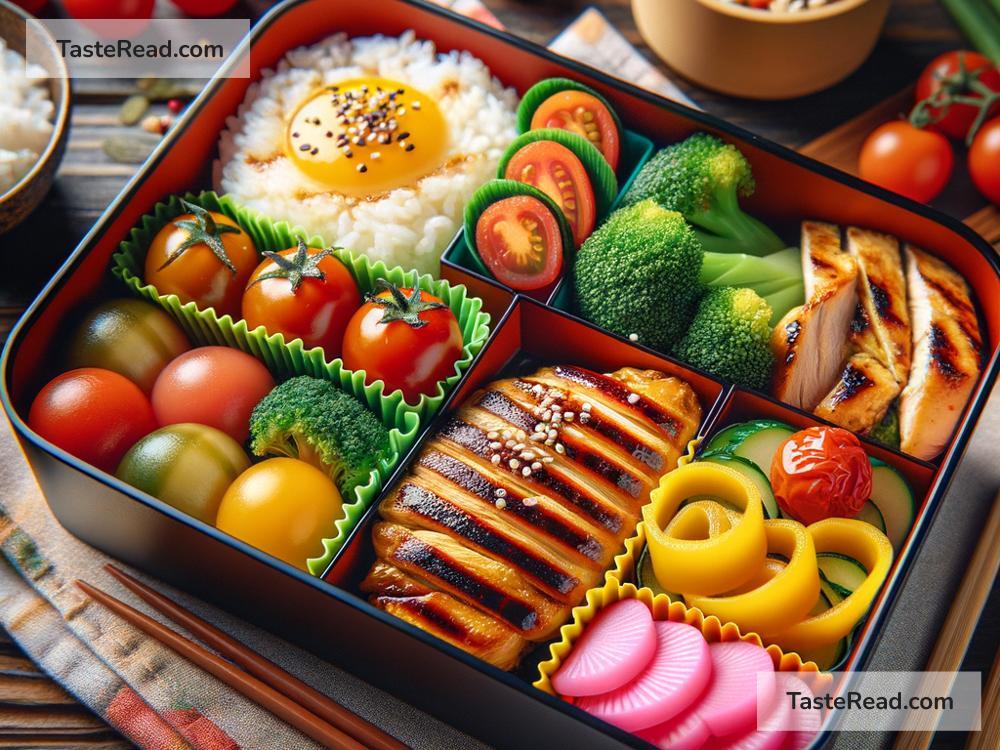
A bento box is essentially a lunchbox—but not just your average sandwich and chips. In Japan, bento boxes are thoughtfully arranged containers that include rice, protein, vegetables, and sometimes fruit or dessert. They are typically colorful, balanced, and neatly packed to ensure every bite is enjoyable.
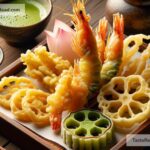
There are many types of bento boxes, ranging from simple homemade versions to elaborate themed styles called “kyaraben,” where food is shaped into cute characters. For this guide, we’ll stick to a beginner-friendly bento that anyone can make.
Step 1: Choose Your Bento Box
The first thing you need is the actual bento box. Bento boxes come in various sizes, shapes, and materials—including plastic, wood, and stainless steel. You’ll want to choose one that fits your portion needs. If you’re preparing lunch for a child, a smaller box will do. For adults, opt for a slightly larger one.
Look for bento boxes with separate compartments, as these will make it easier to organize your food without mixing flavors. If you don’t own a bento box, you can use any container with a lid, but it’s nice to start with the real deal if you can.
Step 2: Plan the Ingredients
A good bento box includes a balance of nutrients and colors. A common guideline is the “3:2:1 rule”:
- 3 parts carbohydrates: Usually rice or noodles are the foundation of a bento.
- 2 parts protein: This could include meat, fish, tofu, or eggs.
- 1 part vegetables: Raw, cooked, or pickled vegetables provide vitamins and add a splash of color.
You can also include fruit, small snacks, or even a sweet treat to round out the meal. Let your creativity shine by mixing colors and flavors!
Step 3: Cook the Carbohydrate Base
Rice is the most common carbohydrate in Japanese bento boxes. You can use plain steamed rice or elevate it by adding furikake (seasoning mix), sesame seeds, or turning it into onigiri (rice balls). To make onigiri, simply shape warm rice into a triangle or ball and wrap it with a piece of seaweed.
If rice isn’t your preference, you can use alternative carbs like soba noodles, udon, or even Japanese-style bread rolls for variety.
Step 4: Prepare the Protein
Next comes the protein, which forms the heart of your bento box. Popular options include:
- Teriyaki Chicken: Cook bite-sized pieces of chicken with soy sauce, sugar, and mirin for a sweet, savory flavor.
- Eggs: Tamagoyaki, a rolled Japanese omelet, is easy to make and packs well. Simply whisk eggs with a bit of sugar and soy sauce, cook in layers, and roll into a rectangular shape.
- Fish: Grilled salmon is a classic and delicious addition to bento.
- Vegetarian Options: If you prefer plant-based proteins, tofu or edamame (boiled soybeans) are great choices.
Be sure to cook your protein thoroughly and season it to taste.
Step 5: Add Vegetables
Vegetables in bento boxes aren’t just about nutrition—they also add color, crunch, and variety. Options include:
- Steamed Vegetables: Broccoli, carrots, asparagus, or green beans work well.
- Pickled Vegetables: Pickled radish (takuan) or cucumber add a tangy flavor.
- Raw Vegetables: Cherry tomatoes, cucumber slices, or lettuce can be placed as fun fillers.
Try to include at least two or three types of vegetables to make the box visually appealing.
Step 6: Assemble the Bento Box
Now comes the fun part—arranging your bento box! Here are some tips to make it look great:
- Pack each ingredient tightly to prevent movement during transport.
- Use contrasting colors: Pair green vegetables with orange carrots or bright yellow tamagoyaki for variety.
- Create shapes: You can use cookie cutters to cut vegetables into stars, flowers, or hearts.
- Divide the space: Use dividers or small baking cups to keep different foods separate if needed.
Take your time to arrange the box neatly—you’ll want the food to look as good as it tastes.
Step 7: Add Final Touches
Once your main ingredients are in place, you can add finishing touches. This might include:
- A few slices of fruit like apple or orange.
- A sprinkle of seaweed flakes or sesame seeds on rice.
- A cute pick or toothpick to secure items like onigiri.
Enjoy Your Bento Box!
Once your bento box is ready, cover it with the lid and store it in the refrigerator (if not being eaten immediately). Pack it with an ice pack to keep food fresh if you’re taking it to school or work. When lunchtime comes around, you’ll have a beautiful and satisfying meal to enjoy!
Preparing Japanese bento boxes is not only fun but also an opportunity to practice mindful eating and creativity in the kitchen. So grab your bento box and start experimenting—your very own Japanese lunch awaits!