How to Create a Classic BBQ Brisket: A Simple Guide for Beginners
Creating a classic BBQ brisket may sound intimidating if you’re new to the art of barbecue, but it doesn’t have to be! With a little patience, the right ingredients, and a simple step-by-step approach, you’ll be able to impress your family and friends with a tender, smoky brisket that tastes like it came from a professional pitmaster. In this blog post, we’ll guide you through the process of making a mouthwatering BBQ brisket in straightforward language. Let’s get started!
What Is Brisket?
Brisket is a large, flavorful cut of beef taken from the lower chest of the cow. It’s known for its tough texture, which is why it needs slow cooking over low heat to become tender and juicy. BBQ brisket gets its signature smoky taste from being cooked in a smoker, but don’t worry — you can also make it on a grill or in the oven.
What You’ll Need
Here’s everything you’ll need to make your brisket:
- Ingredients:
- Beef brisket (choose a piece weighing 8–12 pounds for a classic BBQ)
- Kosher salt and black pepper
- Your favorite BBQ rub (a spice mix that adds flavor)
- Wood chips for smoking (oak, hickory, or mesquite are popular)
-
Optional: BBQ sauce for serving
-
Tools:
- Smoker or grill (if using a regular grill, make sure it has a lid)
- Meat thermometer
- Aluminum foil or butcher paper
- A sharp knife for trimming
Step 1: Pick the Right Brisket
Start by picking a good-quality brisket from your local butcher or store. Look for a brisket with a nice layer of fat on one side (called the “fat cap”), as this will keep the meat moist as it cooks. If possible, buy a “packer brisket,” which includes both the flat and the point — two different sections of the meat that provide a mix of lean and fatty textures.
Step 2: Trim the Brisket
Briskets usually come with excess fat, so you’ll need to trim it before cooking. Use a sharp knife to carefully remove any thick, hard pieces of fat from the surface. Leave a thin layer of fat (around ¼ inch thick) to help baste the meat during cooking. If the fat cap is too thick, it won’t render properly, and your brisket may turn out greasy.
Step 3: Season the Brisket
Seasoning is key to a flavorful brisket. Sprinkle the brisket generously with kosher salt and black pepper, coating it evenly on all sides. If you want more flavor, add a BBQ rub—a mix of spices like paprika, garlic powder, onion powder, chili powder, and brown sugar. Rub the spices into the meat so they stick well.
After seasoning, let the brisket rest at room temperature for about 30 minutes. This allows the rub to soak in while the meat warms slightly.
Step 4: Prepare Your Smoker or Grill
If you’re using a smoker, preheat it to 225–250°F (110–120°C). Add your wood chips; oak, hickory, and mesquite all give a smoky flavor, but try apple or cherry wood if you prefer something milder.
If you’re using a grill, set it up for indirect cooking. This means you’ll create two zones: one side with heat (using charcoal or a burner) and the other side where the brisket will sit and cook slowly. Place a drip pan under the brisket to catch any juices.
Step 5: Smoke the Brisket
Place the brisket on the smoker or on the cooler side of the grill, with the fat cap facing up. Close the lid, and let the brisket cook low and slow. This process can take anywhere from 8 to 12 hours, depending on the size of the brisket. Use a meat thermometer regularly to monitor the temperature — aim for an internal temperature of 165°F (74°C) during the first stage of cooking.
Step 6: Wrap It Up
Once the brisket reaches 165°F, wrap it in aluminum foil or butcher paper. This helps lock in moisture and prevents the outside from drying out. Then return it to the smoker or grill and continue cooking until the internal temperature hits 203°F (95°C). At this point, the brisket will be tender and ready to eat.
Step 7: Let It Rest
After cooking, let the brisket rest (still wrapped) for at least 30–60 minutes. This allows the juices to redistribute, making the meat more flavorful and tender. Don’t skip this step—it’s crucial to get the perfect brisket!
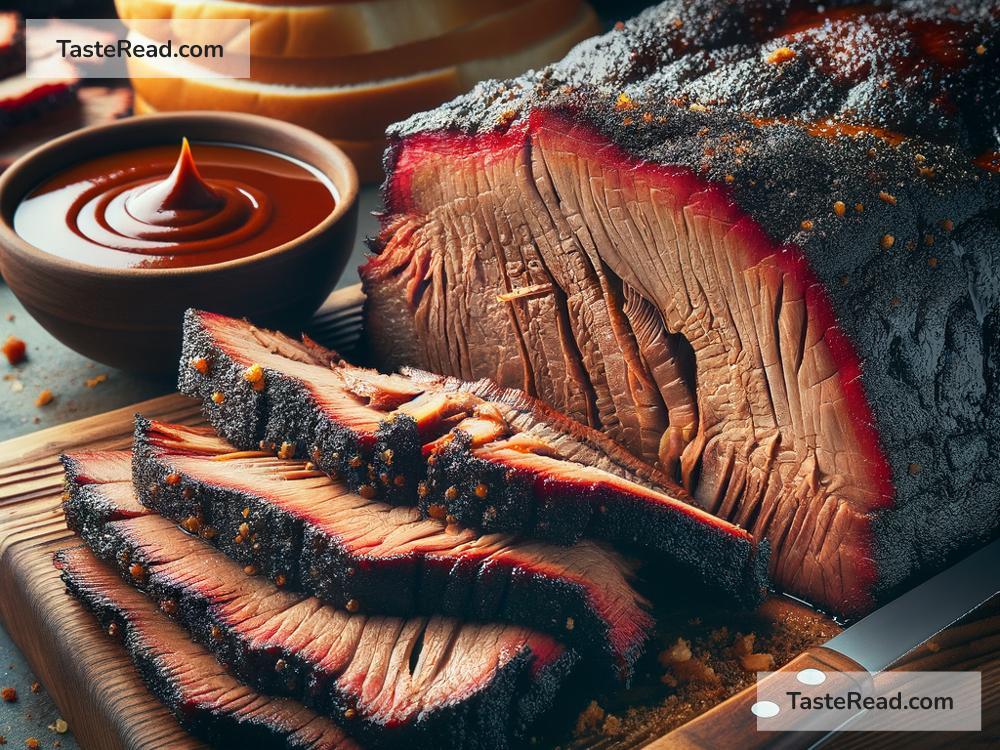
Step 8: Slice and Serve
Unwrap the brisket and place it on a cutting board. Slice it against the grain into thin pieces. Cutting against the grain ensures the meat is tender and easy to chew. Serve the brisket as-is or with your favorite BBQ sauce on the side. Pair it with classic sides like coleslaw, baked beans, and cornbread.
Final Thoughts
Making a classic BBQ brisket requires time and patience, but the results are absolutely worth it. The combination of smoky flavor, tender meat, and delicious spices makes brisket a standout dish for any barbecue. Follow these simple steps, and you’ll be well on your way to becoming the barbecue hero of your next cookout. Remember, practice makes perfect—so don’t be afraid to try again and tweak your recipe until it’s just right.
Happy cooking, and enjoy every bite!