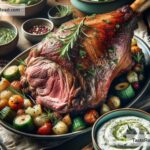
How to Create a Classic Roasted Turkey: A Step-by-Step Guide
Roasting a turkey is one of those timeless traditions that brings families and friends together during holidays and special occasions. While the idea of cooking a whole turkey may seem intimidating, it’s simpler than you think. With a few easy steps and some patience, you can prepare a delicious roasted turkey that will impress your guests. In this blog post, we’ll walk you through the process using simple English, so even first-time cooks can follow along.
Step 1: Gather Your Ingredients and Tools
Before you start, make sure you have everything you need. Here’s what you’ll require:
Ingredients:
– 1 whole turkey (12-15 pounds is ideal for a small gathering)
– Butter or olive oil (about ½ cup)
– Salt
– Black pepper
– Herbs (like rosemary, thyme, and sage)
– Garlic (optional)
– Lemon or orange (optional)
– Vegetables (like onions, carrots, and celery for added flavor)
Tools:
– Roasting pan
– Rack for the roasting pan (if available)
– Kitchen twine (to tie the legs of the turkey)
– Meat thermometer
– Aluminum foil
– Basting brush or spoon
Step 2: Thaw the Turkey
If your turkey is frozen, it needs to be thawed completely before roasting. The safest way to thaw it is in the refrigerator. Place the turkey in a dish to catch any dripping liquids and let it thaw for 24 hours per every 4-5 pounds of turkey. For example, a 12-pound turkey would take about 3 days to thaw.
Pro Tip: Never thaw a turkey at room temperature—it can spoil and become unsafe to eat.
Step 3: Prepare the Turkey
Once the turkey is thawed, remove it from its packaging. Open the cavity and take out the bag containing giblets (often includes the liver, heart, and neck). You can save these for making gravy or stock, or discard them if you don’t plan to use them.
Next, pat the turkey dry using paper towels. Dry skin is important to achieve a crispy, golden exterior.
Step 4: Season the Turkey
Season the inside: Start by seasoning the cavity. Sprinkle salt, pepper, and add a few sprigs of rosemary, thyme, or sage for extra flavor. You can also stuff the cavity with a halved lemon or orange, and a few peeled garlic cloves to infuse the meat with flavor.
Season the outside: Rub the turkey generously with softened butter or olive oil. This helps the skin crisp up while roasting. Sprinkle salt, pepper, and more herbs all over the outside of the turkey.
Step 5: Truss the Turkey (Optional)
Trussing means tying the turkey’s legs together with kitchen twine. While it’s not absolutely necessary, it helps the turkey cook more evenly and keeps the legs from spreading out while roasting.
Step 6: Place the Turkey in the Roasting Pan
Put a rack inside your roasting pan if you have one; this lifts the turkey and allows the heat to circulate evenly. If you don’t have a rack, you can make a bed of chopped vegetables (like onions, carrots, and celery) to elevate the turkey.
Place the turkey on the rack or vegetables breast-side up. If the wings are sticking out, tuck them under the bird to prevent burning.
Step 7: Roast the Turkey
Preheat your oven to 325°F (160°C). Place the turkey in the center of the oven.
The general rule for roasting a turkey is 15 minutes per pound of turkey at 325°F. For example:
– A 12-pound turkey will take about 3 hours.
– A 15-pound turkey will take about 3 hours and 45 minutes.
Halfway through the cooking process, use a basting brush or spoon to coat the turkey with its juices. This step is optional, but it keeps the turkey moist and adds flavor.
Step 8: Check the Temperature
Use a meat thermometer to check if the turkey is done. Insert the thermometer into the thickest part of the turkey’s thigh without touching the bone. The turkey is fully cooked when it reaches:
– 165°F (74°C) in the breast
– 175°F (80°C) in the thighs
If your turkey cooks faster than expected and starts to brown too much on top, loosely cover it with aluminum foil to prevent burning.
Step 9: Let the Turkey Rest
Once the turkey is cooked, remove it from the oven and let it rest for at least 20-30 minutes before carving. This allows the juices to redistribute, making the meat tender and flavorful.
Step 10: Carve and Serve
Use a sharp knife to carve the turkey. Start with the legs, then slice the breast meat. Arrange the slices on a serving platter and garnish with fresh herbs or slices of lemon for presentation.
Serve the turkey with traditional sides like mashed potatoes, stuffing, cranberry sauce, or gravy. Enjoy your meal with loved ones!
Final Tips:
- Plan ahead: Roasting a turkey takes time, so start early in the day.
- Don’t skip resting: Resting the turkey is key to juicy meat.
- Leftovers: Save extra turkey for sandwiches, soups, or salads.
There you have it! Creating a classic roasted turkey is easier than it seems. Follow these steps, and you’ll have a centerpiece that will make your holiday meal unforgettable. Happy cooking!


