How to Create Crunchy Granola Bars at Home
Granola bars are a convenient and delicious snack, perfect for breakfast on-the-go, a midday pick-me-up, or a treat during outdoor adventures. Making your own crunchy granola bars at home is surprisingly easy and allows you to customize flavors to suit your taste. In this blog, I’ll walk you through the simple steps to create crunchy granola bars using everyday ingredients found in your kitchen.
Why Make Granola Bars at Home?
Store-bought granola bars may be convenient, but they often contain added sugars, preservatives, and artificial flavors. By making granola bars at home, you can control the ingredients, experiment with mix-ins like nuts or dried fruits, and enjoy fresher, healthier snacks. Plus, it’s fun and satisfying to make your own!
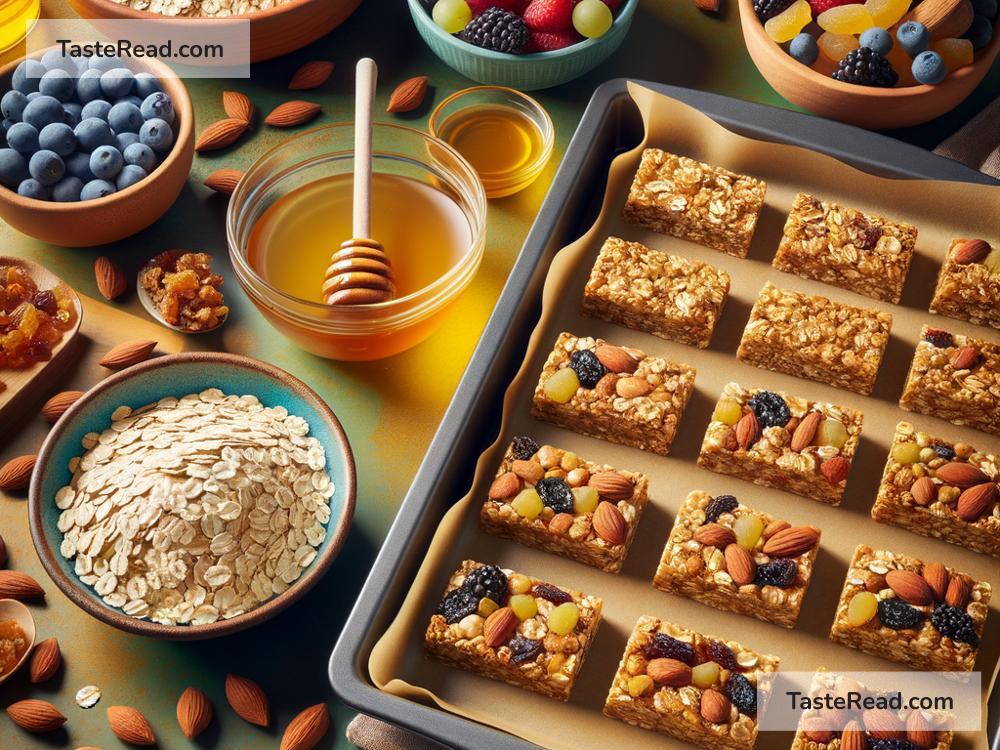
Ingredients You’ll Need
To make crunchy granola bars, gather the following basic ingredients:
- 2 cups rolled oats (not instant oatmeal)
- 1 cup nuts/seeds (almonds, walnuts, sunflower seeds – whatever you like)
- ½ cup dried fruit (raisins, cranberries, or chopped apricots)
- ¼ cup honey or maple syrup (your natural sweetener)
- ¼ cup brown sugar (adds sweetness and helps create the crunch)
- 2 tablespoons butter or coconut oil (for binding)
- 1 teaspoon vanilla extract (flavor enhancer)
- Pinch of salt (balances the sweetness)
- Optional add-ons: Chocolate chips, shredded coconut, ground cinnamon
Feel free to customize these ingredients based on your preferences. For example, if you don’t like nuts, you can replace them with seeds or extra dried fruit.
Simple Step-by-Step Instructions
Here’s how to make crunchy granola bars from scratch:
Step 1: Prepare the Baking Dish
Line a rectangular baking dish (8×8-inch or 9×13-inch pan) with parchment paper. This will make it easier to remove the granola bars later and ensures they don’t stick to the pan.
Step 2: Toast Oats and Nuts
Preheat your oven to 350°F (175°C). Spread the rolled oats and nuts on a baking sheet. Toast them for about 8–10 minutes, stirring halfway through, until they turn lightly golden. Toasting enhances the flavor and texture of the granola bars.
Step 3: Combine the Dry Ingredients
Once the oats and nuts have cooled slightly, mix them in a large bowl with your dried fruit, seeds, and any other add-ons like shredded coconut or chocolate chips.
Step 4: Make the Sticky Sweet Base
In a small saucepan, melt the butter or coconut oil over low heat. Add the honey (or maple syrup), brown sugar, and pinch of salt. Stir until the sugar dissolves completely and the mixture forms a syrup (around 3–4 minutes). Remove the pan from heat, then stir in the vanilla extract.
Step 5: Coat and Mix
Pour the warm syrup over the dry ingredients in your mixing bowl. Stir everything together until the oats, nuts, and dried fruits are completely coated with the sweet syrup. Take your time to ensure everything is evenly mixed—this is key to the bars holding together.
Step 6: Shape and Compress
Transfer the mixture into your prepared baking dish. Spread it out evenly, then press it down firmly with a spatula or the flat bottom of a glass. Packing the mixture tightly helps the bars stick together and ensures they’ll be crunchy instead of crumbly.
Step 7: Bake to Perfection
Place the dish in the oven and bake at 350°F (175°C) for 20–25 minutes. Keep an eye on it during the last few minutes—the edges should turn golden brown, but you don’t want it to burn. Baking gives the bars their crunch and helps them firm up.
Step 8: Cool and Cut
Allow the granola bars to cool completely—this step is important! Cutting them while they’re still warm may cause them to break apart. Once cool, lift the parchment paper out of the dish and place the block of granola on a cutting board. Use a sharp knife to cut the bars into rectangles or squares. Be gentle but firm as you slice.
Tips for Success
- Experiment with Flavors: Try swapping out honey for peanut butter, or toss in a handful of dark chocolate chips for a sweet twist.
- Use a Non-Stick Pan: If you don’t have parchment paper, you can grease the pan slightly to prevent sticking.
- Store Properly: Wrap each granola bar individually in plastic wrap or store them in an airtight container. They’ll stay fresh for about a week at room temperature or longer in the fridge.
Enjoy Your Homemade Crunchy Granola Bars
Congratulations! You’ve mastered the art of making crunchy granola bars. These homemade snacks are excellent for fueling your day while providing a healthy alternative to store-bought options. Share them with friends and family or keep them handy for your next adventure. The best part? You can experiment with different recipes and never get bored!
So, grab your ingredients, preheat the oven, and get ready to make a batch of crunchy goodness. Once you taste the fresh, homemade flavor, you might never go back to packaged granola bars again!
Happy baking! 😊