How to Make Homemade Chocolate Fudge in Simple Steps
There are few things in life sweeter than homemade chocolate fudge! It’s rich, creamy, and melts in your mouth. Plus, making fudge at home is simpler than you might think. You only need a handful of ingredients, a little patience, and some love for chocolate. Whether you’re new to cooking or a seasoned pro, this recipe is perfect for you.
Today, we’ll go step-by-step through how to make chocolate fudge at home using simple ingredients and easy techniques. Just follow along, and you’ll create a delicious treat to share with family and friends—or enjoy all by yourself!
What Is Chocolate Fudge?
Chocolate fudge is a soft, dense dessert made from sugar, butter, chocolate, and sometimes milk or cream. It’s sweet, chocolaty, and perfect for parties, holidays, or as a gift for someone special. Fudge has been a popular dessert for over 100 years, and once you learn how to make it, you’ll see why!
Ingredients for Homemade Chocolate Fudge
This recipe uses everyday ingredients you can find in most kitchens or grocery stores:
- 2 cups semi-sweet chocolate chips (You can also use chopped dark chocolate or milk chocolate, depending on your taste.)
- 1 can (14 ounces) sweetened condensed milk
- 2 tablespoons butter
- 1 teaspoon vanilla extract (optional, but adds flavor)
- ½ cup chopped nuts, marshmallows, or candies (optional toppings for extra crunch or color)
As you can see, the ingredient list is simple and flexible. You don’t need fancy tools either—just a stove, pot, spatula, and a baking pan or dish.
Step-by-Step Instructions
Follow these steps, and you’ll have perfect chocolate fudge in no time:
Step 1: Prepare Your Pan
Start by lining a square baking dish (8×8 inches works well) with parchment paper or aluminum foil. Leave some extra paper hanging over the edges to make it easier to lift the fudge out later. If you don’t have parchment paper, you can grease the pan with a little butter.
Step 2: Melt the Chocolate and Butter
Place a medium-sized saucepan on the stove. Add 2 cups of chocolate chips and 2 tablespoons of butter to the pan. Turn the heat to low or medium-low. Stir the mixture constantly with a spatula or wooden spoon to prevent burning.
As the chocolate and butter melt together, you’ll see a smooth, shiny texture. Be patient—don’t rush this step or use high heat! Chocolate can burn easily, and you want to keep it creamy.
Step 3: Add Sweetened Condensed Milk
Once the chocolate and butter have melted completely, pour in the sweetened condensed milk. Stir it into the mixture until it’s fully combined. The fudge will start to thicken and look even smoother.
If you want to add vanilla extract for more flavor, stir it in now.
Step 4: Mix in Toppings (Optional)
This is the fun part! If you like nuts, marshmallows, or candies in your fudge, now is the time to mix them in. Chop your toppings into small pieces so they blend evenly. You can also leave your fudge plain—it’s delicious either way.
Step 5: Pour and Spread
Carefully pour the fudge mixture into your prepared baking dish. Use a spatula to spread it evenly, pressing it into the corners and smoothing the top.
If you want to add toppings on the surface (like sprinkles or extra nuts), sprinkle them over the fudge before it sets.
Step 6: Chill the Fudge
Place the dish in the refrigerator for 2–3 hours to let the fudge cool and harden. This step is important! Patience is key during this part, as cutting the fudge before it sets can lead to a sticky mess.
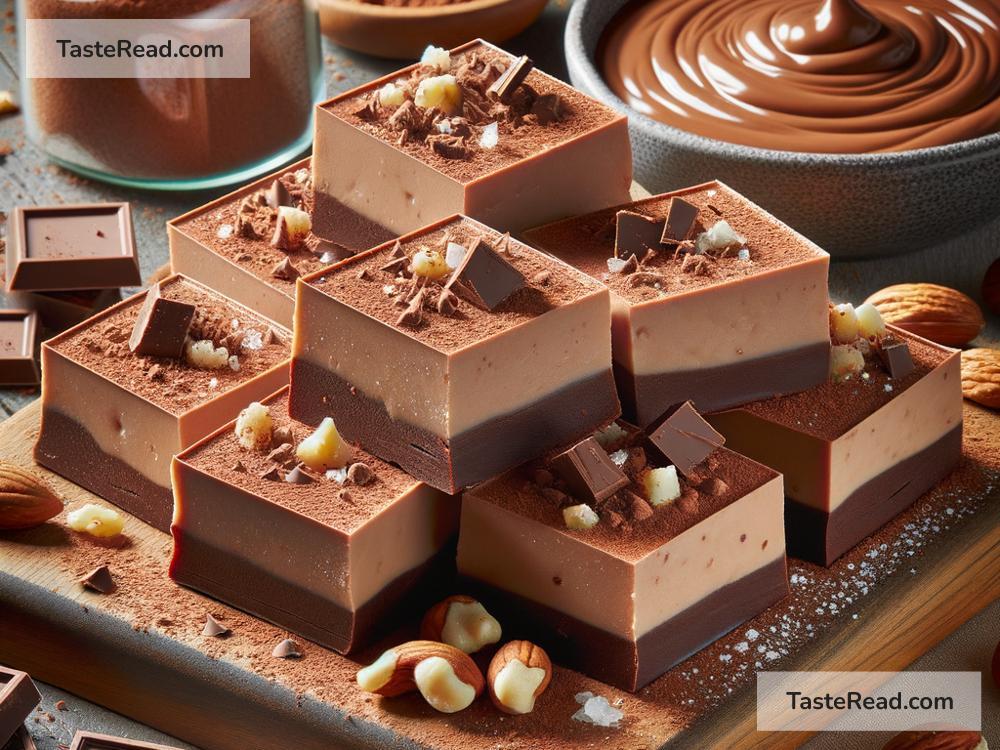
Step 7: Cut and Serve
Once the fudge is firm, lift it out of the pan using the parchment paper or foil. Place it on a cutting board and use a sharp knife to cut it into squares or rectangles.
Now your homemade chocolate fudge is ready to eat! Serve it on a plate, store it in a container, or package it as a gift in fancy boxes or bags.
Helpful Tips
- Store Your Fudge: Keep your fudge in an airtight container in the refrigerator for up to 2 weeks. For longer storage, you can freeze it for up to 3 months. Let frozen fudge thaw at room temperature before eating.
- Experiment with Flavors: Try adding a pinch of sea salt, peppermint extract, or chopped dried fruit to customize your fudge.
- Double the Recipe: If making fudge for a crowd, simply double the ingredients and use a larger pan.
Why You’ll Love Homemade Chocolate Fudge
Homemade chocolate fudge is more than just a dessert—it’s a way to share love and joy. Whether you’re making it for a holiday party, as a gift, or just to satisfy your sweet tooth, the process is fun and rewarding.
With these simple steps, anyone can make fudge that tastes amazing. So grab your ingredients and get ready to create a rich, creamy treat that will brighten your day and impress your taste buds. Enjoy!