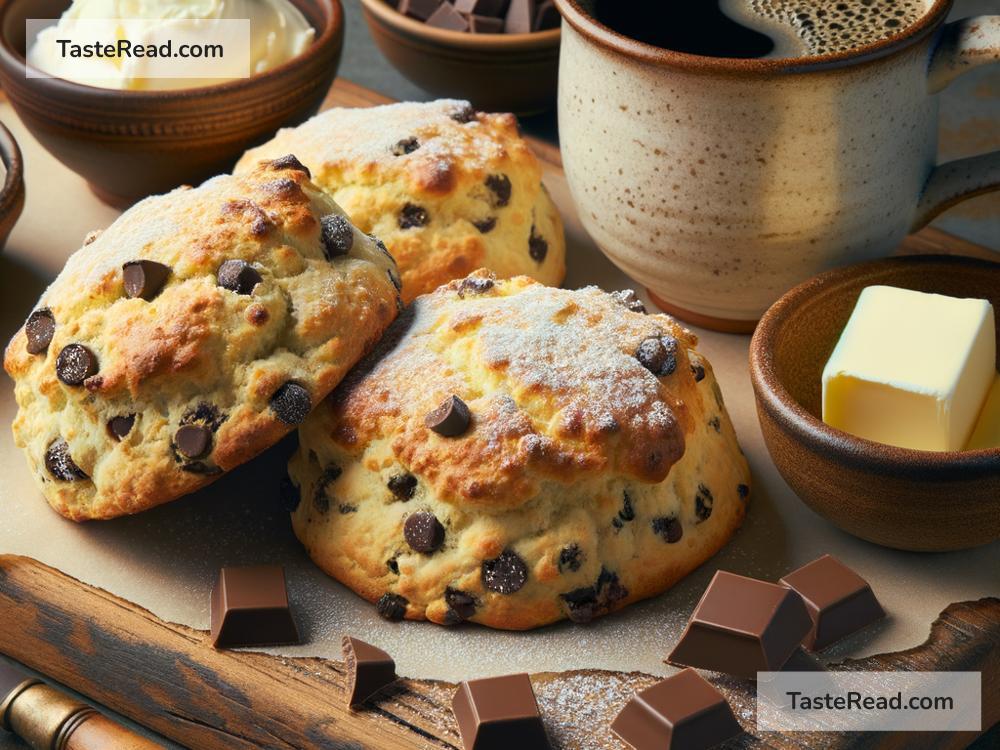
How to Create Buttery Chocolate Chip Scones: A Simple Guide
There’s nothing quite as satisfying as a freshly baked scone bursting with buttery goodness and chocolatey flavor. If you’ve ever wondered how to make buttery chocolate chip scones at home, don’t worry—it’s easier than you think! With simple ingredients and easy steps, you can bake scones that are soft inside, slightly crisp outside, and utterly delicious. Whether you’re enjoying them with morning tea or as a tasty afternoon snack, scones are always a treat. Let’s dive into how to make them.
What You Need
Before you start, gather all your ingredients and tools. Here’s what you’ll need:
Ingredients:
-
2 cups (250 grams) all-purpose flour
This forms the base of your scones. Make sure it’s measured accurately. -
1/4 cup (50 grams) granulated sugar
This adds the sweetness to balance the butter and chocolate. -
1 tablespoon (15 grams) baking powder
This helps the scones rise and become fluffy. -
1/2 teaspoon salt
For flavor balance. -
1/2 cup (115 grams) cold unsalted butter, cubed
Cold butter is key to getting that flaky texture. -
1/2 cup (90 grams) chocolate chips
You can use milk chocolate, dark chocolate, or even mix both! -
2/3 cup (160 ml) heavy cream
Heavy cream gives the scones their rich, buttery taste. -
1 teaspoon vanilla extract (optional)
Adds a nice aroma and enhances flavor. -
1-2 tablespoons milk or cream (for brushing on top)
Helps give your scones a golden crust.
Tools:
- Mixing bowl
- Pastry cutter or fork (to cut the butter into the flour)
- Baking sheet
- Parchment paper or silicone baking mat
- Rolling pin (optional but helpful)
- Measuring cups and spoons
Simple Step-by-Step Instructions
Follow these steps to create buttery chocolate chip scones.
Step 1: Preheat Your Oven
Start by preheating your oven to 400°F (200°C). Place parchment paper or a silicone baking mat on your baking sheet to prevent sticking.
Step 2: Mix the Dry Ingredients
In a large mixing bowl, whisk together the flour, sugar, baking powder, and salt. This ensures that all the dry ingredients are evenly combined.
Step 3: Add the Cold Butter
Take your cubed butter and add it to the dry mixture. Using a pastry cutter or fork, cut the butter into the flour. You want to break it down until the butter pieces are the size of small peas. This step is crucial for creating a flaky texture in your scones. If you don’t own a pastry cutter, you can use clean fingers to rub the butter into the flour—just be quick so the butter doesn’t warm up.
Step 4: Add the Chocolate Chips
Mix the chocolate chips into the flour-butter mixture. Toss them around so they’re evenly distributed throughout the dough.
Step 5: Pour in the Cream
Slowly pour in the heavy cream (and vanilla extract, if using) while gently stirring with a spoon. The dough will start coming together. If it feels too dry, add an extra tablespoon of cream. Don’t overmix; the dough should be a little crumbly but moist enough to hold together.
Step 6: Shape the Dough
Lightly flour your work surface and place the dough onto it. Gather the dough together into one piece and gently press it into a round shape about 1 inch thick. You can use a rolling pin to make the surface even, but don’t overwork the dough.
Step 7: Cut into Triangles
Using a knife or a dough cutter, slice the round into 8 triangles, just like cutting a pizza. You can also use a round biscuit cutter for circle-shaped scones—choose whichever look you prefer!
Step 8: Brush with Milk or Cream
Place the scones on the prepared baking sheet, leaving space between them. Brush the tops with a little milk or cream using a pastry brush. This step ensures that your scones will bake to a beautiful golden color.
Step 9: Bake
Pop the scones into the preheated oven and bake for 15–18 minutes, or until the tops are golden brown. Keep an eye on them toward the end of baking to prevent overbrowning.
Step 10: Cool and Serve
Once they’re baked, remove the scones from the oven and cool them on the baking sheet for a few minutes. They’re best enjoyed slightly warm, so dig in while the chocolate chips are still gooey and melty!
Tips for Perfect Scones
- Use cold butter and cream: Cold ingredients help create a flaky texture. Don’t let them warm up before mixing.
- Don’t overmix the dough: Overmixing can make your scones tough, so just mix until everything comes together.
- Experiment with flavors: Add orange zest or a sprinkle of cinnamon for a fun twist!
Final Thoughts
There you go—a simple recipe for buttery chocolate chip scones that you can easily whip up in your own kitchen. These scones are perfect for breakfast, tea time, or even dessert. With their buttery base and rich chocolate chips, they’re guaranteed to please your taste buds. Happy baking!