How to Create Classic Cherry Pie: A Simple Guide
Cherry pie is one of the most iconic and delicious desserts you can make. Its sweet and tangy flavors, paired with a buttery, flaky crust, make it a family favorite and a crowd-pleaser at gatherings. Despite its classic appeal, creating a cherry pie at home isn’t as complicated as you might think! With simple ingredients and easy steps, you can enjoy a homemade cherry pie that tastes just like grandma used to make. Let’s dive into this step-by-step guide to make a classic cherry pie that everyone will love!
Ingredients You’ll Need
Before you start, gather the following ingredients:
For the Pie Filling:
– 5 cups of fresh or frozen cherries (pitted)
– ¾ cup of granulated sugar
– ¼ cup of cornstarch (for thickening)
– 1 teaspoon of vanilla extract
– ¼ teaspoon of almond extract (optional, for extra flavor)
– 1 tablespoon of fresh lemon juice
– ¼ teaspoon of salt
For the Pie Crust:
– 2 ½ cups of all-purpose flour
– 1 cup of unsalted butter (cold and cut into small cubes)
– 1 teaspoon of salt
– 1 tablespoon of sugar
– 6-8 tablespoons of ice-cold water
Extras:
– 1 egg (for an egg wash to glaze the crust)
– 1 tablespoon of water or milk (to mix with the egg)
– Optional: coarse sugar for sprinkling on top
Step 1: Make the Pie Crust
The secret to a great cherry pie is a buttery, flaky crust. Start by making your pie dough:
- In a large bowl, combine the all-purpose flour, salt, and sugar.
- Add the cold butter cubes to the flour mixture. Use a pastry cutter, a fork, or your fingers to cut the butter into the flour until the mixture looks like coarse crumbs with small butter pieces.
- Start adding ice-cold water one tablespoon at a time. Mix gently after each addition until the dough starts to come together. Be careful not to overwork the dough.
- Divide the dough into two equal parts, shape them into disks, and wrap them tightly with plastic wrap. Place them in the refrigerator for about 30 minutes to chill.
Step 2: Prepare the Cherry Filling
While your dough is chilling, it’s time to make the cherry filling!
- If you’re using fresh cherries, wash and pit them. If you’re using frozen cherries, thaw them first and drain any excess liquid.
- In a large mixing bowl, combine the pitted cherries, granulated sugar, cornstarch, salt, lemon juice, vanilla extract, and almond extract. Stir everything together until the cherries are evenly coated. The cornstarch will help thicken the pie filling as it bakes.
Step 3: Roll Out the Dough
Once the dough has chilled, you’re ready to roll it out:
- Lightly flour your work surface and rolling pin. Take one disk of dough out of the fridge and roll it into a circle about 12 inches in diameter. This will be your bottom crust.
- Carefully transfer the rolled-out dough to a 9-inch pie dish and press it gently into place. Let the edges hang over the rim slightly.
- Pour the prepared cherry filling into the crust.
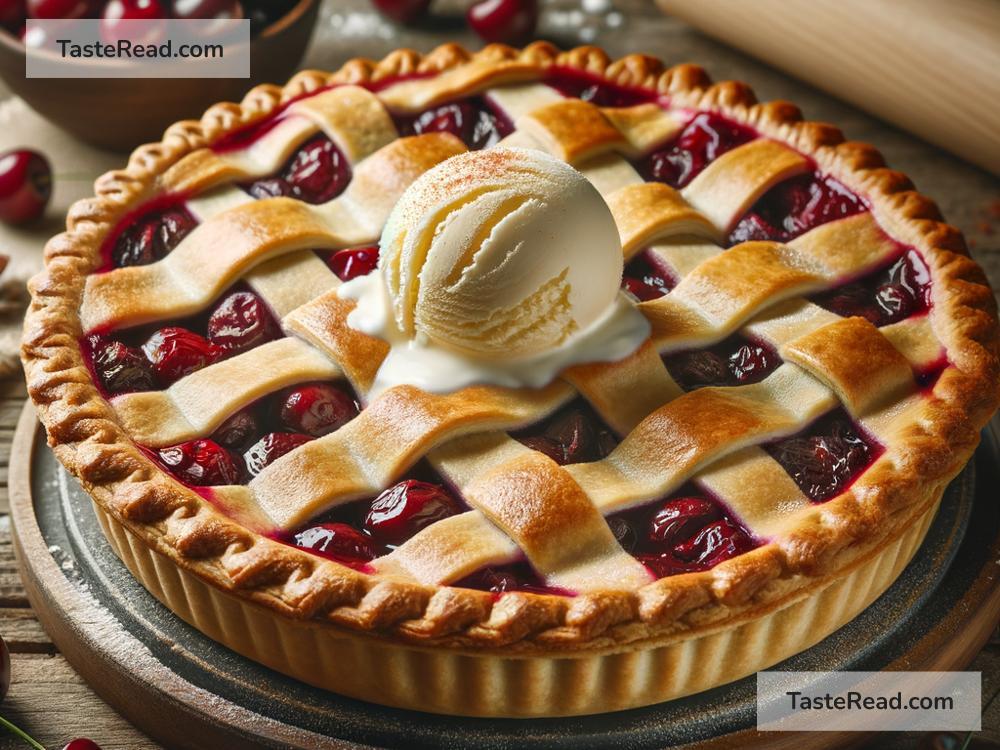
Now, roll out the second disk of dough to create the top crust. You can keep it simple by covering the pie completely and cutting small slits on top to allow steam to escape. Or, you can try a lattice design by cutting the dough into strips and weaving them over the filling. Both methods work beautifully!
Step 4: Seal and Decorate the Pie
To seal the pie:
- If using a full top crust, place it over the cherries and pinch the edges of the top and bottom crusts together to seal them. Trim off any excess dough.
- If making a lattice design, pinch the edges together after placing the strips. You can also crimp the edges using your fingers or a fork for a decorative look.
Brush the top crust lightly with an egg wash (the beaten egg mixed with water or milk). Sprinkle some coarse sugar on top for added sweetness and crunch, if desired.
Step 5: Bake the Cherry Pie
Preheat your oven to 375°F (190°C) and place the pie dish on a baking sheet (this will catch any drips).
- Bake the pie for 20 minutes at 375°F.
- Reduce the oven temperature to 350°F (175°C) and bake for another 40-50 minutes, or until the crust is golden brown and the filling bubbles through the vents or lattice. If the edges of your pie crust are browning too quickly, cover them with aluminum foil or a pie crust shield.
Step 6: Cool and Serve
Once your cherry pie is done baking, allow it to cool for at least 2-3 hours before serving. Cooling helps the filling set, making the pie easier to slice.
Serve your classic cherry pie with a dollop of whipped cream or a scoop of vanilla ice cream for an extra special treat!
Making cherry pie at home is a joyful and satisfying experience. With just a few simple ingredients and careful steps, you can create a dessert that looks and tastes amazing. So, grab your apron, follow this recipe, and enjoy the fruity goodness of homemade cherry pie!