How to Create Classic Chocolate Mousse Cake
Chocolate mousse cake is a timeless dessert that combines the rich, decadent flavor of chocolate with the airy, fluffy texture of mousse. If you’re looking for a special treat to wow your friends or family, this dessert is perfect and easier to make than you might think! In this step-by-step guide, I’ll show you how to create a classic chocolate mousse cake using simple English. You don’t have to be a professional baker to make this—it’s all about patience and love for chocolate.
What You’ll Need
Before diving in, gather your ingredients. You’ll need:
For the cake base:
– 1 cup of all-purpose flour
– 1/2 cup of cocoa powder
– 1/2 tsp baking soda
– 1/2 tsp baking powder
– A pinch of salt
– 1/2 cup sugar
– 1/2 cup vegetable oil
– 1/2 cup milk
– 2 large eggs
– 1 tsp vanilla extract
For the mousse:
– 200 g (7 oz) of dark chocolate (70% cocoa works best)
– 1 cup heavy cream (chilled)
– 3 large egg yolks
– 1/4 cup sugar
Optional:
– Whipped cream for topping
– Chocolate shavings or cocoa powder for garnish
Step 1: Prepare the Cake Base
The cake base forms the bottom layer of your dessert, so you’ll want it light but sturdy enough to hold the mousse.
- Preheat your oven to 350°F (175°C). Grease and line an 8-inch round cake pan with parchment paper.
- Mix the dry ingredients. In a large bowl, sift together the flour, cocoa powder, baking soda, baking powder, and salt.
- Combine wet ingredients. In another bowl, whisk together the sugar, vegetable oil, milk, eggs, and vanilla extract until smooth.
- Make the batter. Gradually fold the dry ingredients into the wet mixture until combined. Avoid overmixing; you want the batter smooth but not overworked.
- Bake. Pour the batter into the prepared pan and bake for 20–25 minutes, or until a toothpick inserted into the center comes out clean.
- Cool the cake. Remove it from the oven and let it cool completely in the pan before transferring it to a plate.
Step 2: Make the Chocolate Mousse
The mousse is the star of this cake—it’s soft, creamy, and packed with chocolate flavor.
- Melt the chocolate. Chop the dark chocolate into small pieces and melt it in a heatproof bowl over a pot of simmering water (double boiler method). Stir constantly until smooth, then let it cool slightly.
- Prepare the egg yolks. In a clean bowl, beat the egg yolks and sugar together until pale and creamy. Slowly add the melted chocolate to the egg mixture, stirring well to combine.
- Whip the cream. Using an electric mixer, beat the chilled heavy cream until soft peaks form. Be careful not to overwhip—you don’t want stiff peaks.
- Fold the ingredients. Gently fold the whipped cream into the chocolate mixture in small batches. This keeps the mousse light and fluffy. Take your time to mix everything evenly without deflating the whipped cream.
Step 3: Assemble the Cake
Now comes the fun part—putting it all together!
- Layer the cake base. Place your cake base on a serving plate or cake stand. If the top is uneven, you can trim it with a knife to ensure a smooth, flat surface.
- Add the mousse. Spoon the chocolate mousse onto the cake base, spreading it evenly with a spatula. You can heap it on thick or aim for about half the cake height.
- Chill the cake. Once assembled, place the cake in the refrigerator for at least 4 hours (or overnight) to allow the mousse to firm up. This step is crucial for the mousse to set and hold its shape.
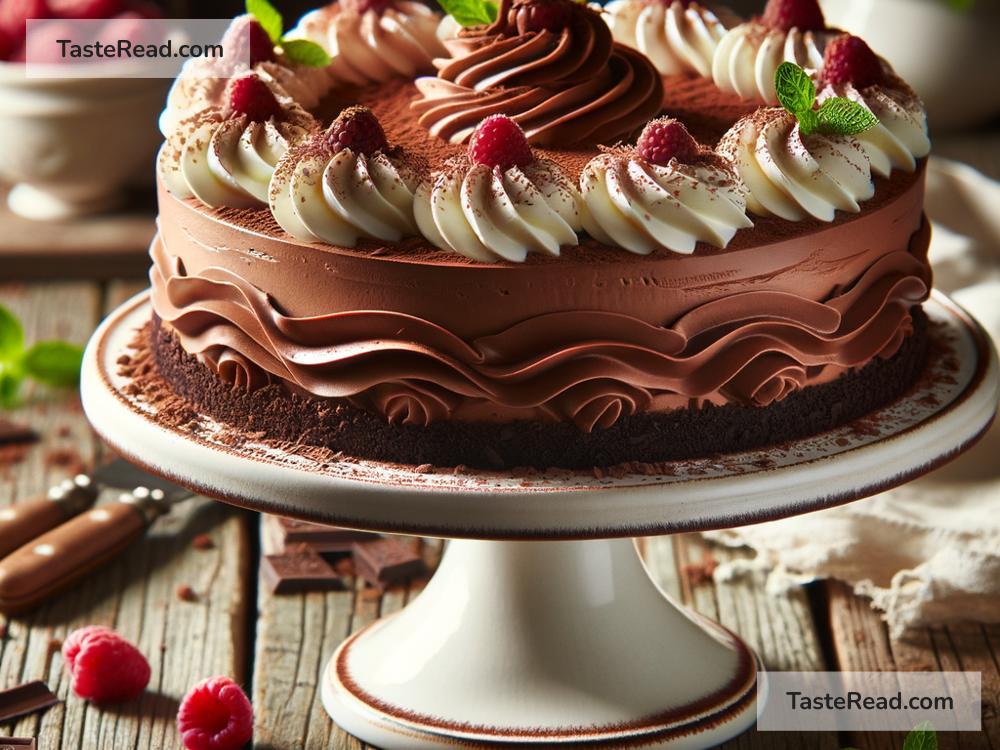
Step 4: Decorate and Serve
Your chocolate mousse cake is almost ready! A little decoration will turn it into a showstopper.
- Top with whipped cream: Spread or pipe whipped cream over the mousse for an elegant finish.
- Add garnishes: Sprinkle cocoa powder, chocolate shavings, or crushed nuts over the top. Fresh berries like raspberries or strawberries also make a great addition.
- Slice and serve: For neat slices, use a hot knife (dip it in hot water, then wipe dry before slicing). Serve chilled and watch as everyone’s eyes light up with delight!
Tips for Success
- Quality chocolate matters: Use high-quality dark chocolate for the mousse; it makes a big difference in flavor. Avoid overly sweet chocolate.
- Don’t rush: Give the mousse enough time to set in the refrigerator. This ensures it’s firm and easy to slice without running.
- Experiment: You can add coffee or orange zest to the mousse for a unique twist.
Final Thoughts
Making a classic chocolate mousse cake may seem intimidating at first, but once you follow these simple steps, you’ll realize how manageable it is. This dessert is perfect for birthdays, celebrations, or even just treating yourself—you deserve it!
Give this recipe a try, and you’ll surely impress your friends and family with your baking skills. After all, who can resist the combination of rich chocolate and creamy mousse?
Happy baking, and enjoy your chocolate mousse cake!