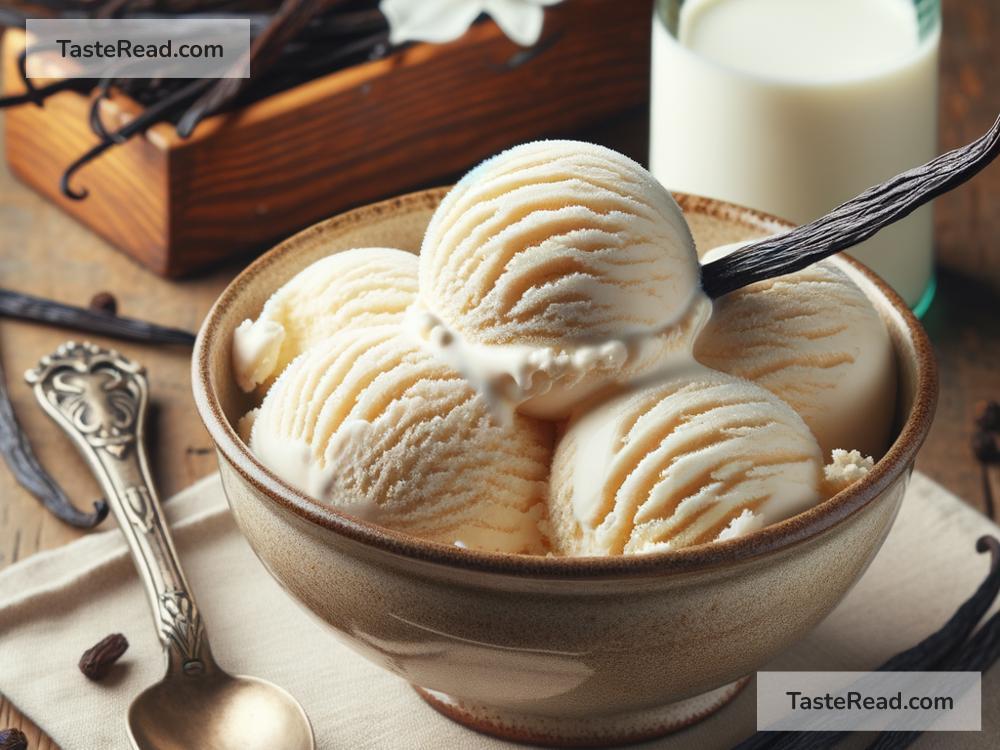
How to Make Classic Vanilla Bean Ice Cream at Home
Who doesn’t love a scoop of creamy, homemade vanilla bean ice cream? It’s a classic dessert that pairs wonderfully with pies, cookies, or even stands alone as the perfect treat. Making ice cream at home might sound intimidating, but trust us—it’s much easier than it seems. With just a few ingredients and some patience, you’ll create ice cream that’s so good, you may never go back to store-bought!
In this step-by-step guide, we’ll show you how to make classic vanilla bean ice cream. We’ll keep it simple so that anyone can follow along. Let’s dive in.
Ingredients You’ll Need
To make vanilla bean ice cream, you only need a few basic ingredients. Here’s what you’ll need:
- 2 cups of whole milk
- 2 cups of heavy cream
- ¾ cup of granulated sugar
- 1 vanilla bean (or 2 teaspoons of pure vanilla extract)
- 5 large egg yolks
- A pinch of salt
These ingredients are the foundation of any great ice cream recipe. The vanilla bean gives it that deep, rich vanilla flavor, but you can substitute vanilla extract if necessary.
Equipment You’ll Need
Before you begin, make sure you have the right tools:
- Ice cream maker (Electric or manual)
- Medium-sized saucepan
- Whisk
- Heat-safe bowl
- Fine mesh strainer
- Spatula
- Freezer-safe container (For storing the ice cream)
Step-by-Step Instructions
Let’s break it down into simple steps. Follow these carefully to ensure your ice cream turns out perfectly.
Step 1: Prepare the Vanilla Bean
If you’re using a vanilla bean, start by splitting it lengthwise with a sharp knife. Use the back of the knife to scrape out the seeds inside. Set the seeds and the pod aside—they’re packed with intense flavor!
Step 2: Heat the Milk, Cream, and Vanilla
In your medium-sized saucepan, combine the whole milk, heavy cream, sugar, and the vanilla bean seeds. Toss in the empty pod too—it adds extra flavor while the mixture heats. If you’re using vanilla extract instead, don’t add it yet. Heat the mixture over medium heat until small bubbles form along the edges, but don’t let it boil. Stir occasionally to keep the sugar dissolved.
Step 3: Whisk the Egg Yolks
While the milk mixture is heating, separate your eggs and whisk the yolks in a heat-safe bowl. Beat them until they’re smooth and pale yellow. Egg yolks are the secret to giving ice cream its creamy, custard-like texture.
Step 4: Temper the Egg Yolks
Tempering means carefully mixing two different temperatures without cooking the eggs. Slowly pour about 1 cup of the hot milk mixture into the bowl with the yolks, whisking constantly. Once combined, pour the yolk mixture back into the saucepan with the rest of the milk. Stir well.
Step 5: Cook the Custard Base
Keep the saucepan on medium heat and stir the mixture gently with a spatula. Cook until the mixture thickens slightly—it should coat the back of the spatula. This step usually takes about 5 to 8 minutes. Be careful not to overheat, as high temperatures can cause the eggs to curdle.
Step 6: Strain the Custard
Once the custard base is done, remove the saucepan from the heat. Pour it through a fine mesh strainer into a clean bowl to remove the vanilla pod and any possible lumps. This ensures your ice cream is silky smooth.
Step 7: Add Vanilla Extract (Optional)
If you didn’t use a vanilla bean, now’s the time to add the vanilla extract. Stir it into the warm custard.
Step 8: Chill the Mixture
Cover the bowl with plastic wrap, pressing the wrap directly against the surface of the custard to prevent a skin from forming. Refrigerate for at least 4 hours or preferably overnight. The cooler your mixture is, the better it will churn later.
Step 9: Churn the Ice Cream
Once your custard base is fully chilled, pour it into your ice cream maker. Follow the manufacturer’s instructions to churn until the mixture thickens into ice cream. This usually takes 20 to 30 minutes, depending on your machine.
Step 10: Freeze and Serve
Transfer the churned ice cream into a freezer-safe container. Cover it tightly and freeze for at least 2 hours for a firmer consistency. When you’re ready to serve, let the ice cream sit at room temperature for a few minutes to soften slightly, then scoop and enjoy!
Tips for Success
- Use high-quality ingredients: Fresh milk, cream, and pure vanilla will make all the difference in flavor.
- Keep everything cold: The colder your custard base and ice cream maker, the creamier the final product will be.
- Don’t skip the chilling step: Rushing through this step can result in less smooth ice cream.
Why Homemade Is Worth It
Making ice cream at home allows you full control over the ingredients and flavor. Whether you’re avoiding preservatives or experimenting with fun add-ins like chocolate chips or caramel swirls, the possibilities are endless. Plus, nothing beats the satisfaction of enjoying a dessert you made from scratch!
So, grab your ingredients, roll up your sleeves, and get ready to whip up some classic vanilla bean ice cream. It’s way easier than you think—and way tastier too!