Simple Steps to Create Scrumptious Roasted Garlic and Herb Cheese Balls for Your Next Gathering
If you’re on the hunt for a show-stopping appetizer that’s sure to wow your guests at your next dinner party or gathering, look no further! Roasted Garlic and Herb Cheese Balls perfectly blend rich flavors and creamy textures, providing an irresistibly tasty starter that everyone will love. The best part? They’re surprisingly simple to make, even if you’re not a whiz in the kitchen. Let’s dive right into how you can prepare these delightful cheese balls with ease.
Ingredients You’ll Need:
- 2 heads of garlic
- Olive oil
- 1 package (8 oz) of cream cheese, softened
- 1 cup of shredded sharp cheddar cheese
- 1 cup of shredded mozzarella cheese
- 1 tablespoon of fresh thyme, finely chopped
- 1 tablespoon of fresh rosemary, finely chopped
- 1 tablespoon of fresh parsley, finely chopped
- Salt and pepper to taste
- 1 cup of chopped nuts (walnuts, pecans, or almonds) or breadcrumbs for coating
- Crackers or sliced baguette for serving
Getting Started with Roasted Garlic:
- Preheat your oven to 400°F (200°C).
- Cut the top off the heads of garlic to expose the cloves. Drizzle olive oil over each head, wrap them separately in foil, and place them on a baking sheet.
- Roast in the preheated oven for 30-40 minutes, or until the cloves are soft and golden. Let them cool enough to handle.
- Gently squeeze the roasted garlic cloves out of their skins into a small bowl. Mash them with a fork until smooth.
Preparing the Herb Cheese Mixture:
- In a large mixing bowl, combine the mashed roasted garlic with softened cream cheese. Mix until well-incorporated.
- Add the shredded sharp cheddar and mozzarella cheese to the bowl along with the chopped thyme, rosemary, and parsley. Stir the mixture until all the ingredients are evenly distributed. Season with salt and pepper according to your taste.
- Cover the bowl with plastic wrap and chill in the refrigerator for about an hour. This step helps the cheese mixture to firm up, making it easier to shape into balls.
Shaping and Coating the Cheese Balls:
- While your cheese mixture chills, you can prepare your coating. If you’re using nuts, chop them finely until you have about a cup. If you prefer breadcrumbs for a crispy texture, get them ready in a shallow dish.
- Once chilled, use a spoon or a small ice cream scoop to portion the cheese mixture. Roll each portion between your hands to form smooth balls.
- Roll each cheese ball in the chopped nuts or breadcrumbs until well-coated. If the nuts or breadcrumbs aren’t sticking as well as you’d like, you can lightly press them onto the cheese balls to ensure a good coating.
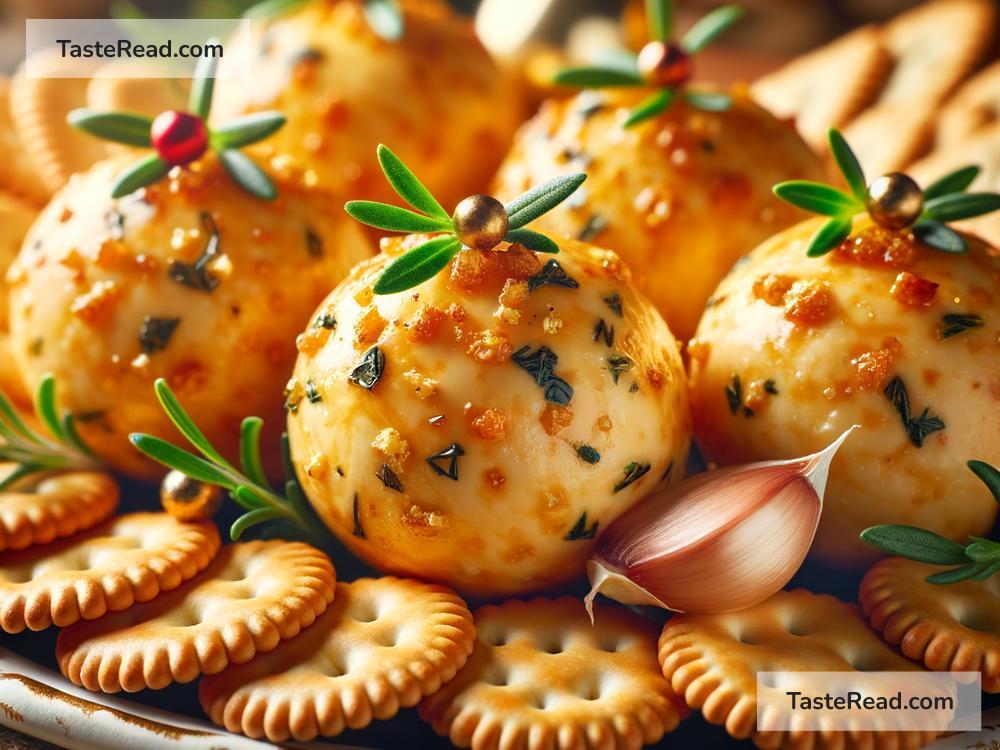
Serving Your Garlic and Herb Cheese Balls:
Arrange the cheese balls on a serving platter with crackers or thinly sliced pieces of baguette. The rich, savory flavors of the roasted garlic and herbs, combined with the creamy cheese and crunchy exterior, make a delightful contrast that’s sure to tantalize the taste buds of your guests.
A Few Tips for Perfection:
- If you have the time, consider making the cheese mixture a day ahead. The flavors develop and meld together even more when given time to rest in the refrigerator.
- Feel free to experiment with different types of cheese, herbs, or coatings based on your preferences or what you have on hand.
- For a festive touch, divide the cheese mixture and create smaller balls, serving them as individual bite-sized appetizers.
Roasted Garlic and Herb Cheese Balls are not only delicious but also add a touch of elegance to any gathering. They’re a testament to the fact that with a few simple ingredients and straightforward steps, you can create appetizers that are both impressive and delectable. So, the next time you’re in charge of the starters, remember this recipe and prepare to bask in the compliments from your delighted guests. Happy cooking!