How to Make Authentic Korean Kimchi at Home
Kimchi is a hallmark of Korean cuisine, beloved for its spicy, sour, and slightly sweet flavors. It’s a versatile side dish, made from fermented vegetables, that can elevate any meal. Making kimchi at home might seem daunting, but it’s an enjoyable process that immerses you in the vibrant world of Korean cooking. Here’s a simple guide to crafting authentic Korean kimchi in your own kitchen.
Ingredients:
– 1 large Napa cabbage (about 2 pounds)
– ¼ cup sea salt
– Water
For the Paste:
– 1 tablespoon grated ginger
– 1 tablespoon minced garlic (about 5-6 cloves)
– 1 teaspoon sugar
– 2-3 tablespoons fish sauce (or a vegan substitute)
– 1-5 tablespoons Korean red pepper flakes (gochugaru) depending on your spice tolerance
– 4 green onions, chopped
– 1 medium daikon radish, peeled and cut into matchsticks
– 1 carrot, peeled and cut into matchsticks
Directions:
1. Prepare the Cabbage:
Begin by cutting the Napa cabbage in half lengthwise, then cut each half into quarters. You should have four long quarters. Rinse these under cold water. Sprinkle the sea salt between the leaves, ensuring it’s well-distributed. Place the quarters in a large bowl and cover them with cold water. Place a heavy object (like a plate with a can on top) to keep the cabbages submerged. Leave them to brine for about 2 hours, turning every 30 minutes.
2. Rinse and Drain:
After brining, rinse the cabbage quarters under cold water thoroughly to remove the salt. Let them drain in a colander for about 15 to 20 minutes. Meanwhile, you can start preparing the paste.
3. Make the Kimchi Paste:
In a bowl, combine ginger, garlic, sugar, fish sauce, and Korean red pepper flakes. This mixture should form a paste; you can adjust the amount of fish sauce and red pepper flakes according to your taste preferences. More fish sauce will give a deeper flavor, while more red pepper flakes will increase the heat.
4. Add the Vegetables:
To the paste, add the chopped green onions, daikon radish sticks, and carrot sticks. Mix everything together until the vegetables are well-coated with the paste.
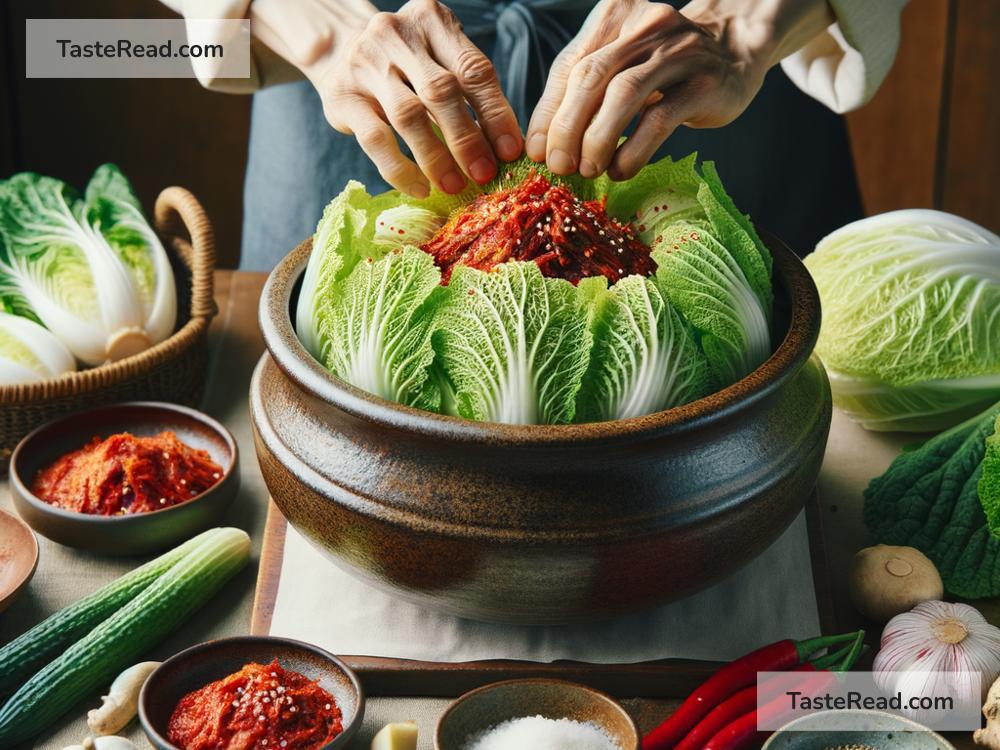
5. Massage the Cabbage:
Now, take each cabbage quarter and rub the paste into the leaves, making sure to spread it evenly. Get into all the crevices so each leaf gets a touch of flavor. This step is messy but fun – don’t be afraid to use your hands!
6. Pack the Kimchi:
Take a clean, airtight container and start packing the coated cabbage quarters into it. Press down on the cabbage as you go to eliminate any air pockets. Any leftover paste can be smeared on top. Once packed, seal the container.
7. Ferment:
Leave the sealed container of kimchi at room temperature for about 1-5 days. You’ll know it’s fermenting when you see bubbles in the jar, and it starts to smell sour. The exact fermenting time depends on your taste and the ambient temperature – warmer environments lead to faster fermentation. Taste it periodically; once it reaches your desired level of sourness, it’s done.
8. Refrigerate:
After the fermentation process, store the kimchi in the refrigerator. This slows down the fermentation, but the flavors will continue to develop. Kimchi is usually best after a week or two in the fridge and can last for months.
Remember, kimchi is not just about the recipe but the technique and love that goes into making it. Every batch might taste slightly different, and that’s part of its charm. Feel free to experiment with the recipe, adjusting spices and ingredients to fit your palate.
Incorporate your homemade kimchi into various dishes like stews, fried rice, or simply enjoy it on its own as a flavorful side dish. Making kimchi at home allows you to customize it to your taste and introduces the joy and tradition of Korean cuisine into your cooking repertoire. Enjoy the process, and don’t forget to share your delicious creation with friends and family.