Title: Mastering the Art of Duck Confit: A Simple Guide to Golden Perfection
Duck confit might sound like a delicacy reserved for high-end restaurants, but it’s a dish that you can perfectly prepare right in your kitchen. Rooted in French culinary tradition, duck confit is a method where the meat is slowly cooked in its own fat, resulting in a tender, flavorful, and irresistibly crisp finish. If you’re eager to elevate your cooking game and impress at your next dinner party, then mastering the art of making a crisp, golden duck confit is your next step. Here’s a simplified guide to creating a chef-worthy duck confit at home.
Ingredients:
- 4 duck legs
- 4-6 cups of duck fat (you can also use a combination of duck fat and olive oil)
- 2 tablespoons salt
- 4 cloves of garlic, minced
- 1 teaspoon freshly ground black pepper
- 2 tablespoons herbes de Provence or a mix of thyme and rosemary
- 2 bay leaves, crumbled
Equipment:
- Oven
- Ovenproof dish
- Aluminum foil
- Paper towels
Step-by-Step Guide to the Perfect Duck Confit:
1. Season the Duck
Begin by taking your duck legs and giving them a generous seasoning. Mix the salt, minced garlic, black pepper, and herbes de Provence (or your herb mix) in a bowl. Rub this mixture all over the duck legs, making sure every nook and cranny is seasoned. This not only flavors the meat but also helps in the curing process.
2. Cure the Duck
Lay the seasoned duck legs in a single layer in a dish, sprinkle the crumbled bay leaves over them, and cover with plastic wrap. Refrigerate them for at least 12 hours, or up to 48 hours for deeper flavor infusion. This step is crucial for drawing out moisture, which enhances the duck’s flavor and texture.
3. Rinse and Dry
Preheat your oven to 275°F (135°C). Take the duck legs out of the fridge, rinse off the seasoning under cold water, and pat them dry with paper towels. It’s essential to dry them thoroughly to achieve that coveted crispiness.
4. Slow Cook in Fat
Place the duck legs in an ovenproof dish and pour the duck fat (or a combination of duck fat and olive oil) over them. The fat should cover the legs completely. Cover the dish with aluminum foil and slow-cook in the preheated oven for 2 to 2.5 hours. The meat should be tender and nearly fall off the bone when it’s done.
5. Crisp the Skin
Once cooked, you can either let them cool and store them in the refrigerator for later use or move on to crisping them up immediately. To crisp, remove the duck legs from the fat (reserve the fat for future uses—it’s gold!) and place them skin side down in a hot skillet over medium heat. Cook until the skin is gloriously golden and crisp, about 5 to 10 minutes.
6. Rest and Serve
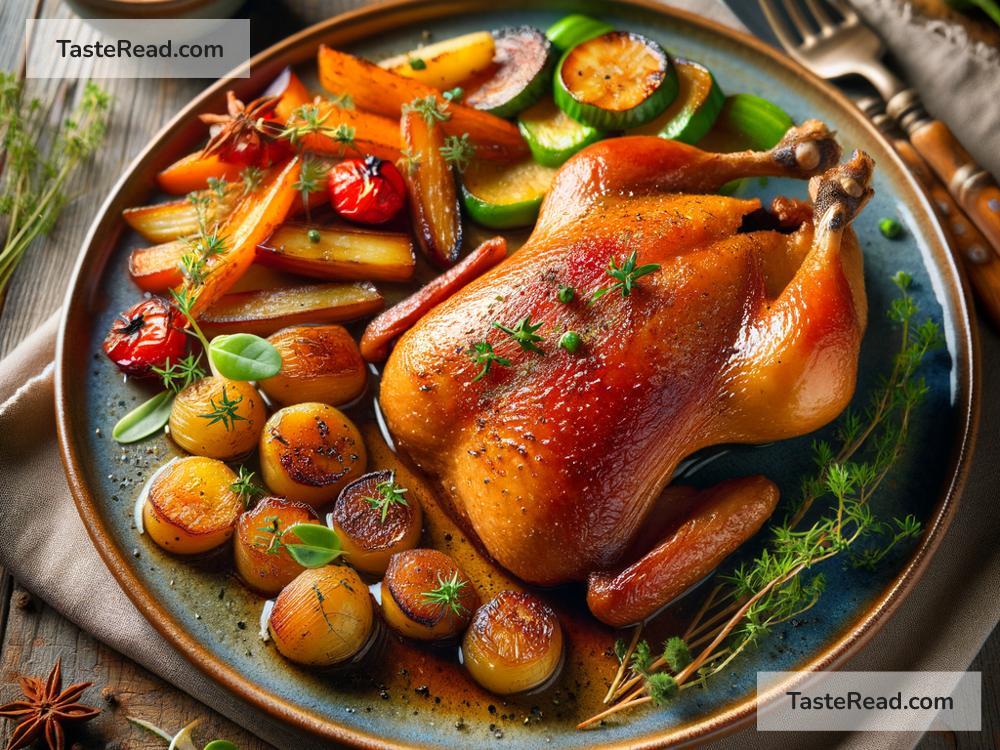
Let the duck legs rest for a few minutes on a cutting board after crisping. This not only helps retain the juices but also makes for easier handling. Serve your duck confit on a platter with your favorite sides. Traditional accompaniments include roasted potatoes, sautéed greens, or a simple salad, but feel free to get creative.
Tips for Success:
- Quality Matters: Opt for the best quality duck legs you can find. The better the quality, the more flavorful and tender your confit will be.
- Patience is Key: Don’t rush the curing or the slow-cooking process. These steps are essential for achieving that perfect texture and flavor.
- Storage: Duck confit can be stored in the refrigerator covered in its cooking fat for up to a month. This not only preserves the duck but also allows the flavors to meld and deepen.
- Versatility: Once you’ve mastered duck confit, don’t be afraid to use it in a variety of dishes. It’s excellent in salads, pastas, or even as a luxurious addition to a breakfast hash.
By following this simple guide, you’ll be well on your way to making a duck confit that’s as delicious as any chef’s. It might take a bit of time and patience, but the result—a dish that balances tenderness with a mouth-watering crisp—makes it all worthwhile. Embrace the process and enjoy the delightful journey to achieving golden perfection in your kitchen. Happy cooking!